.avif)
.png)
Automate your life. That’s the goal of AI. You don’t have to hire an assistant or relevant people to do it for you. And you should never consider doing it yourself. You have to automate your work life to get things done on time. Machines rarely make mistakes and never take holidays. AI’s biggest feature is to automate menial tasks like cc’ing to an AI email agent to schedule meetings automatically. Meetings are an integral part of a corporate employee’s life. It’s not something you can overlook or steer clear of, especially when you have a high-profile job or work in a hotshot corporate office.
This tutorial, unlike others, is about creating an AI email agent acting like your sidekick, sitting quietly in Lindy’s servers waiting for your orders. We will show you how to set up a pre-built template for the AI email agent, configure the AI email agent template, set up your email addresses and triggers, configure two-mode scheduling logic, change the available time block and test and deploy your scheduling agent.
In this tutorial, you’ll be able to:
- Access the AI email agent pre-built template
- Configure your AI email agent template
- Set up your email addresses and triggers
- Configure two-mode scheduling logic
- Change the available time block and test your scheduling agent.
Let’s dive right into it.
Step 1 - Access the AI email agent pre-built template
Head over to Lindy. Log in to your account or create a new one if you haven’t done so already.

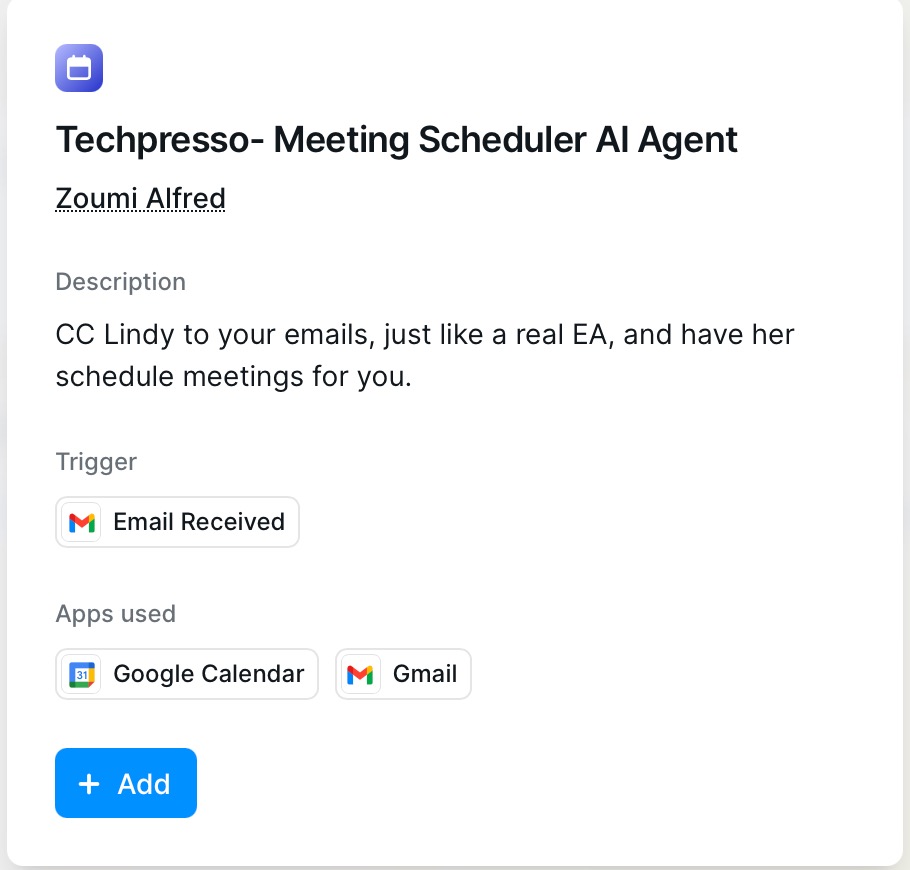
Once you log in, click here to access our pre-built template. It’s free, and it has all the core logic configured and pre-built to help you get started. No need to create the workflow on your own. We found this amazing template to help you with your workflow. Click ‘Add.’
Once you add the template, simple go to ‘flow editor’ at the top of your screen and the whole workflow will lay bare right in front of you.

Step 2 - Configure your AI email agent template
Okay, don’t get confused by the workflow. The template comes with most of the automation logic configured right into it. All you have to do is set up the right authentication connection to your Gmail, Google Calendar, and others. In the template settings, you’ll see connection points for:
- Gmail - your trusty email service for reading and sending emails
- Google Calendar - To set up the availability and book meetings.
- Your preferred meeting platform - Zoom, Teams, or whatever your choice may be.
Tip: Create a separate email inbox for your AI agent and connect it to the correct account. You can give your agent any name you like. I used Ava as an example.
Okay, now click the first ‘Email received’, which is the first step in your workflow. The settings pane will open. Authorize your email by clicking ‘Authorize’.

Let’s move on and update all the steps in our workflow. Next, click ‘Time given or requires a search.’
Enter the sender’s email address by replacing ‘youremail@gmail.com.’ For example, you meet the finance team frequently. Enter the email or emails of the people you meet with frequently. So when they propose a meeting, Lindy will automate the meeting time in your Google Calendar for you.

You can change the name of your email agent to something you prefer. I call it ‘Ava.’ Change the name ‘Ava’ to a name of your choice.
Next, click ‘cc’ing Ava to find time. Change the sender’s email address here.

Do the same for all the steps in the workflow editor.
Now you need to set which email addresses can activate your AI assistant. In the trigger settings, configure the following:
Outbound email address: The address your assistant will use to send replies (for example, zoumi.humanist@gmail.com).
Filtered sender: Your own email address (for example, yourname@gmail.comi) that is allowed to activate the assistant. This ensures only the messages you send can trigger it.
If an email comes from your address and includes your AI assistant in the CC, the automation will run. Be sure to update every trigger in the template by replacing “Ava” with your chosen assistant's name and “youremail@gmail.com” with your actual email.
Step 3 - Configure two-mode scheduling logic
Your AI assistant works in two smart modes based on what you write in your email:
Mode 1: Direct Booking
If you mention a specific time (for example, “Let’s meet Tuesday at 2 PM”), the assistant books that slot in your calendar and sends a confirmation to everyone.
Mode 2: Time Finding
If you ask it to “find a good time” without giving details, the assistant checks your Google Calendar, finds open slots, and shares options with the recipient. Once they pick a time, it books the meeting for you. If they ask to reschedule, the assistant takes care of the changes automatically.

Step 4 - Change the available time block and test your scheduling agent.
Next, change your available time block. Click “Find Available Times” and adjust your User preferences.
- Set Workday Start Hour to the time you want your AI agent to begin suggesting slots.
- Set Workday End Hour to the time you want suggestions to stop.
In the example shown, the agent only offers a 3-hour window, Monday through Thursday.


Once you set up the event and the time block, you are almost set to execute this workflow.
Test and go live
Before you go live, test both modes with a colleague or a secondary email. Send a message with your AI assistant in CC and try both cases: one with a specific time, and one asking it to find a time.

When the responses and calendar updates look good, CC your assistant on any scheduling email. It will handle the coordination automatically.
Click the ‘Test’ button at the top right corner of the screen to test the workflow. Tweak the settings to ensure that all the steps are executed in the workflow. Once you’re satisfied with the configuration, click the ‘Live’ button to go live and test again. Tweak the settings accordingly.
Super important tip: In the trigger settings, add extra “from” conditions for your team members’ email addresses and connect their Google Calendars. This lets anyone on your team CC the AI agent to schedule meetings based on the whole team’s availability.
That’s it for this tutorial, Automation buffs! The important thing is tweaking the settings to find the right balance. It’s not hard. All you have to do is manage your time block, set your calendar, receive the emails, and test the whole thing. Once you do that, you’re ready to set the automation gears in motion. Sit back and relax. Get lazy. No need to do chores every day.
.png)
.png)

