.avif)

AI is devouring everything that comes its way. Developers are frantically automating every design, content writing, and creative process they can get their hands on. But here's the thing: when it comes to mobile app UI design, this isn't just hype. It's a game-changer. Gone are the days of spending weeks wireframing, prototyping, and tweaking every button and screen. With UXPilot AI, you can literally go from a rough app concept to a polished, professional mobile interface in minutes. If you're coding solo and stuck on the design stuff, or running a startup that can't afford a full-time designer, this tool might just save your sanity. Want to see what happens when UI design actually moves at the speed of your ideas?
In this tutorial, we will guide you on how to access UXpilot, use Hifi Designer to design the UI of your mobile app, create a wireframe of your mobile UI, generate a flow of screens to develop the concept at scale, and download the UI as source code.
By the end of this tutorial, you’ll be able to:
- Access UXpilot
- Use Hifi Designer to design your app’s user interface
- Create a Wireframe
- Download the UI source code
Let’s get started with it!
Step 1 - Access UXpilot
UXpilot allows you to test its platform for free. It has limited access to some of the most useful features. Therefore, we recommend that you buy a subscription to get the most out of its features.
Go to UXpilot and create an account or log in to an existing one if you’ve already used their free account. Use a Google account to sign up automatically and log into the main interface in under a minute.

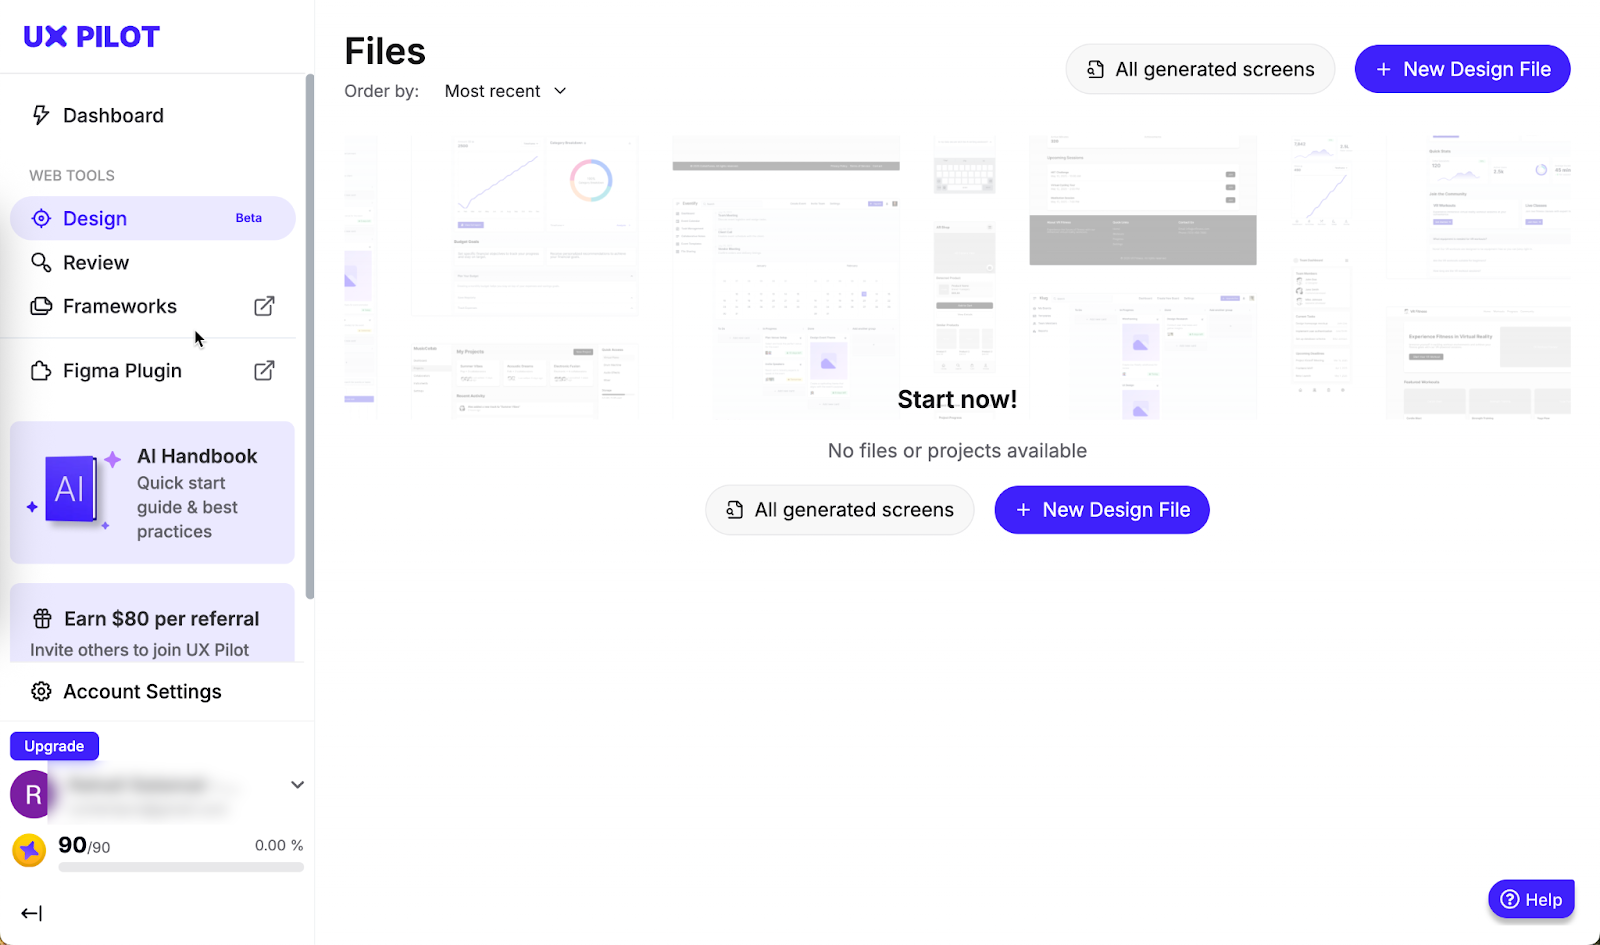
The design interface is simple. You get 90 credits, which is enough to explore the features of this AI design service. Click ‘New Design File’ to get started.
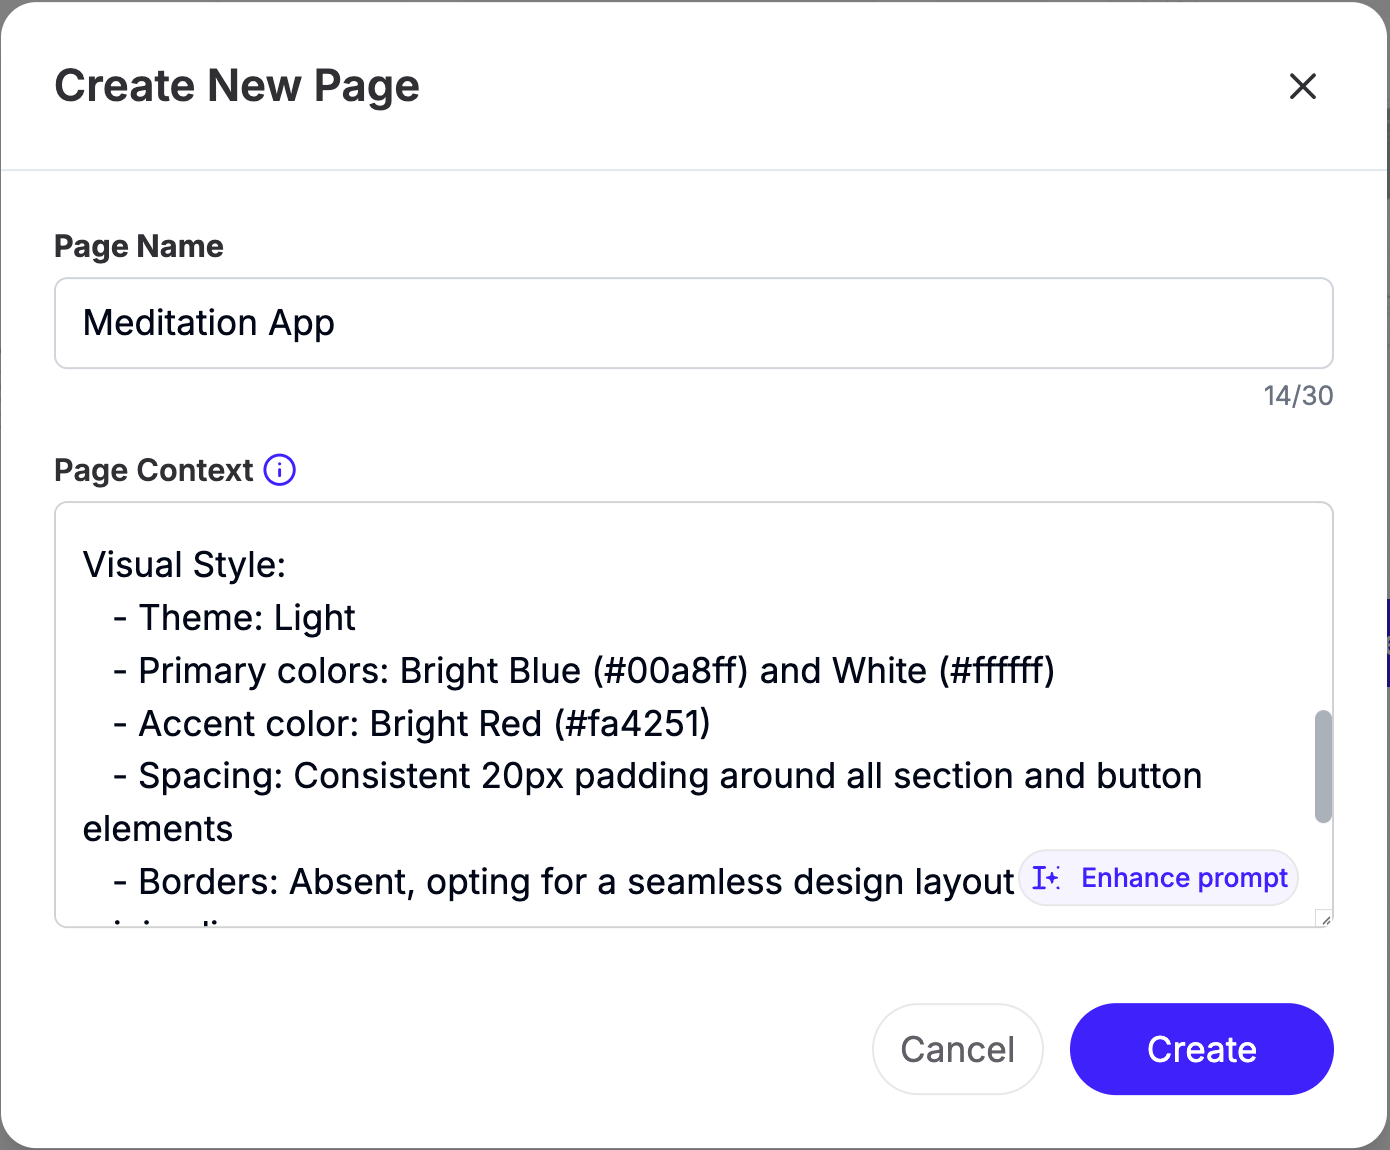
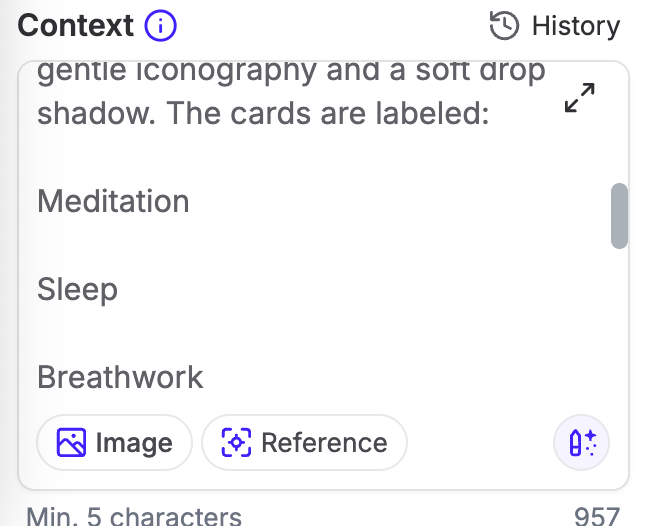
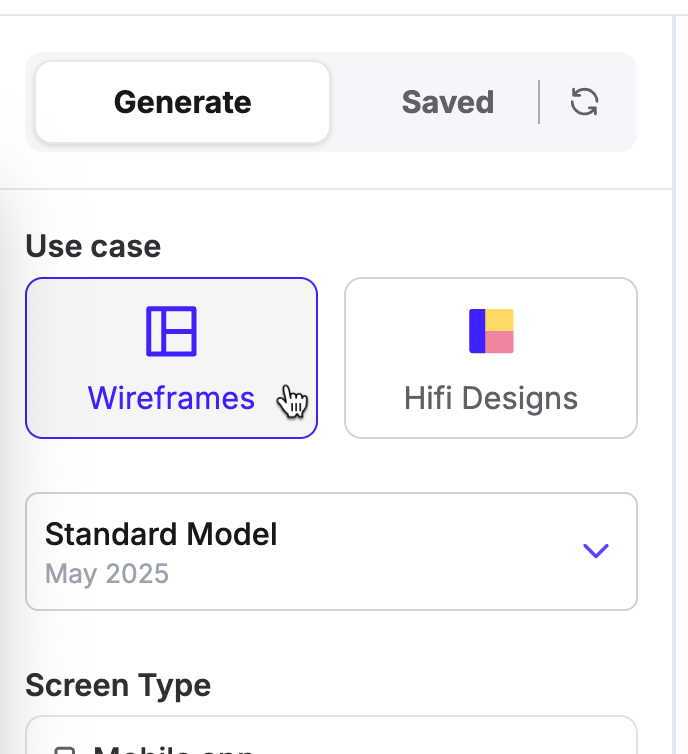
Specify the page name and the context of the design you want to generate. The context is like a system prompt. It provides direction to the AI model. You can specify theme colors, layout instructions, and other details to help UxPilot create the design you want.
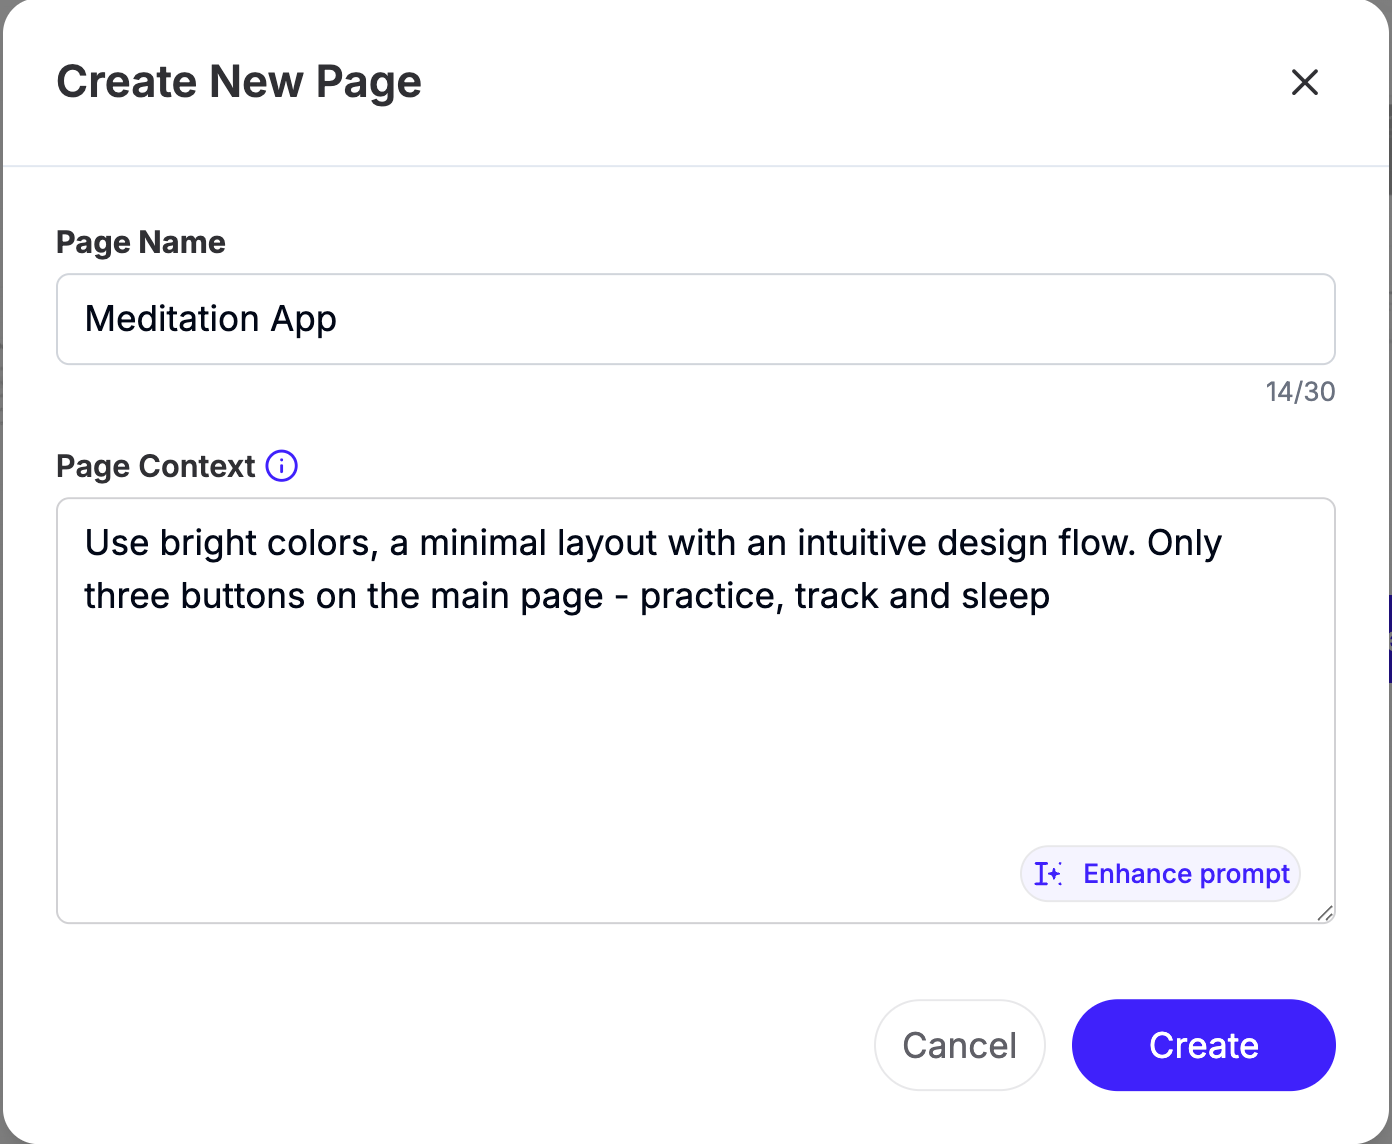
You can also use ‘Enhance prompt’ to amplify your prompt. It’s an AI-generated prompt that helps with writing your prompt. Click ‘Create.’
Step 2 - Use Hifi Designer to design your app’s user interface
There are two ways to proceed with your UI app design. You can either choose to create wireframes to visualize the design first, or you can generate HiFi designs with colors, fonts, and a generalized layout. Let’s first explore Hifi designer.
After clicking the ‘Create’ button, you will be transported to the main interface of Uxpilot Dashboard. The intuitive interface gives you an easy navigational environment where you can configure the use case by selecting Hifi designs or the wireframes. Since we are now exploring Hifi designs, click the button and configure the prompt elements to generate a beautiful UI design for your app.
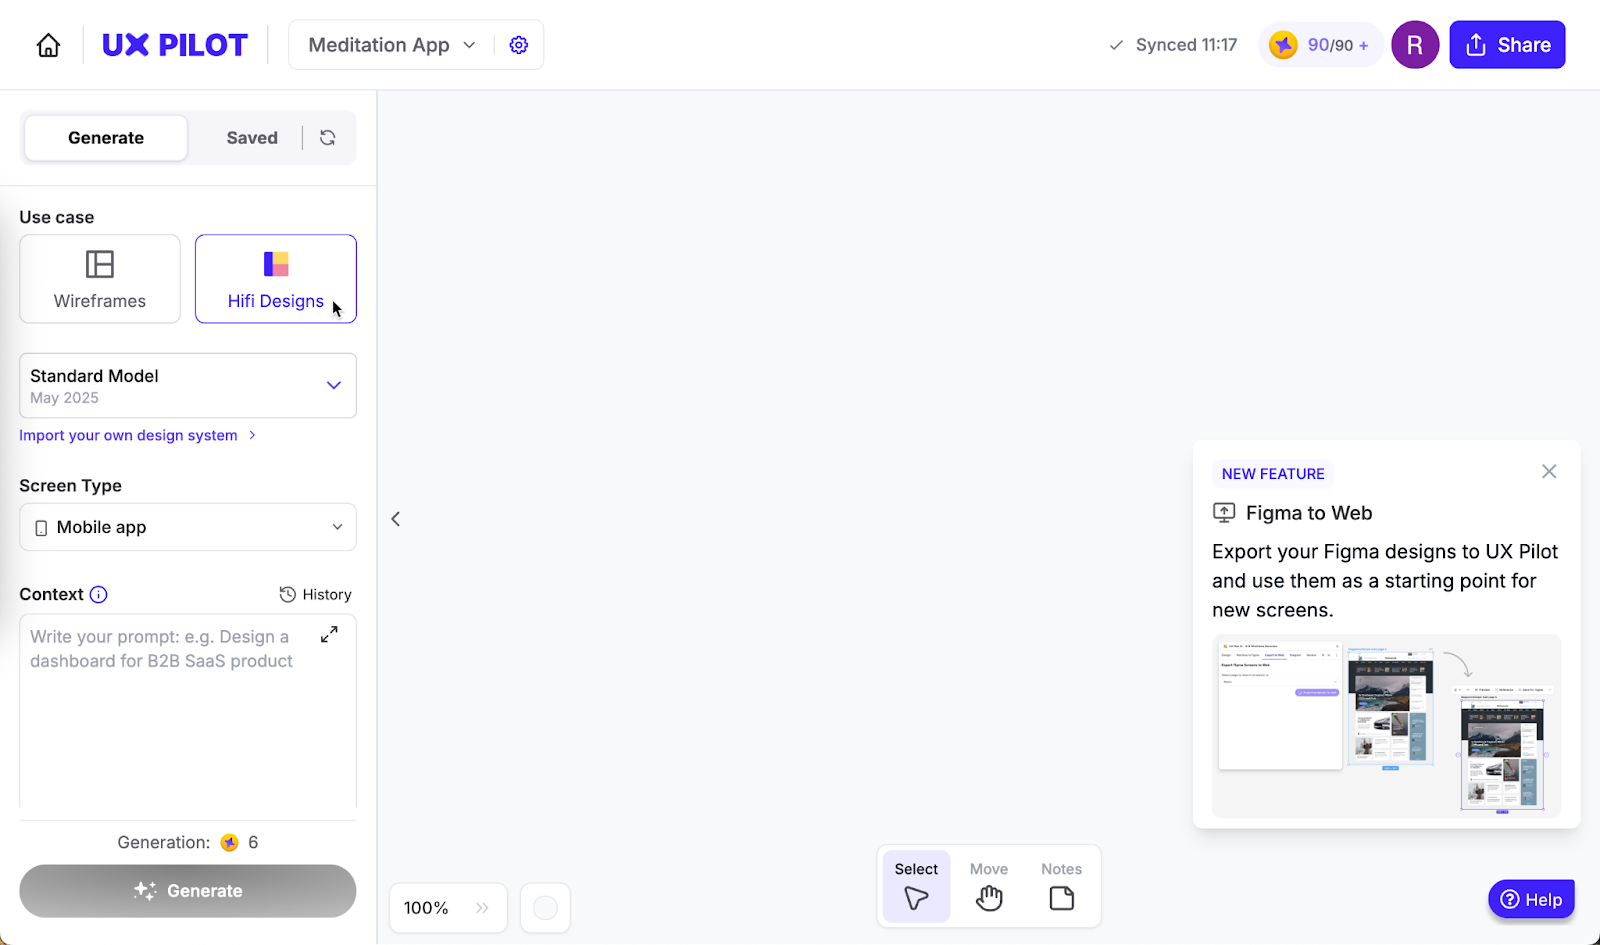
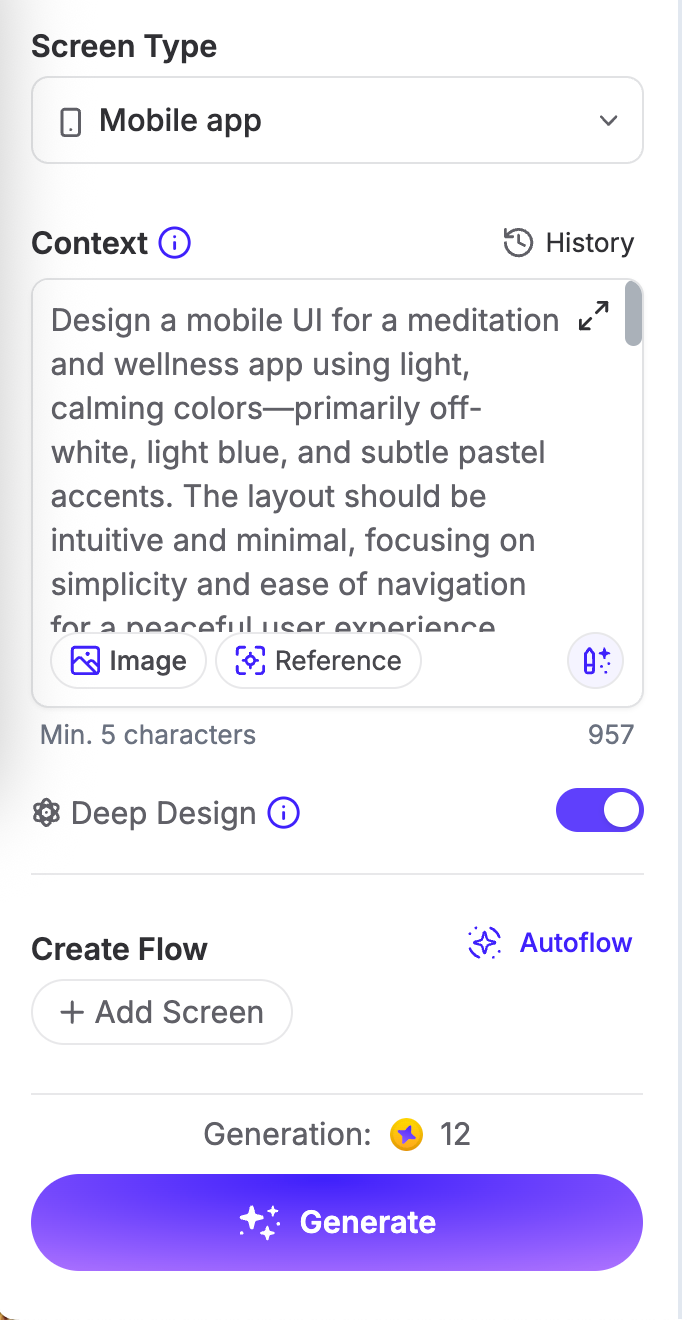
Choose the screen type. If you are designing for a mobile app, choose mobile. You can also generate a UI design for a desktop app, too.
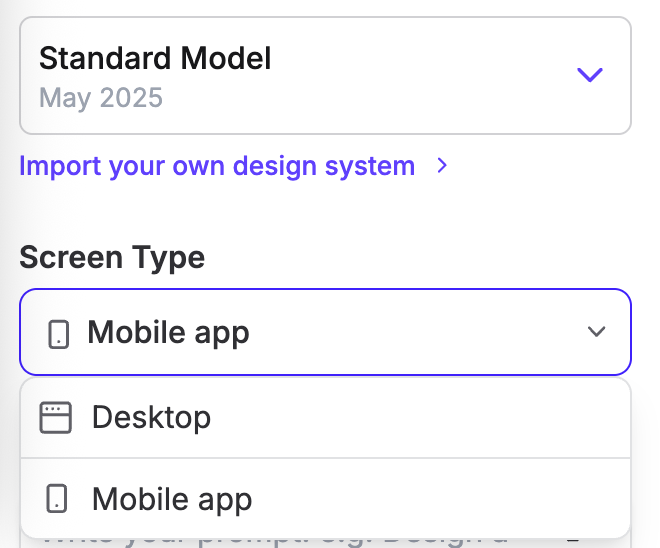
Next, type a prompt for the UI design. Specify all the details you can think of. Explain the layout, buttons, colors, fonts, and other UI elements. Write about the images or other design elements for the main screen.
You can also provide an image. However, this feature is available for a subscription. The Reference link allows you to select a screen to use as a reference for your next design. This is used to design the subsequent screens in the app.
Flick the ‘Deep Design’ slider to enable detailed and high-quality design. This feature will cost you 12 credits compared to 6 credits without the deep design feature. Review the prompt and the settings and click ‘Generate.’

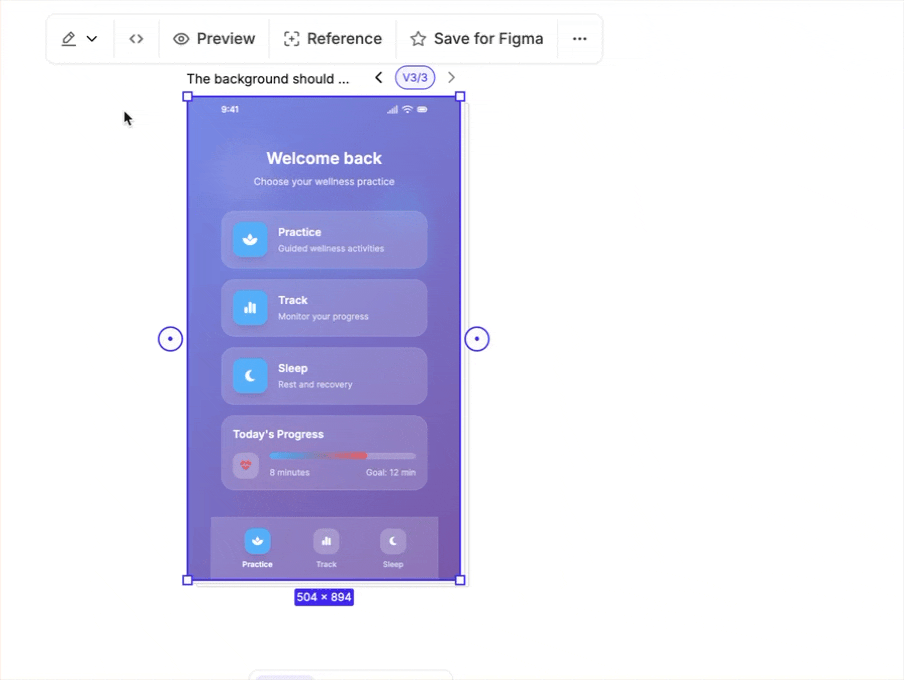
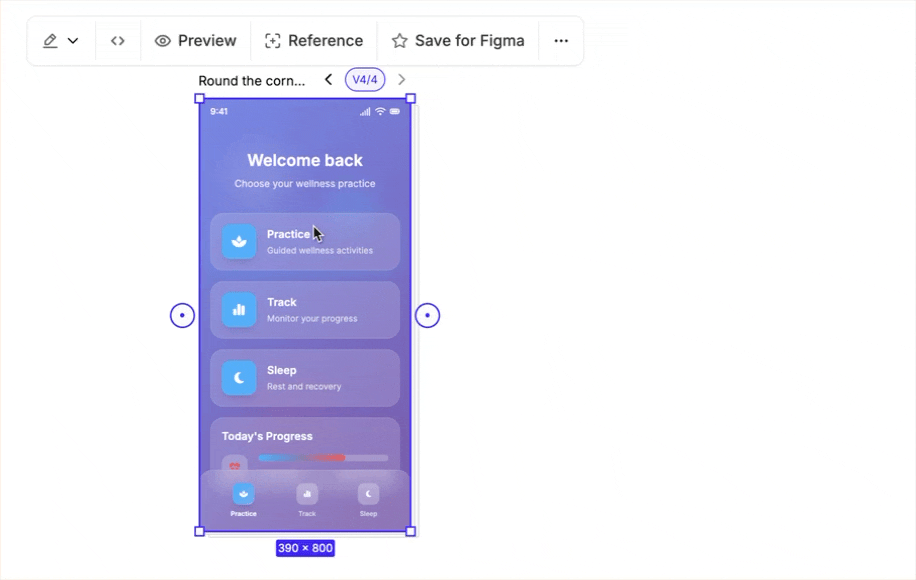
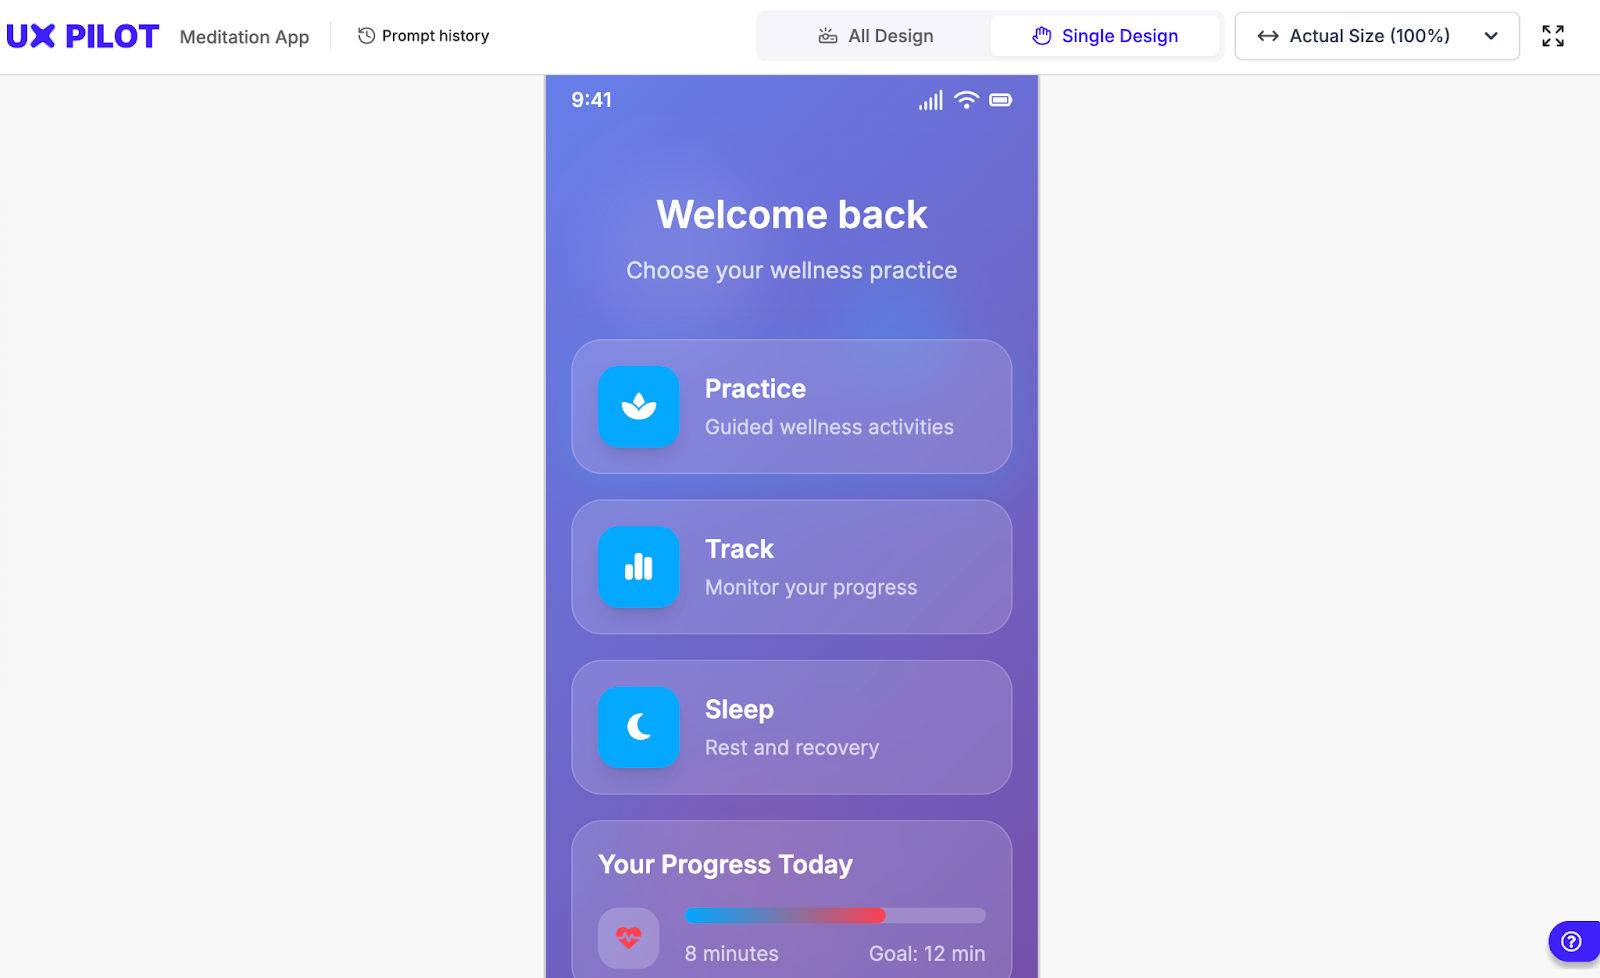
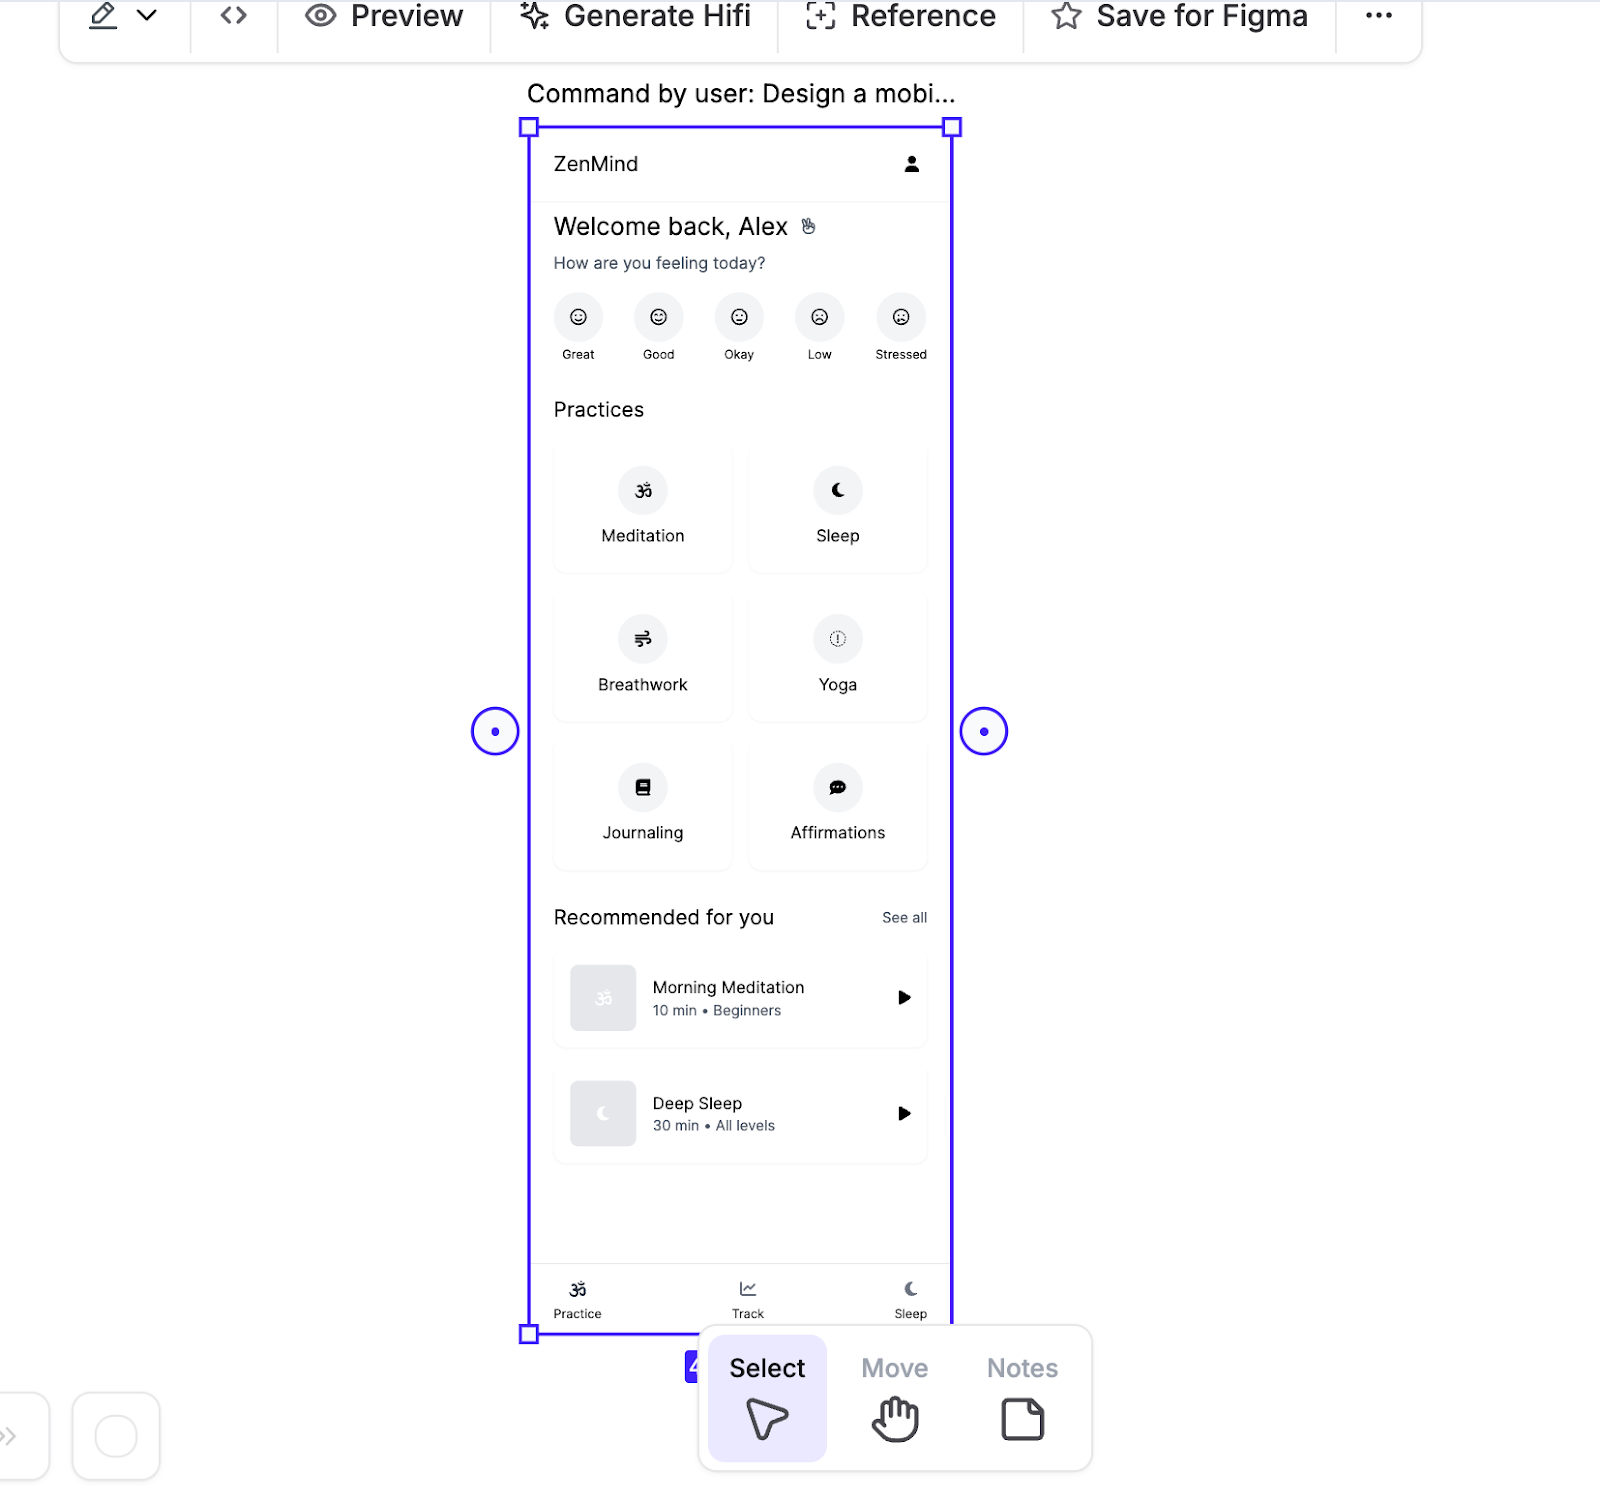
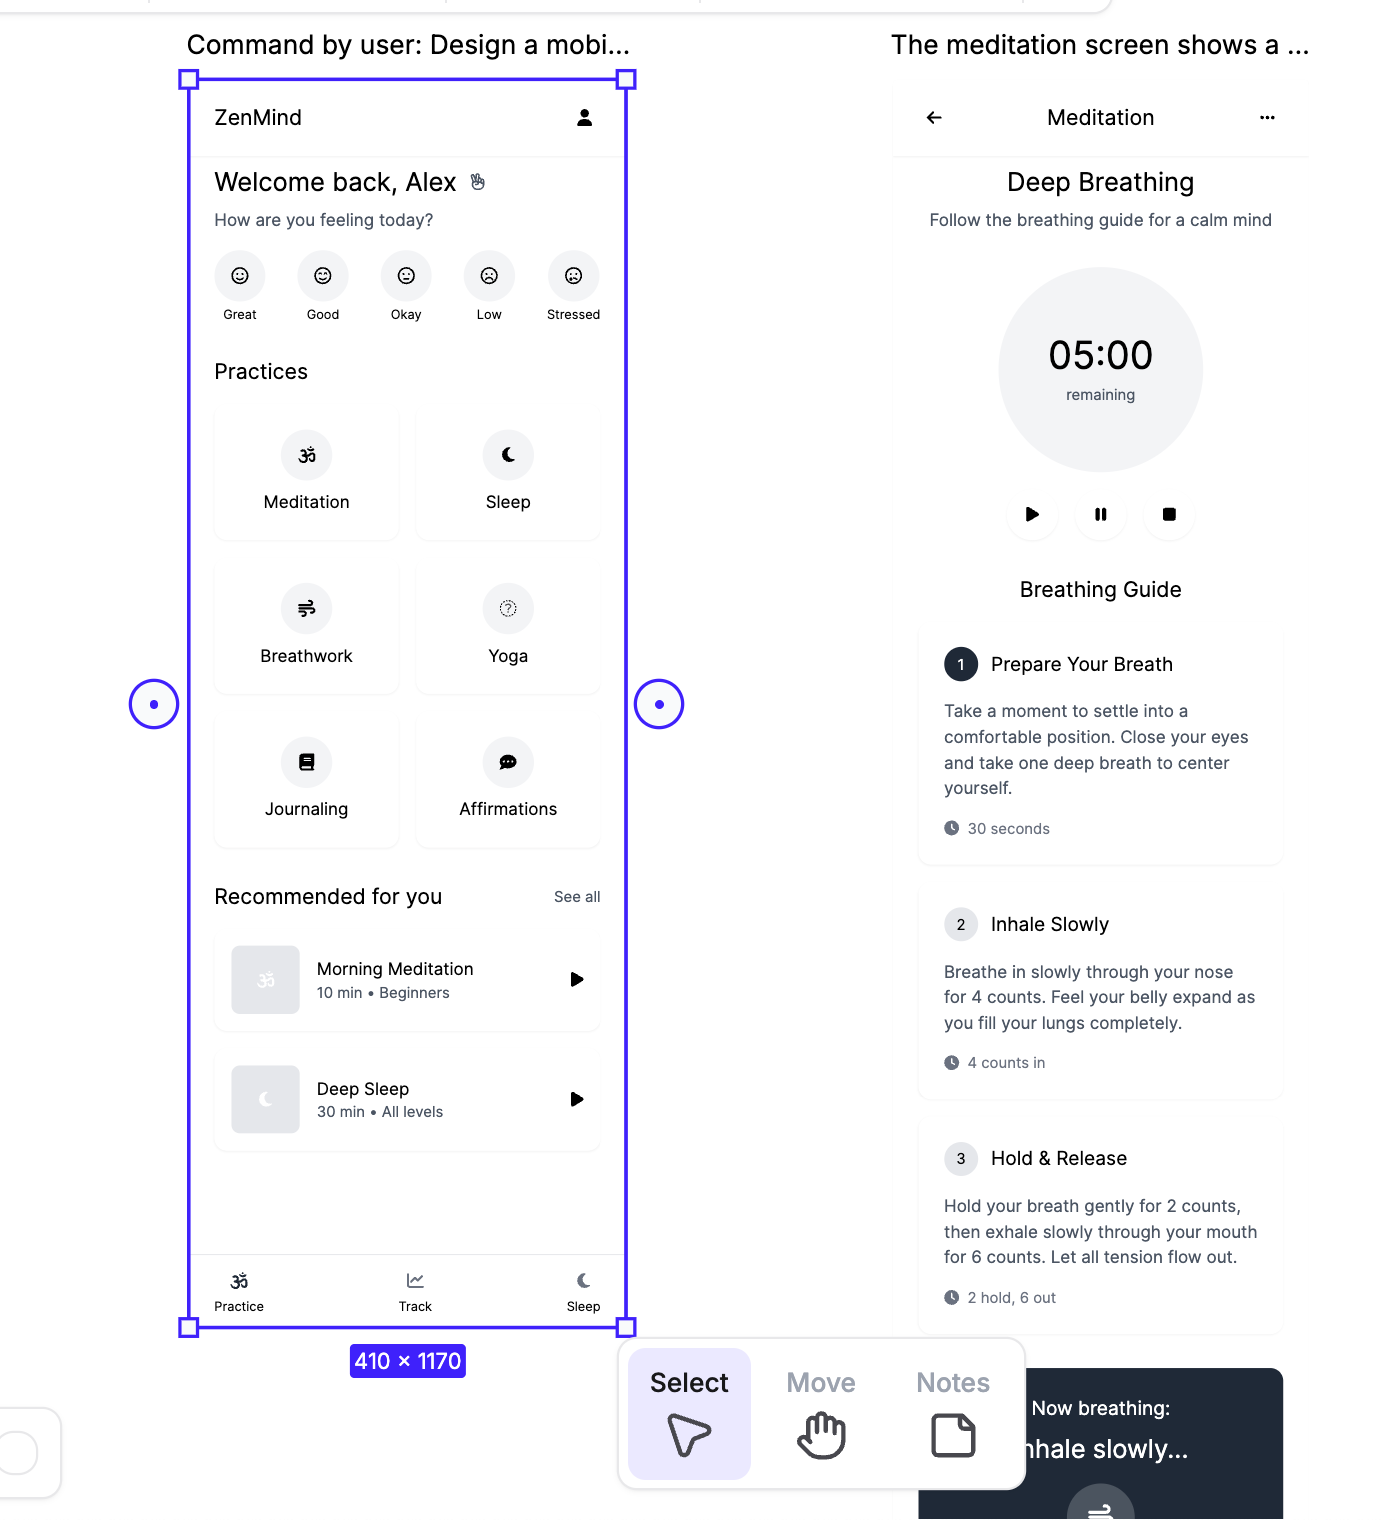
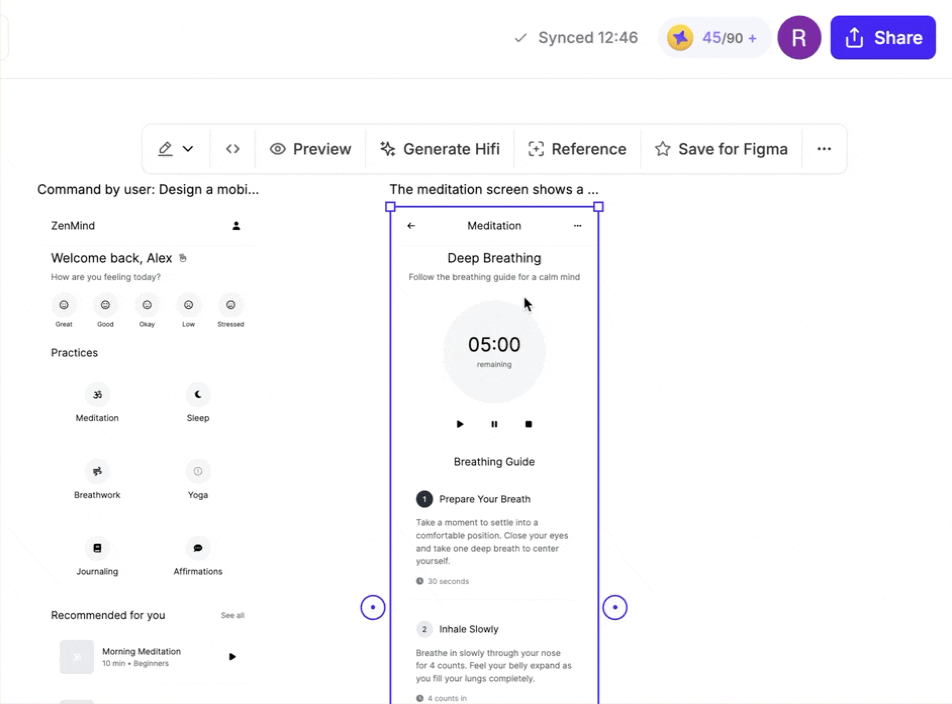
UxPilot created a nice design for the first screen. The layout is simple. The colors and fonts are spot-on. You can edit the design elements individually.
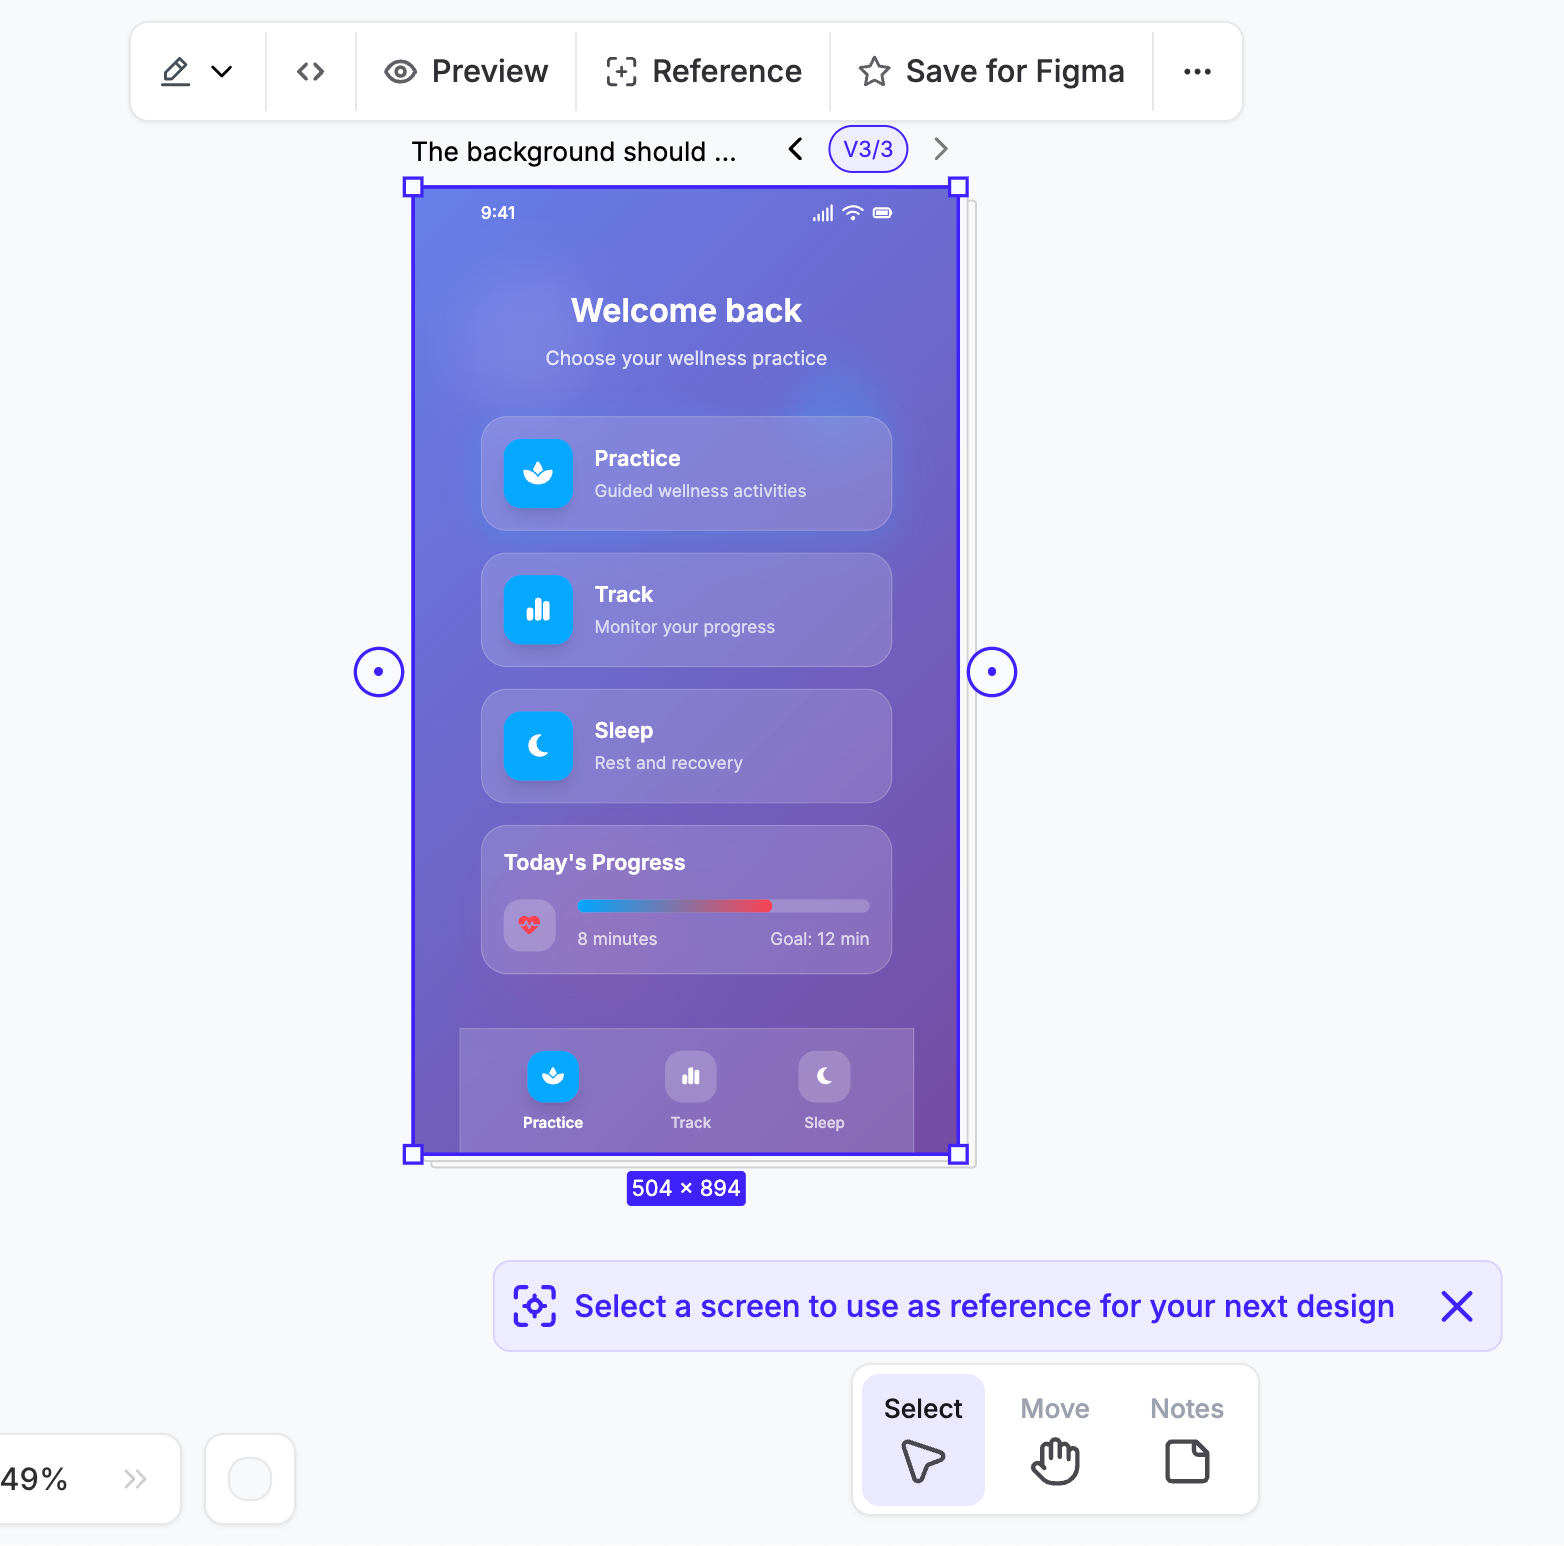
There is a selection of tools at the bottom of the screen's display section. To move the design around the space, select the ‘Move’ button. Click ‘Notes’ to add notes. The notes are shared along with the design. The ‘Select’ tool enables you to select elements within the design.
Notice the circle icons with a dot in them. Click these to add a screen before or after the screen you generated. We will come to this feature later. Let’s first explore the editing tools. If you want to change the design, click the pencil icon in the hover menu at the top of the screen.
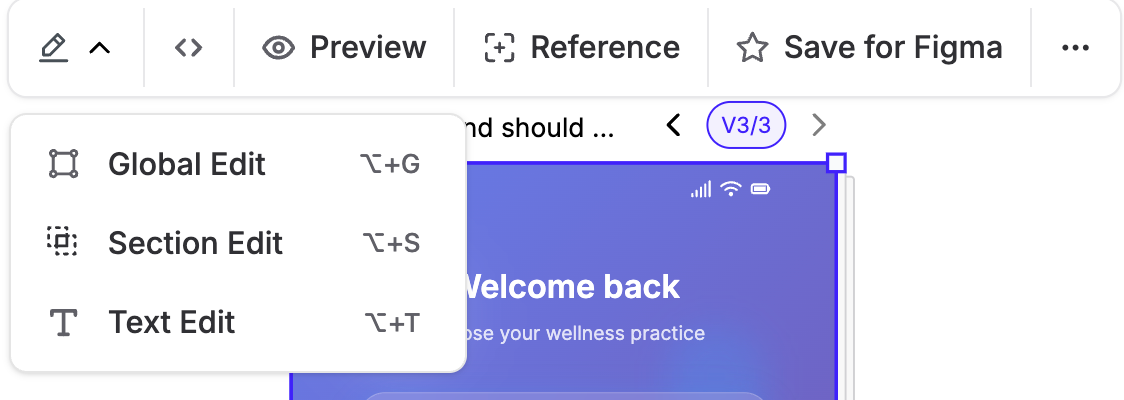
The Global edit enables you to edit the entire screen design with a prompt. This will cost you 6 credits. Section Edit allows editing a section within the design. Let’s say you want to edit the footer section. Click Section Edit and select the footer section. Write a prompt, and UxPilot will change the footer design, costing you another 6 credits!
The text edit gives you the ability to edit any text on the screen. This is a fantastic feature. It gives you the ability to control elements within the generated design.
Let’s move on to other editing features. There’s a preview feature that lets you preview the design in real time. You can click the buttons or go through the screens. It shows the button animation and other subtle design elements.
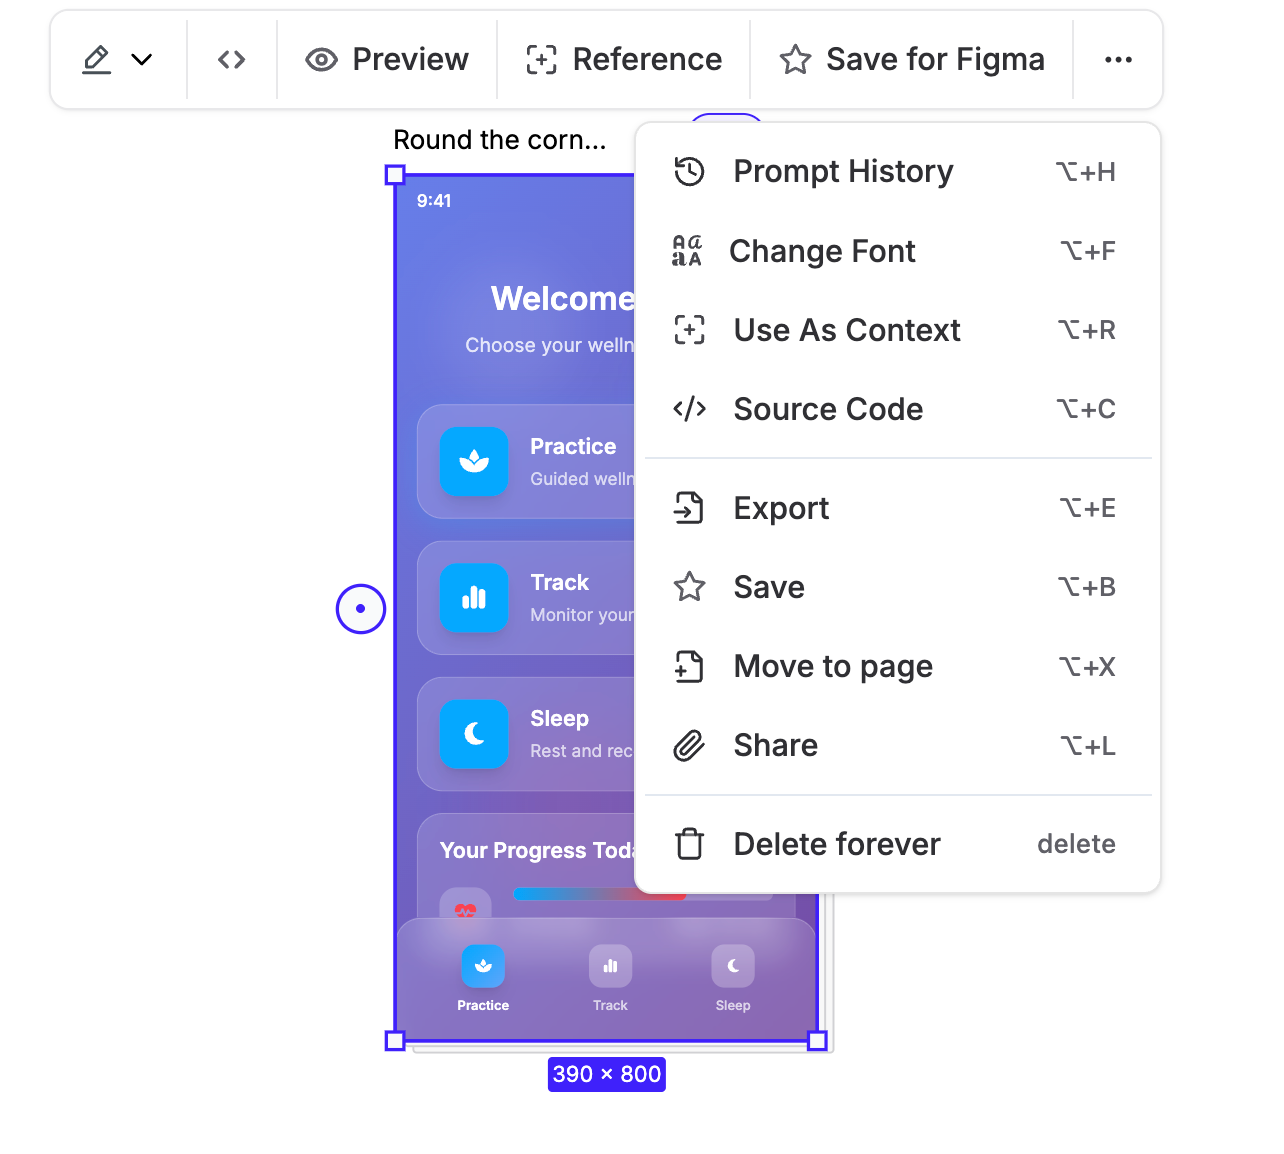
Then, there’s Figma. You can save the design in Figma and edit it further to refine it. This is a standard feature that requires a subscription. Click the ellipsis button to access more editing features. You can view the prompt history, change font, export the design, or share it with your team members.
Step 3 - Create a Wireframe
The Wireframes are a critical element in any UI design process. It’s one of the first steps towards realizing the UI design. Designers and developers use it to get approvals. It basically shows the layout, app progression, and other critical design and functional elements within the app. To create a wireframe, click ‘Wireframes’ at the top of the prompt configuration section.
The rest of the configuration process is the same. You select the orientation of the design, whether its for a mobile or a desktop app, write a detailed prompt, enable deep design, and add more screens (available on subscription). Click ‘Generate.’
The layout is clear. It actually created a fantastic wireframe for the main screen.
The editing options are the same. You can control every element within the design with a prompt. When you click ‘Reference,’ it will use this wireframe as a reference for your HiFi design. You can also click ‘Hifi design’ in the editing tools bar to instantly generate a more detailed UI based on the wireframes.
Step 4 - Add more screens
Adding more than one screen in the prompt box is a feature available on subscription. You can add screens with the design section as an added value. Click the circled icon with a dot next to the generated design.
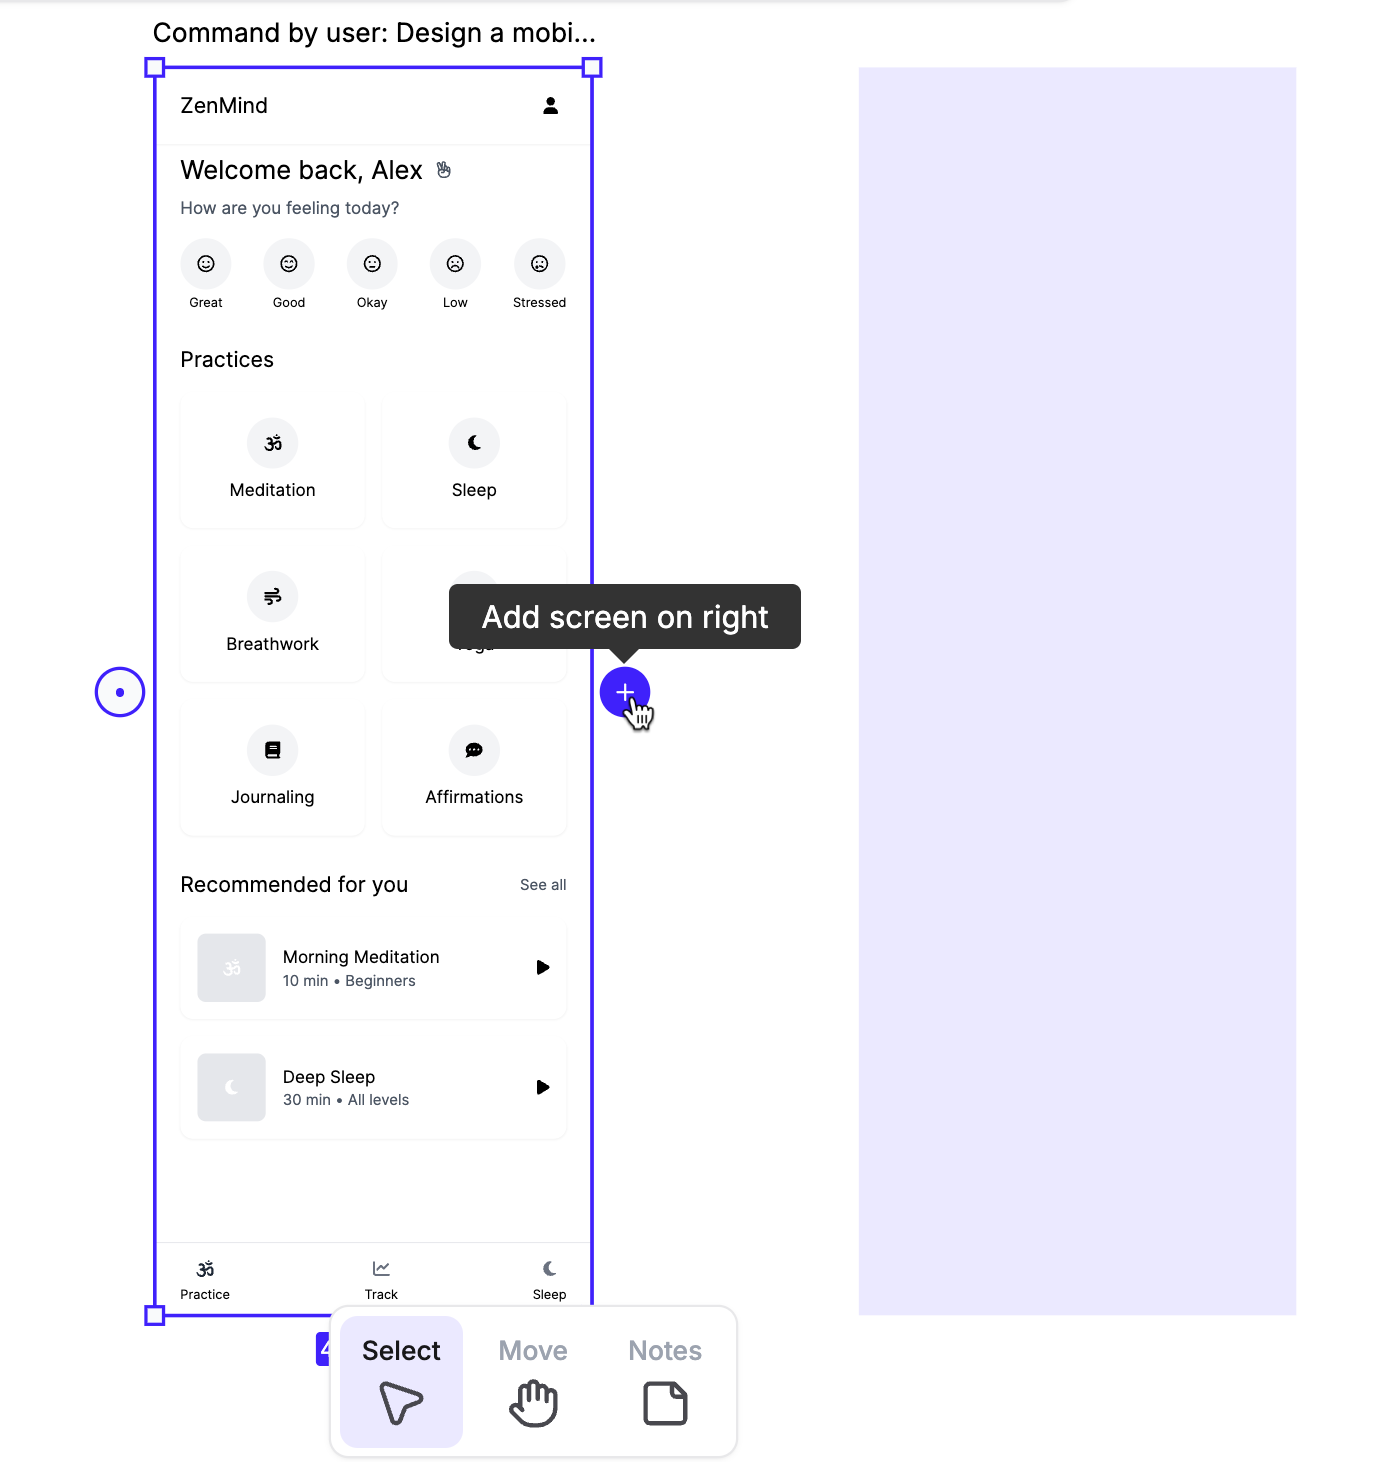
Simply, type a detailed prompt for the next screen and click ‘Generate.’

The second screen wireframe is pretty good. It followed the prompt clearly. This app is really shaping up. You can always edit the design elements individually using the editing tools.
If you want to add more screens, you must purchase a subscription.
Step 5 - Share your designs.
Click the ‘Share’ button at the top and slide the button to give access to anyone with a link. Copy the link and share it with your team members.
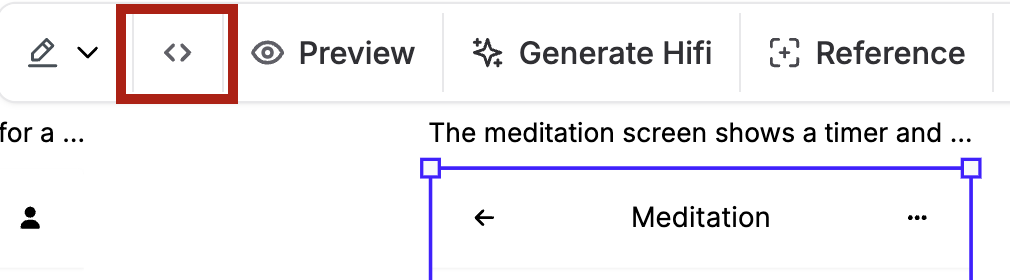
You can download the source code of the UI for individual screens. However, this feature is only available for extra credit. Click the source code icon in the hover menu above a screen and copy the source code.
That’s it for this tutorial, AI designers. UxPilot is a wonderful tool for UI designs. It can be used to get approvals for the design or for UX designs. It all depends on the use case. This tool can replace those expensive UI/UX designers for sure.

.png)

