.avif)

Gone are the times when building and deploying websites required trained web developers, a database specialist, and a truckload of money to bring your idea to fruition. Now, laymen and older individuals (most of whom are averse to the concept of online business) can create a fully functional website with real database functionality without any prior knowledge of coding or programming languages.
This tutorial will guide you through bringing your ideas to life, step by step, using powerful ChatGPT o3 and Canvas. Best of all, the entire process is free, straightforward, and designed for anyone ready to get started.
By the end of this tutorial, you’ll be able to:
- Set up the environment
- Prepare the prompt
- Preview and test your app
- Save and deploy your application
Step 1 - Set up the environment
Access ChatGPT. Change the model selector at the top of the interface to o3 mode from the dropdown menu.
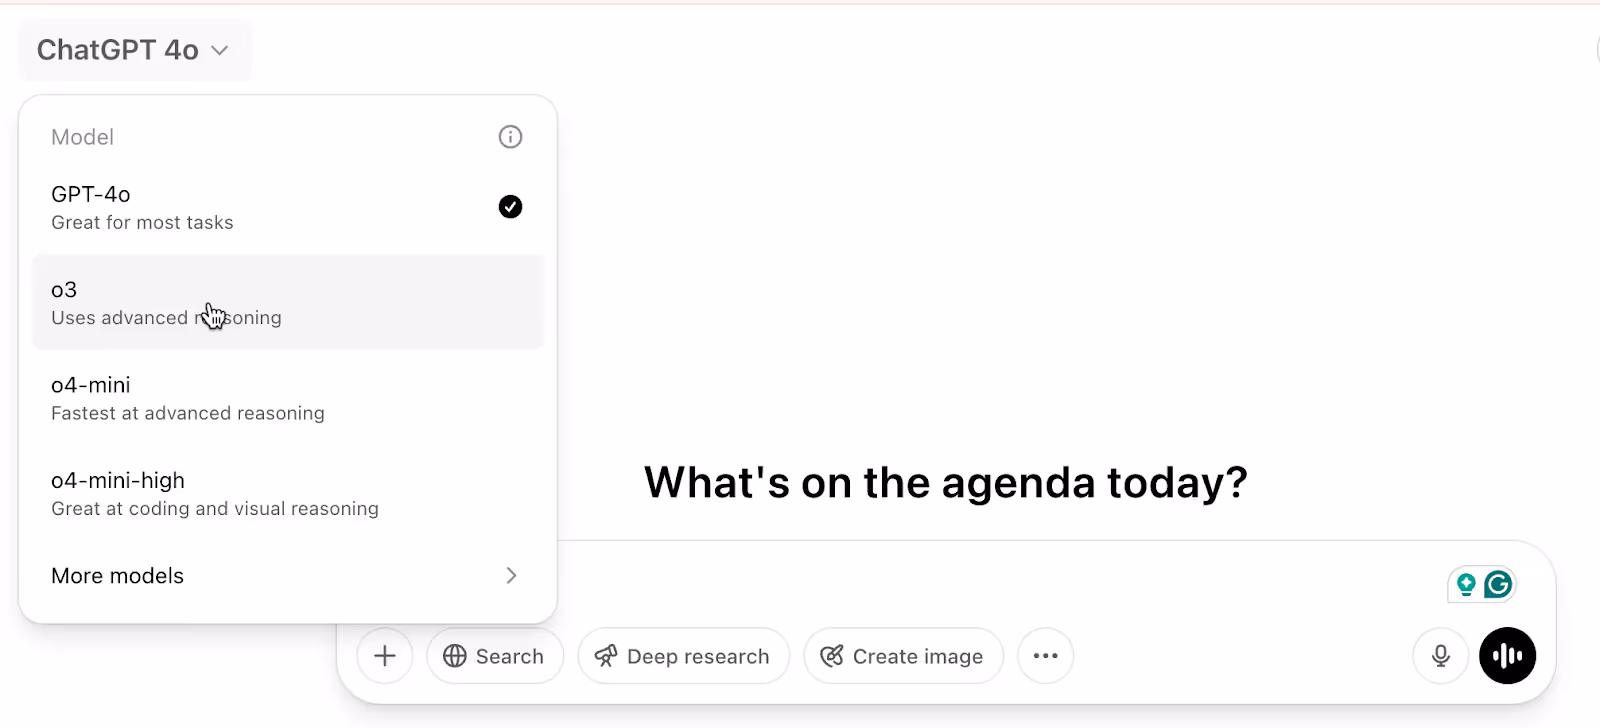
Next, activate the ‘Canvas’ option for the web application development capabilities. With this setup, you can build fully working web apps that even save data, right inside ChatGPT. The canvas is also the best way to see and test your app as you go before locking in the final version.
Step 2 - Prepare the prompt
Prepare the prompt for the web application you want to build by writing a clear and detailed description of the web app you want to create. The more specific you are, the better the results will be. Be sure to cover things like:
- What is your app for
- The features you want it to have
- Your design preferences (colours, layout, overall vibe)
- Any must-have functionality
- Sample content you'd like to include to get started
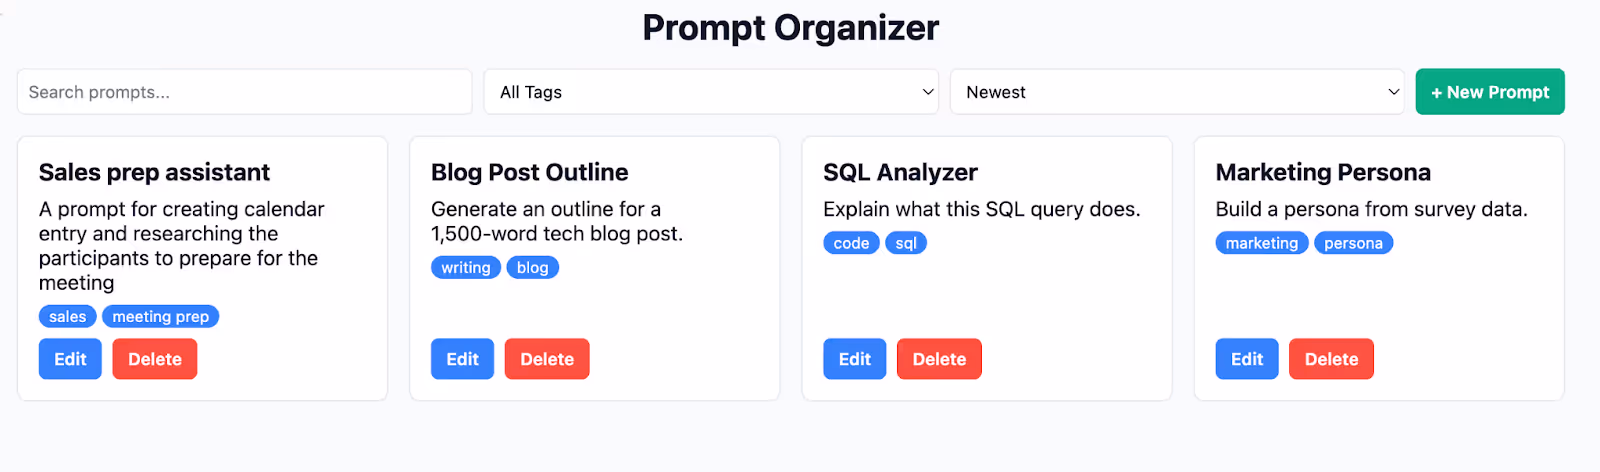
Let’s say you want to build a prompt organizer tool. Use the following prompt to get started.
Prompt:
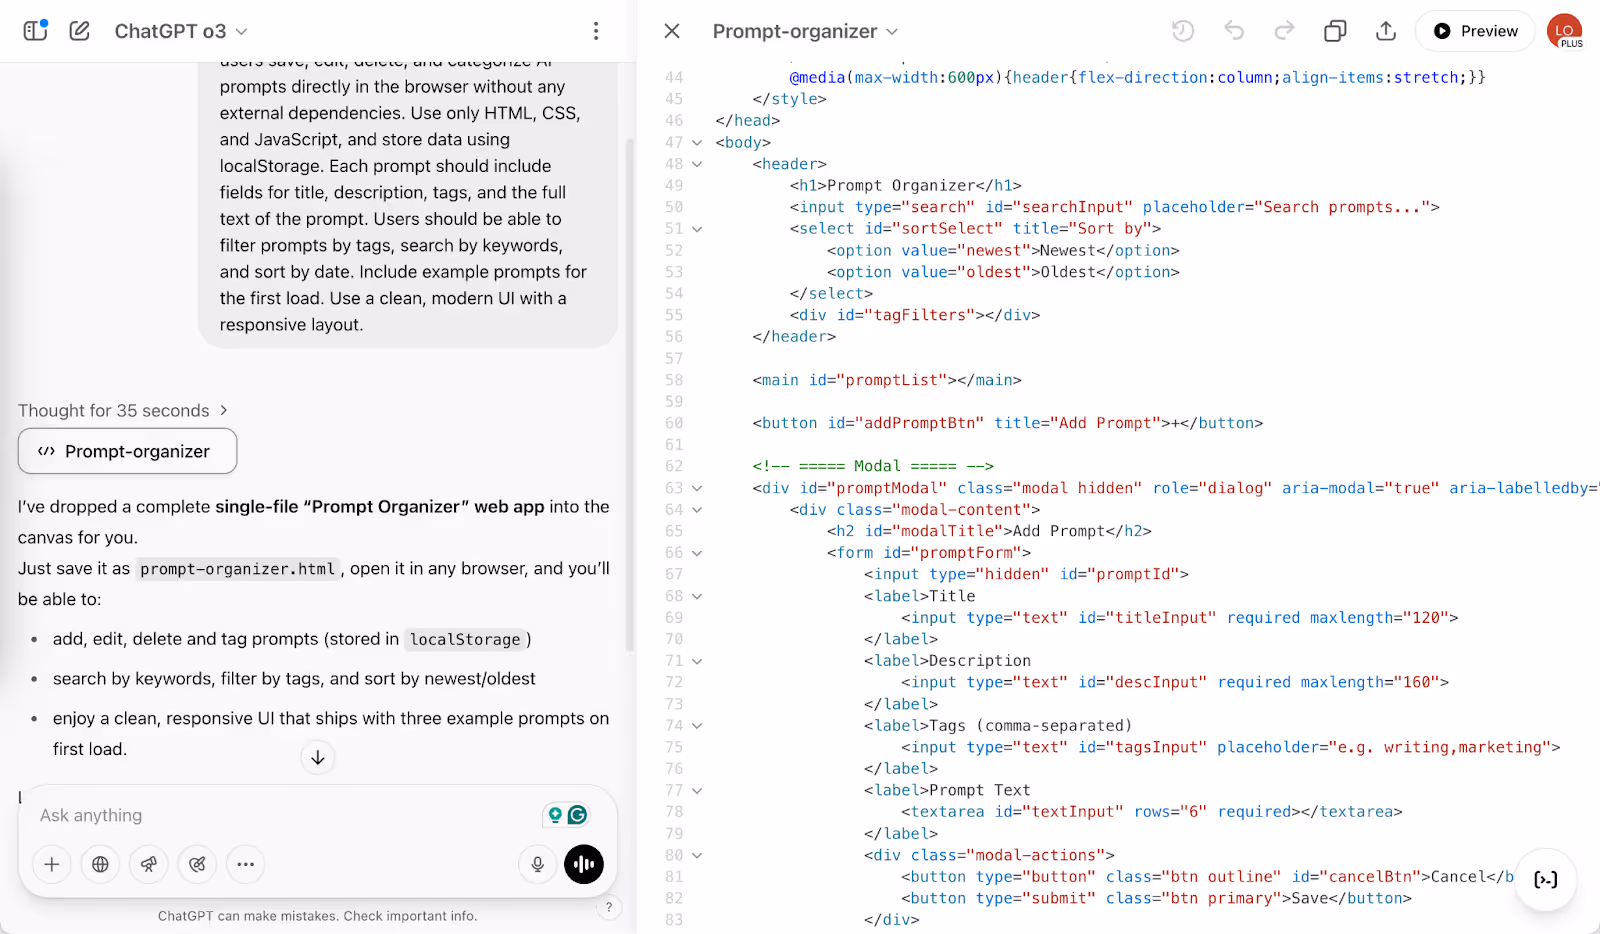
Create a single-file web application that serves as a 'Prompt Organizer' to help users save, edit, delete, and categorize AI prompts directly in the browser without any external dependencies. Use only HTML, CSS, and JavaScript, and store data using localStorage. Each prompt should include fields for title, description, tags, and the full text of the prompt. Users should be able to filter prompts by tags, search by keywords, and sort by date. Include example prompts for the first load. Use a clean, modern UI with a responsive layout.
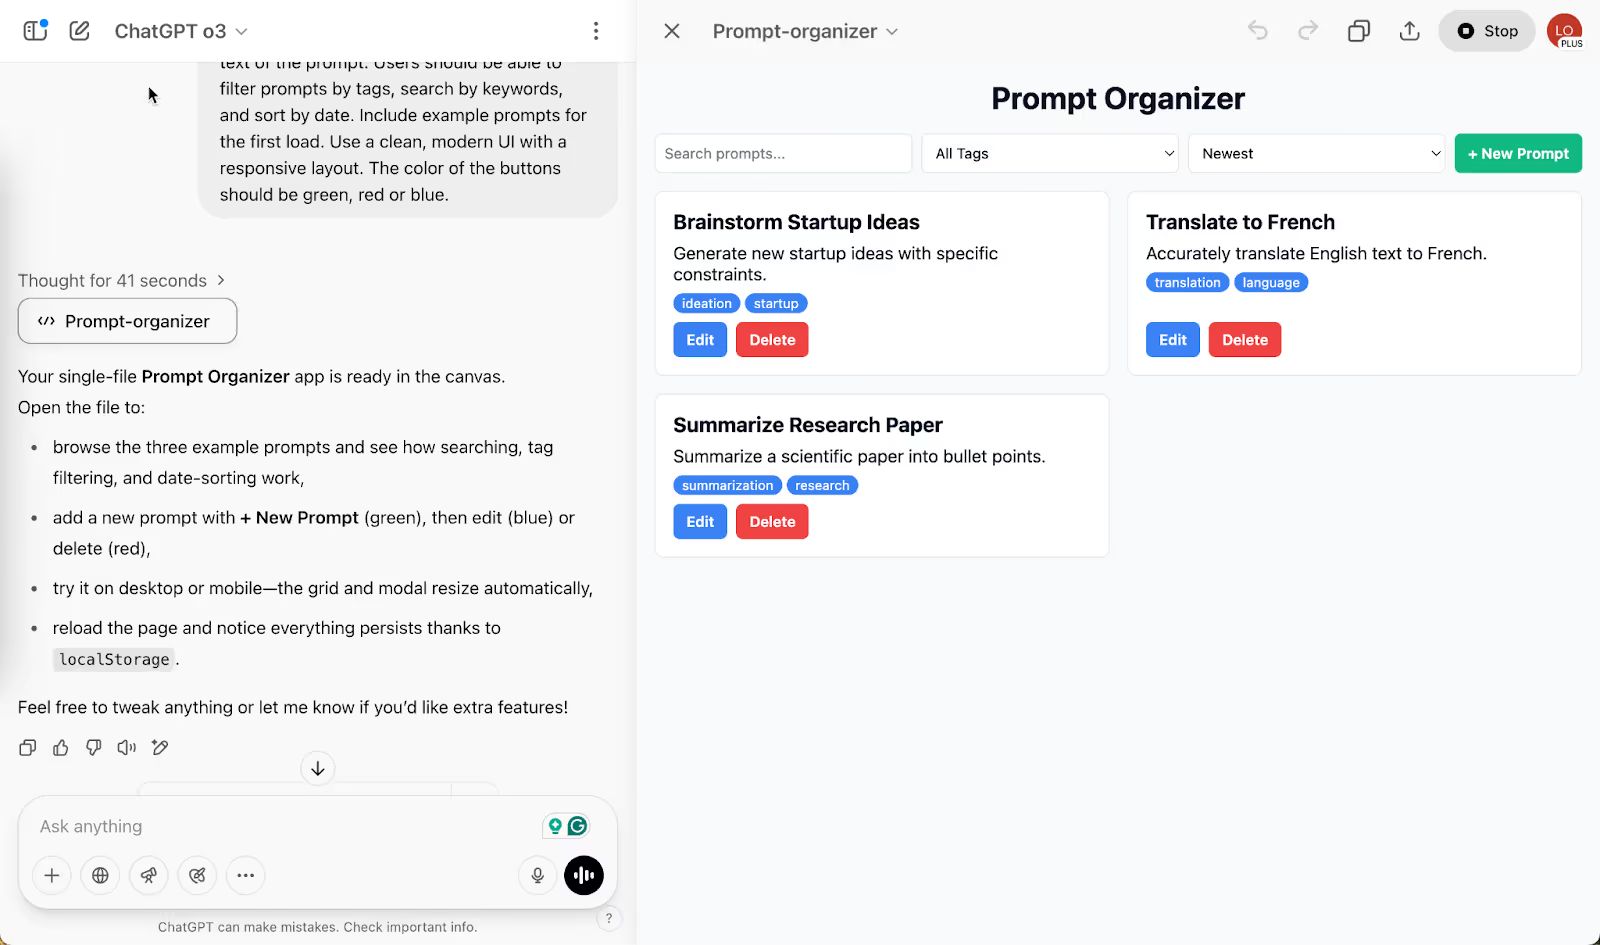
If you want to change the colors of the button or modify any other aspect, write a prompt and instruct ChatGPT to make the necessary changes.
Copy the code and create an HTML file on your computer. Paste the contents and save the file. Open the file in a browser so that if you create or save prompts, the changes will persist.

Step 3 - Preview and test your app
Once your app has been generated, click the "Preview" button to see it in action. This allows you to try out all the features and ensure everything is working properly before finalizing.
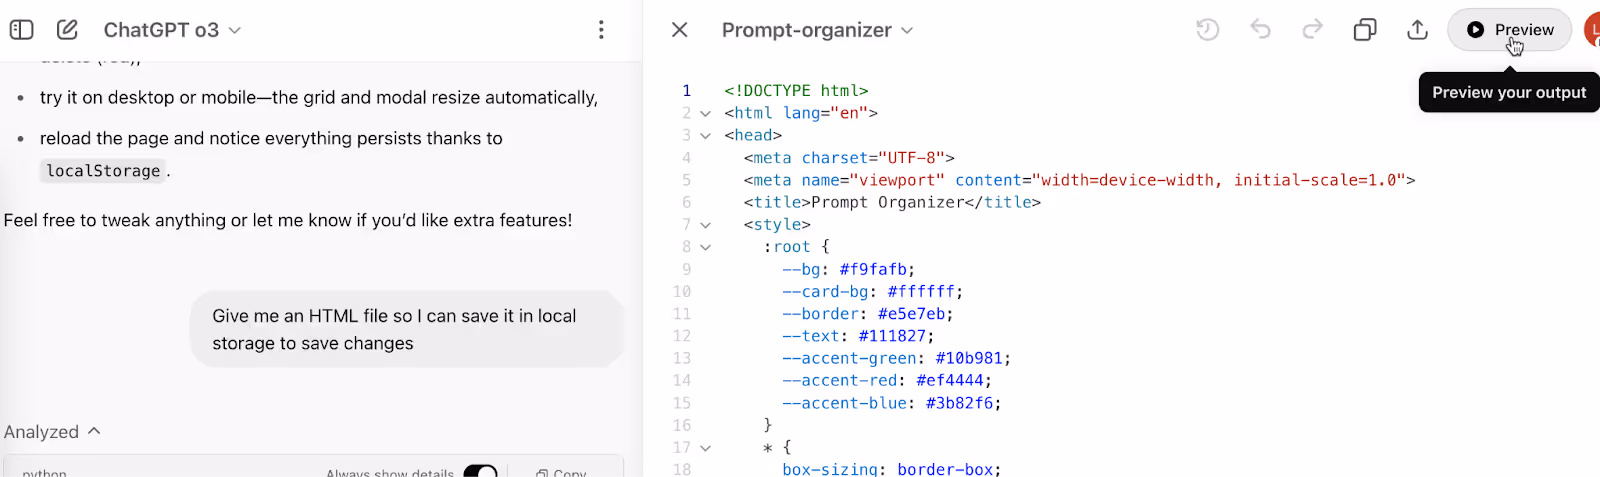
During preview mode, you can interact with your app just like a real user would, and even test data persistence thanks to localStorage support.
If you spot any problems or want to tweak something, you can simply ask the AI to update specific parts of the app for you.
Step 4 - Save and deploy your application
Once you’re happy with your application, it’s time to save and deploy it. Start by copying all the generated code — HTML, CSS, and JavaScript — and pasting it into a text editor of your choice. Save the file with a ‘.html’ extension, like ‘prompt-organizer.html’.

You can also deploy your app for free using Cloudflare Pages.
Head over to Cloudflare and log in to your account or create a new one if you haven’t already done so.
Go to Cloudflare’s dashboard. Click the ‘Add’ button at the top right corner of the screen and click ‘Pages.’
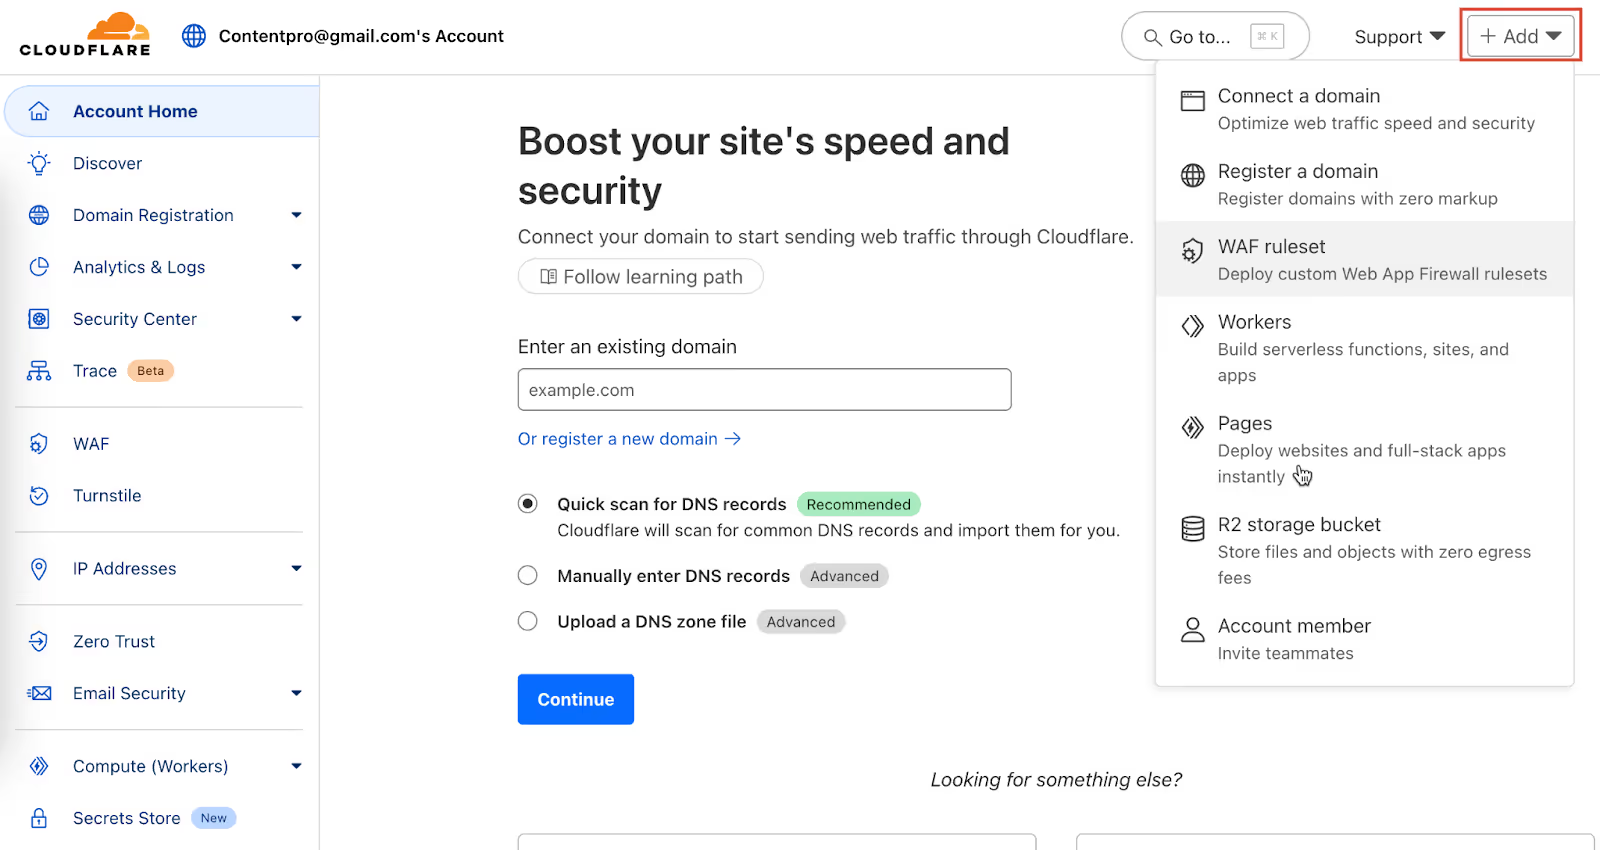
In the ensuing window, click "Upload assets" and select your HTML file.

Specify the project name and click ‘Create project.’
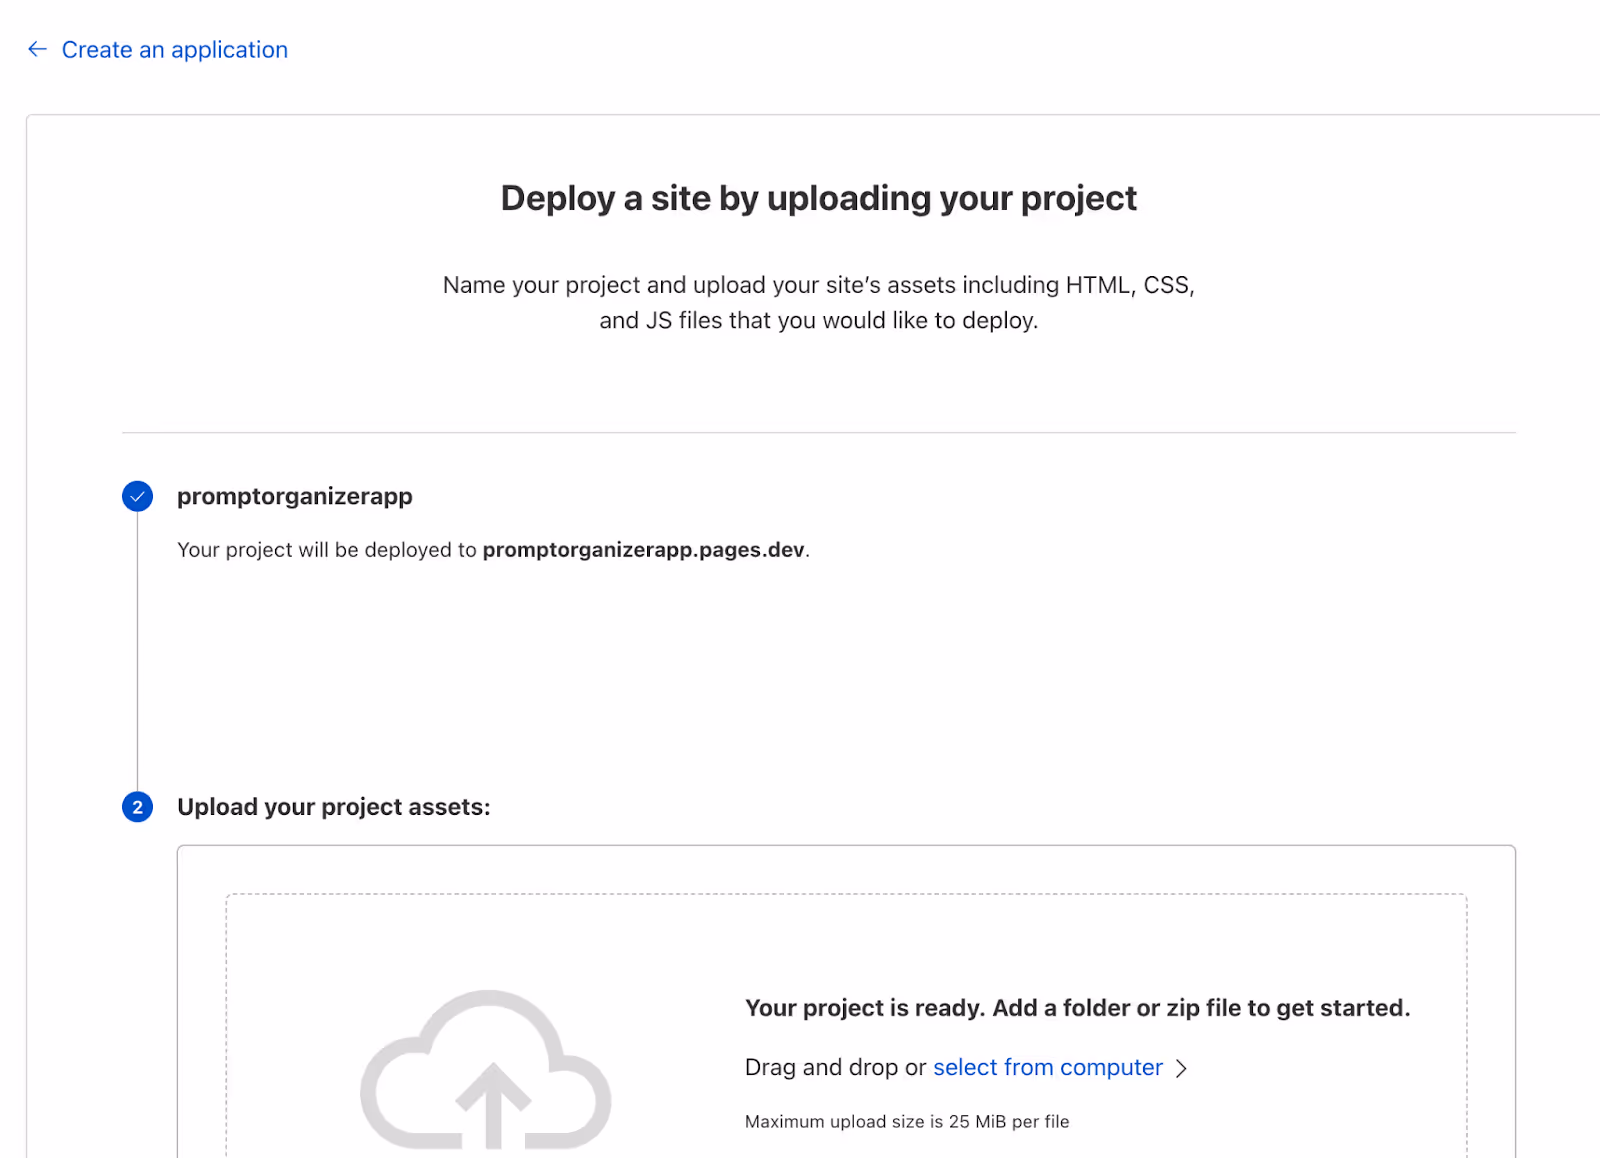
Now, zip and upload the HTML file you created with the ChatGPT code. Click ‘select from computer’ or drag and drop the file.
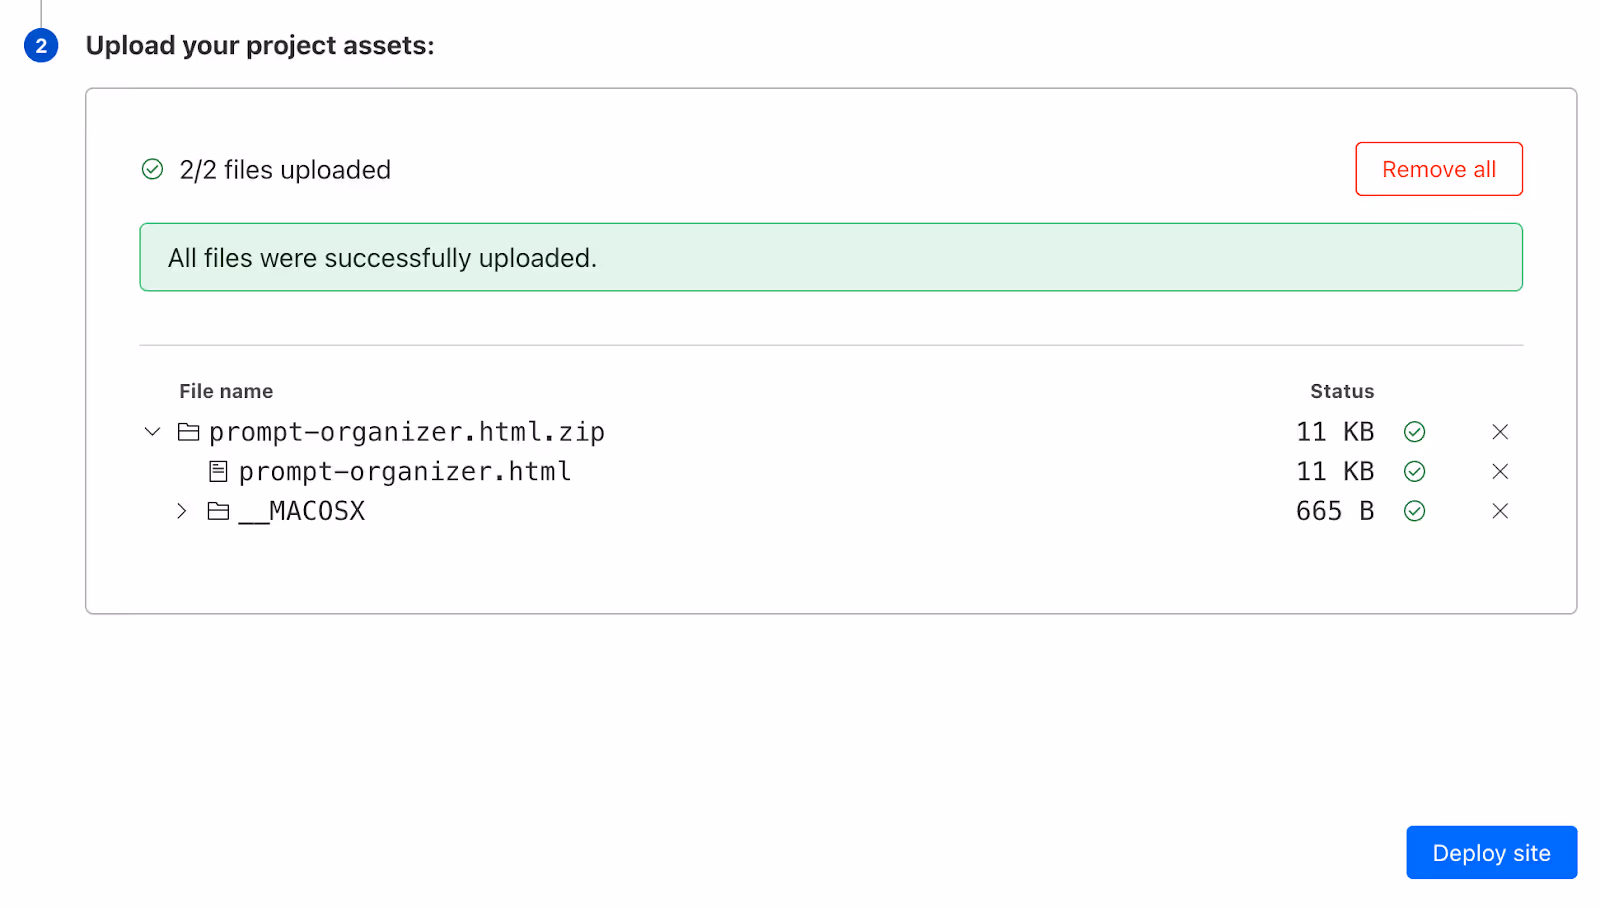
Click ‘Deploy site.’Click the link that Cloudflare generated for your app.
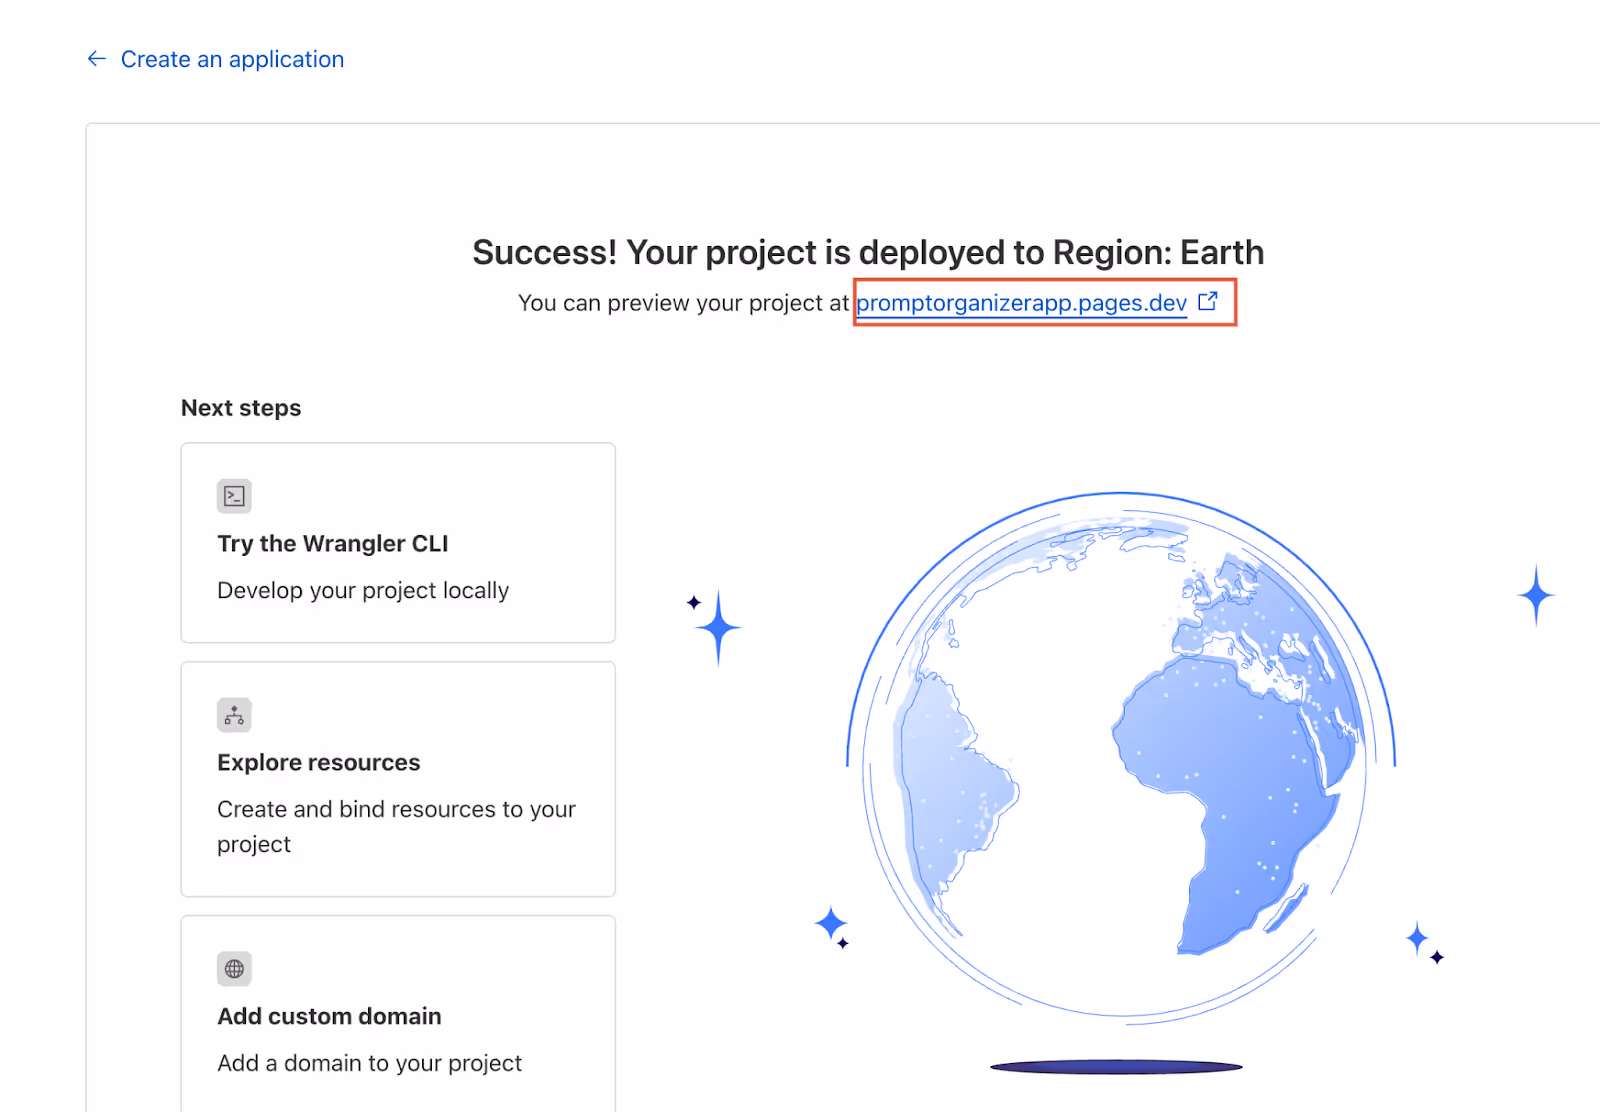
Wait a couple of minutes, and your app will be live in no time.
That’s it for this tutorial, folks. Create complex apps and deploy them on CloudFlare for a live preview. Tweak the prompts, add a database, or some React JS elements. Once you’re done with it, copy the files to a server with a custom domain name, and you are golden!
.avif)


.png)