.avif)
All of you who have been reading our tutorials know the automation n8n can do. It’s an amazing platform for quickly setting up complex automations to ease your workload. However, it requires some technical knowledge of APIs and a little bit of coding. N8N is great for developers or automation enthusiasts. But it might be a bit challenging for ordinary people who have never gone beyond social media and emails. And the seniors are almost lost in the tech forest. Automation and AI are a steep learning curve for seniors. For those who can type in English, Claude has given an amazing way to automate stuff without understanding APIs and other tech jargon. We are pretty sure most readers aren't interested in learning about any of that API stuff.
So the easy way is to let Claude handle the technical stuff while you do the talking! In this tutorial, we will show you how to integrate n8n with Claude. All you need is a prompt, and Claude will create some cool automation workflows in n8n that are easy to execute.
In this tutorial, you’ll learn how to:
- Install Claude Desktop and Node.js
- Connect Claude account to your n8n account
- Enable n8n tools and create a project
- Build your first workflow
Let’s get right into it!
Step 1 - Install Claude Desktop and Node.js
You have to install a couple of apps on your computer. First, install the Claude desktop by visiting the Claude Desktop website. Depending on your operating system, double-click the download file and follow the instructions:
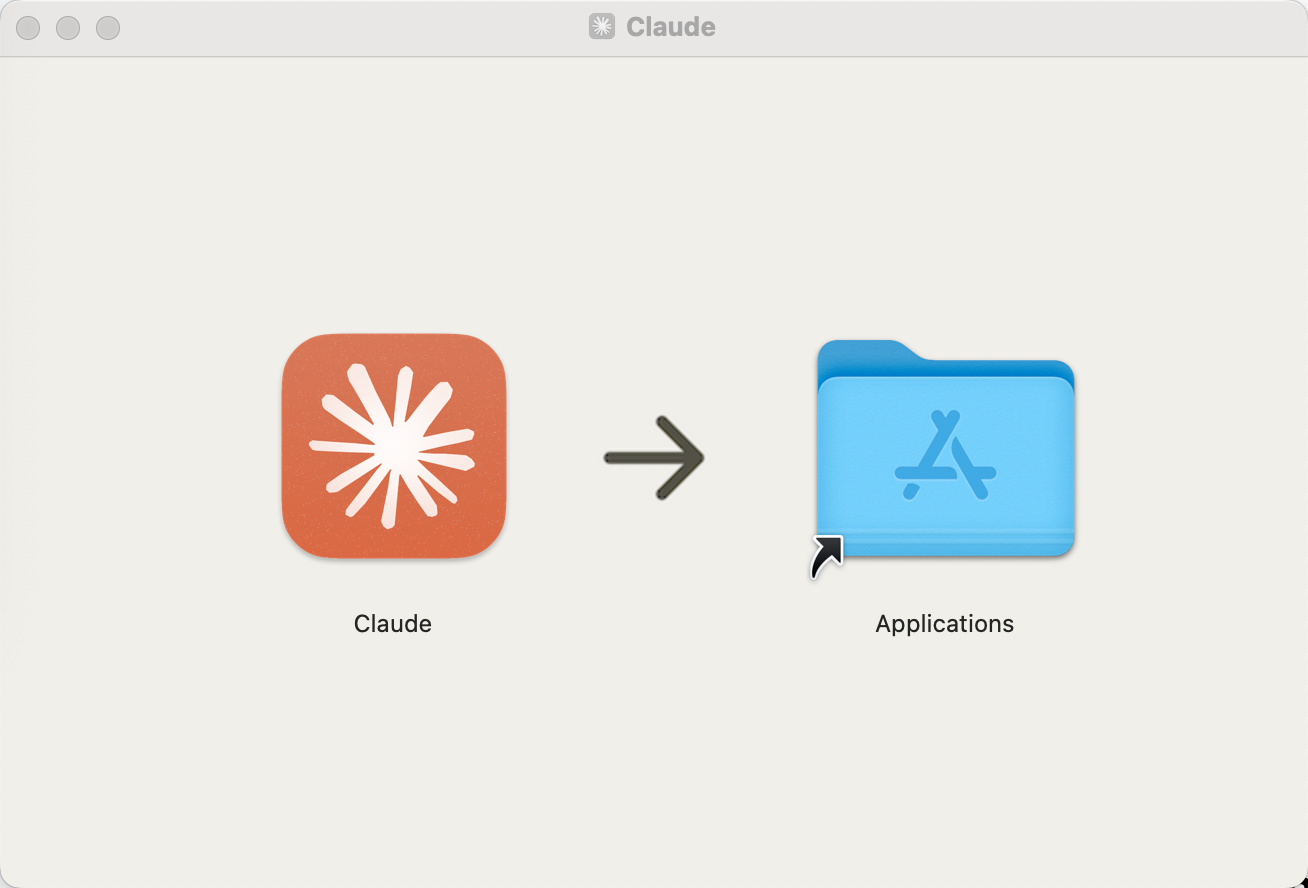
- Download the appropriate installer for your operating system. If you’re on a Mac, click the Mac version.
- Follow the steps to install an application on Windows. For Mac, simply double-click the installer file and drag the Claude icon into ‘Applications.’
- Sign in to your existing Claude account or create a new one
- Make sure you use the same account across all devices. (This is important)
Next, install Node.js. Open nodejs.org in your browser and:
- Download the installer for your operating system (The process is the same as described for the Claude desktop)
- Execute the installer and follow the setup wizard for Windows and Mac. You have to follow the installation wizard on Mac, too unlike Claude, where you drag the application icon and put it in the Applications folder.
- Accept the default settings by clicking Continue and Agree.
Node.js is a crucial component that allows Claude to talk to n8n through MCP.
That’s it. You’re done with the installation part.
Now comes the interesting part. You need to install the MCP server in Claude so it can communicate with n8n and do your bidding. If you have a Mac system, open your terminal app (search ‘Terminal’ on Mac or ‘Command Prompt’ on Windows) and paste the following command:
npx n8n-mcp
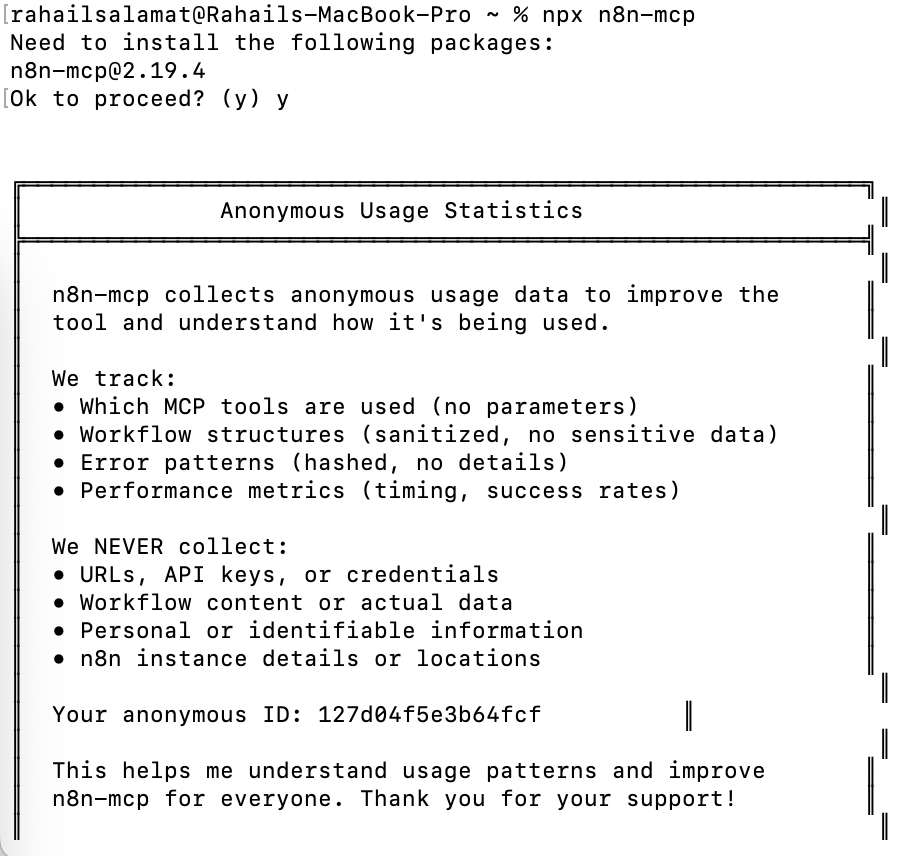
Press Enter on the keyboard, type ‘Y’ if prompted, and you should see the ' n8n MCP server is running’ message. This means everything is working.
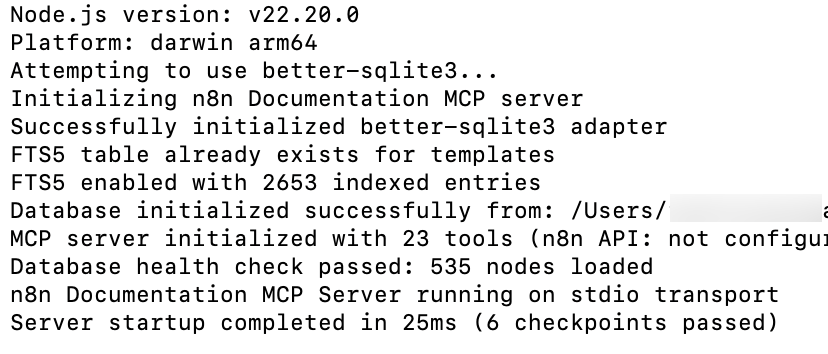
Press enter, type "Y" if prompted, and you should see "n8n MCP server is running." That means everything's working.
Step 2 - Connect the Claude account to your n8n account
The next task is to connect the Claude account to your n8n account. Open Claude Desktop, click the settings icon, and go to the Developer tab.
Click ‘Edit Config.’ A configuration file opens up.
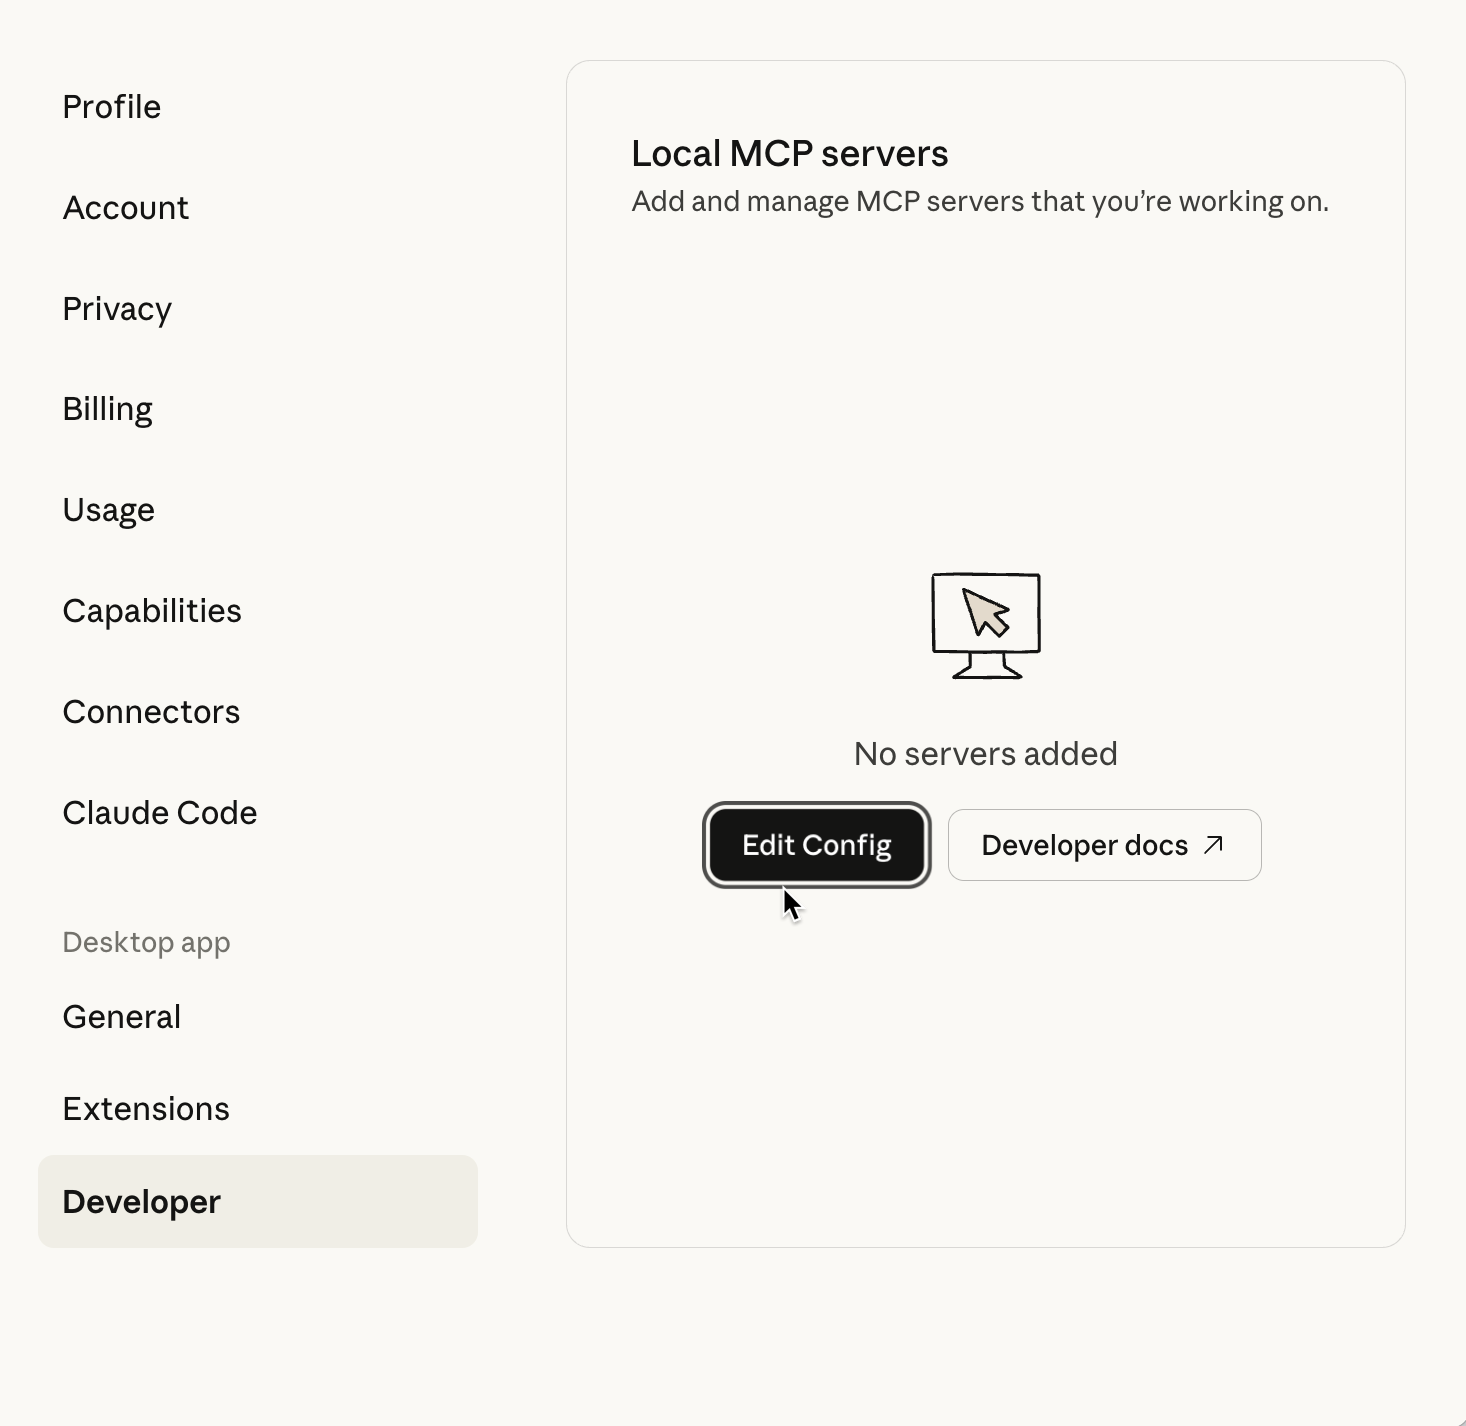
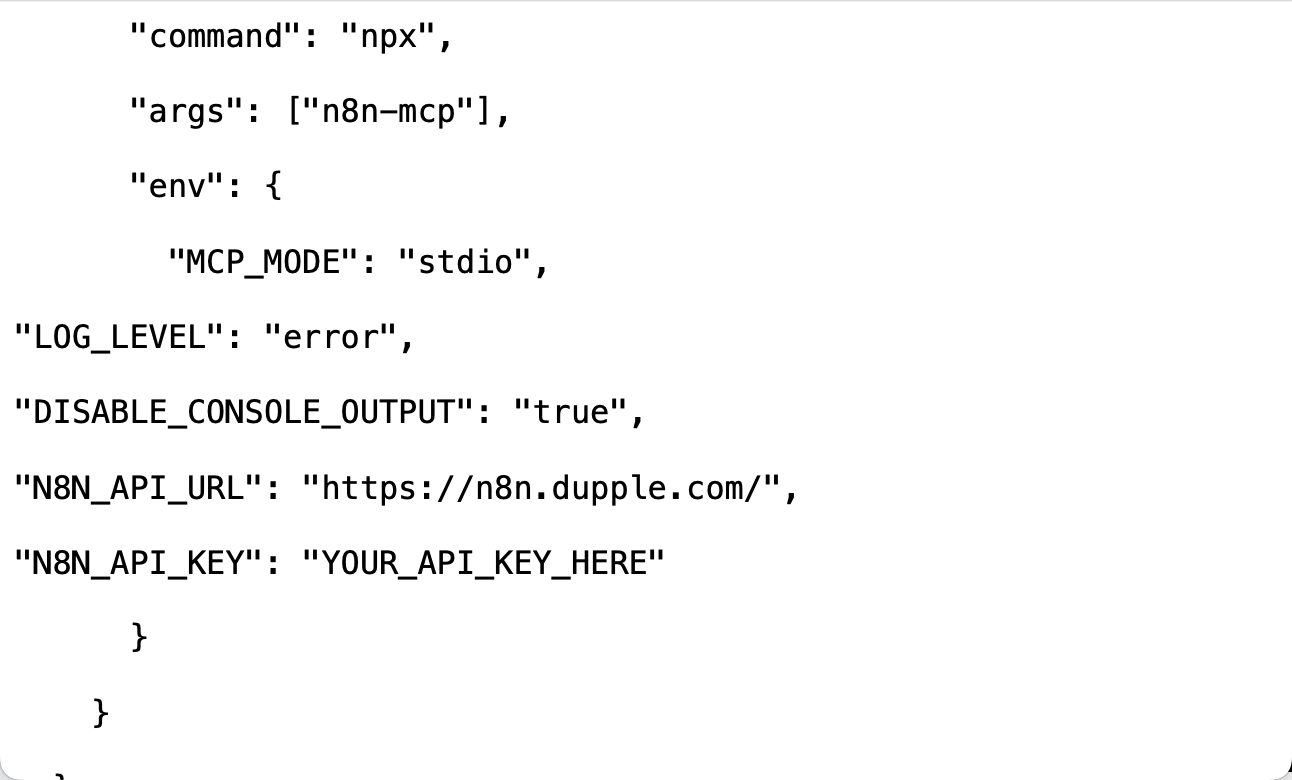
When you click ‘Edit Config’, open the file that is already highlighted. Now, paste the following code in your file carefully (replace everything).
Code:
{
"mcpServers": {
"n8n-mcp": {
"command": "npx",
"args": ["n8n-mcp"],
"env": {
"MCP_MODE": "stdio",
"LOG_LEVEL": "error",
"DISABLE_CONSOLE_OUTPUT": "true",
"N8N_API_URL": "https://YOUR_APP_NAME.app.n8n.cloud",
"N8N_API_KEY": "YOUR_API_KEY_HERE"
}
}
}
}
Do not close the file. Set up your API connection by following these steps:
Access your n8n workflow dashboard and copy the URL from your browser (everything before ‘/workflows’). Paste as N8N_API_URL without a trailing slash.
Now, create an API key in n8n. Navigate to Settings by clicking the ellipsis icon next to your name in your n8n account. In the settings window, click n8n API. Click ‘Create API Key.’ Name it ‘Claude MCP,’ and save. Copy the key and paste it into the config file by selecting N8N_API_KEY, replacing the placeholder text.
Save all changes. Save the claude_desktop_config.json file and quit Claude Desktop completely. Then reopen it.
Step 3 - Enable n8n tools and create a project
In the Claude Desktop app, click the search and tools icon in the chatbox and look at the bottom of the drop-down menu. You’ll see the n8n MCP connector. Click the forward arrow and ensure ‘Enable all tools’ is turned on. This setting ensures that all n8n features are accessible from this MCP connector.
It is advised to keep all n8n chats in Projects. If you’ve a paid plan, you can click ‘Projects’ and select ‘New Project. Name it n8n workflows or n8n chats and add the following instructions to ensure everything is organized:
Prompt:
You are an expert in n8n automation using n8n-MCP tools. Always check templates first, attribute authors, validate configs early and often, prefer standard nodes over code, build efficient workflows, and deploy only after full validation with incremental updates for fixes, and give the direct link to the workflow in n8n.
This prompt ensures that Claude understands that you are using this chat for building n8n automations only.
You’re all set! All you have to do is create an automation using prompts in Claude.
Step 4 - Build your first workflow
Test the connector by building your first workflow with Claude. Craft a prompt to tell Claude exactly what you want to automate. You can try something like this:
Prompt:
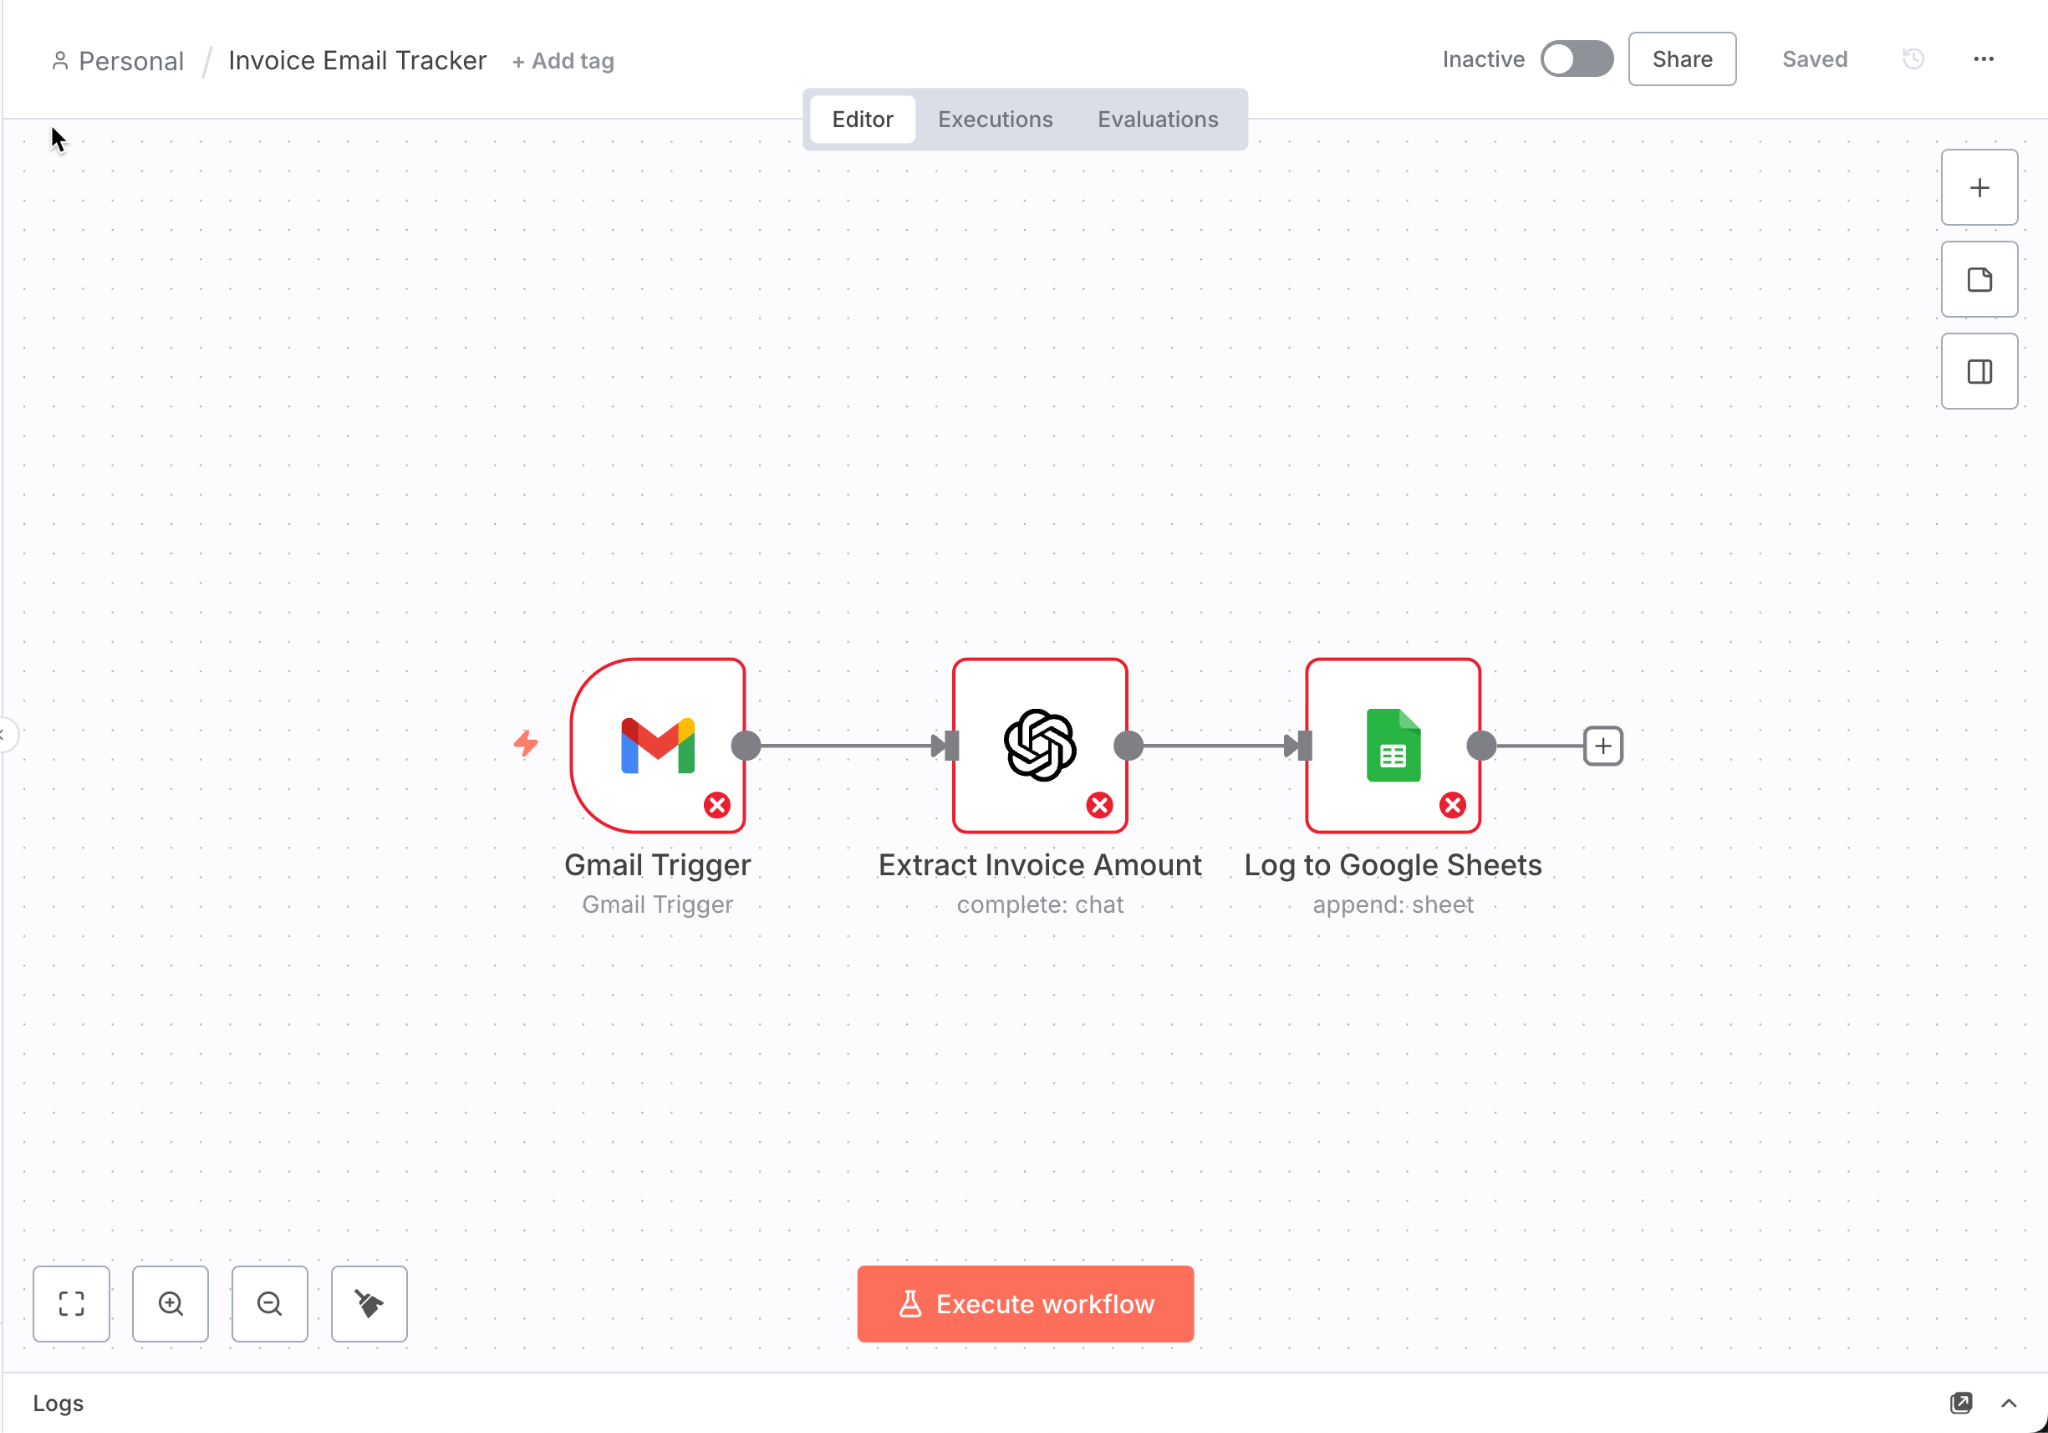
Create an n8n workflow that scans Gmail for emails containing “invoice” in the subject, uses AI to extract the invoice amount, and records the amount, sender, and date in a Google Sheet.

Claude starts executing the prompt, analyzes the prompt, selects the right n8n nodes (Gmail trigger, AI node, Google Sheets, etc.), builds the workflow, and gives you a link to access the n8n workflow.
Click the link to open the n8n dashboard containing the automated workflow with all the connections ready. The only step you have to do in n8n is to add your credentials and test it.
That’s it for this tutorial, automation nerds! Claude performs best with precise instructions. For example, instead of saying “automate my emails,” try “when a Slack message includes ‘urgent,’ create a To-do-list task and schedule a calendar reminder.” The more specific your request, the smarter your workflow.
.avif)

.png)
.png)
.png)