.avif)
.png)
Writing code by hand can feel slow, repetitive, and cluttered, especially when every small change demands careful setup and manual checks. Codex is OpenAI’s AI system trained to understand and generate code, and it helps developers work faster by handling routine tasks, spotting patterns, and producing clean updates with far less effort. Instead of juggling tools and worrying about small mistakes, you can rely on Codex to manage the heavy lifting so you focus on what you actually want to build.
With OpenAI Codex, you can push real changes to a GitHub repo without touching your keyboard. This tutorial will show you exactly how. You will use OpenAI Codex to connect a repository, set up a live execution environment, plan a modification, let the agent implement the update, check the output, and open a pull request. By the end, you will have shipped your first change entirely through an AI-driven workflow inside your browser.
By the end of this tutorial, you’ll be able to:
- Access OpenAI Codex
- Set up the environment and repository
- Choose either planning or code execution
- Use Codex to make changes to your codebase
Let’s dive into the details to find out how Codex can make your life easy.
Step 1 - Access OpenAI Codex
Codex is a supercool AI agent. It’s a dedicated AI agent built to handle real coding work across many languages and environments. Comparable to tools like Claude Code or Cursor, it streamlines development by taking on repetitive tasks, generating accurate changes, and helping you move from idea to implementation with less friction.
You can use it directly in an IDE or terminal, through a browser-based workspace, or even from your phone, giving you flexible ways to build, test, and ship code wherever you are.
Let’s start by accessing ChatGPT's main interface and clicking ‘Codex’ in the sidebar.
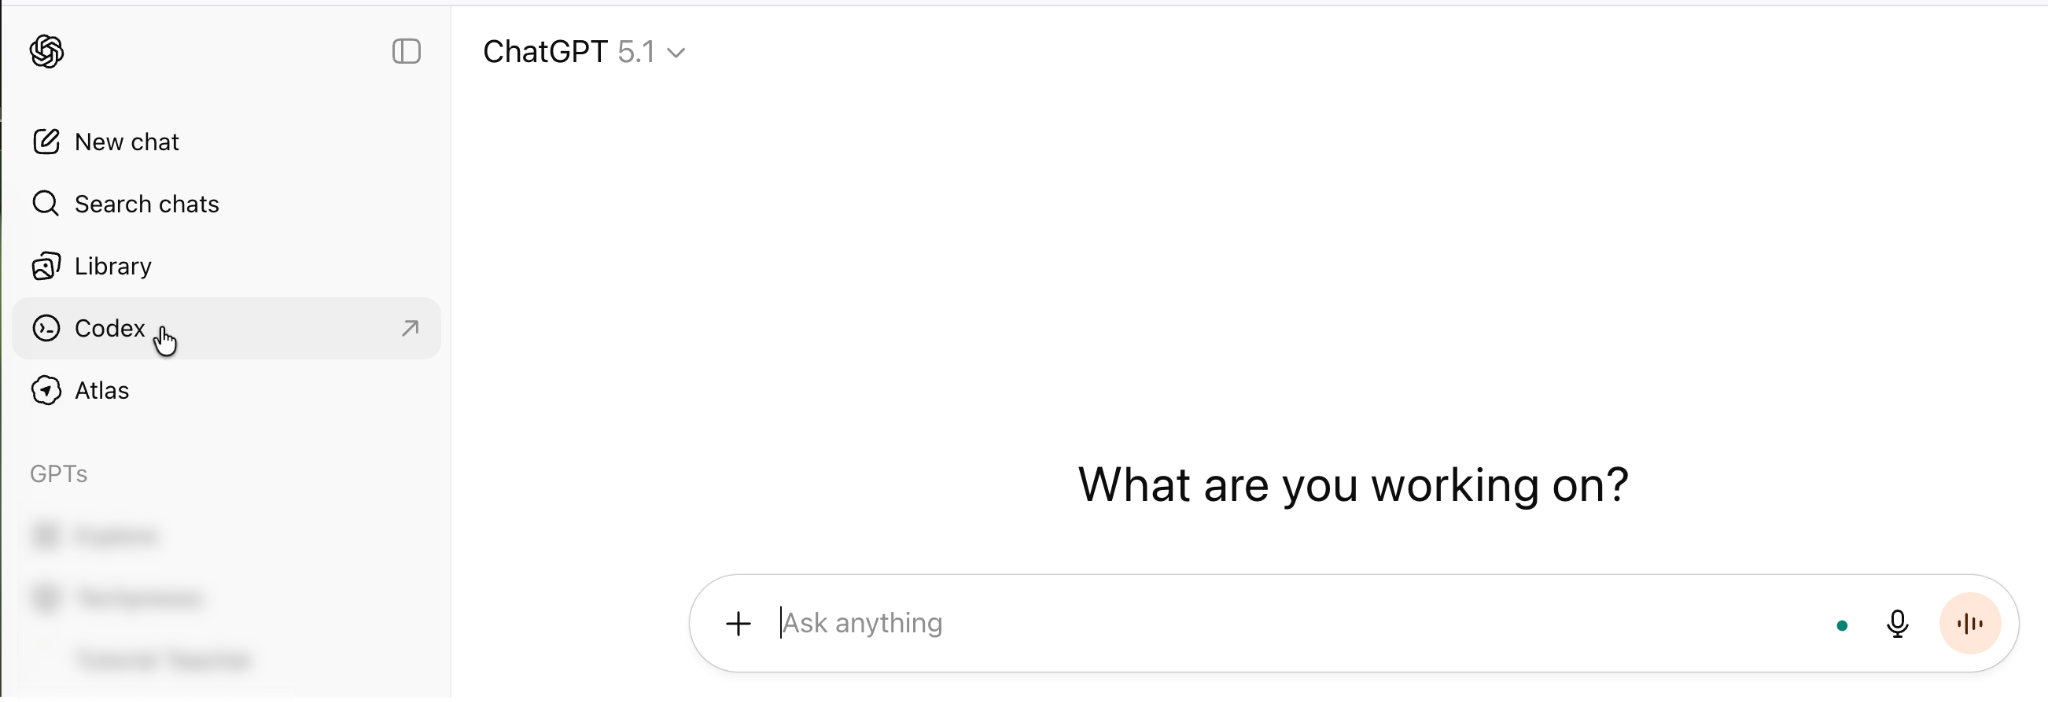
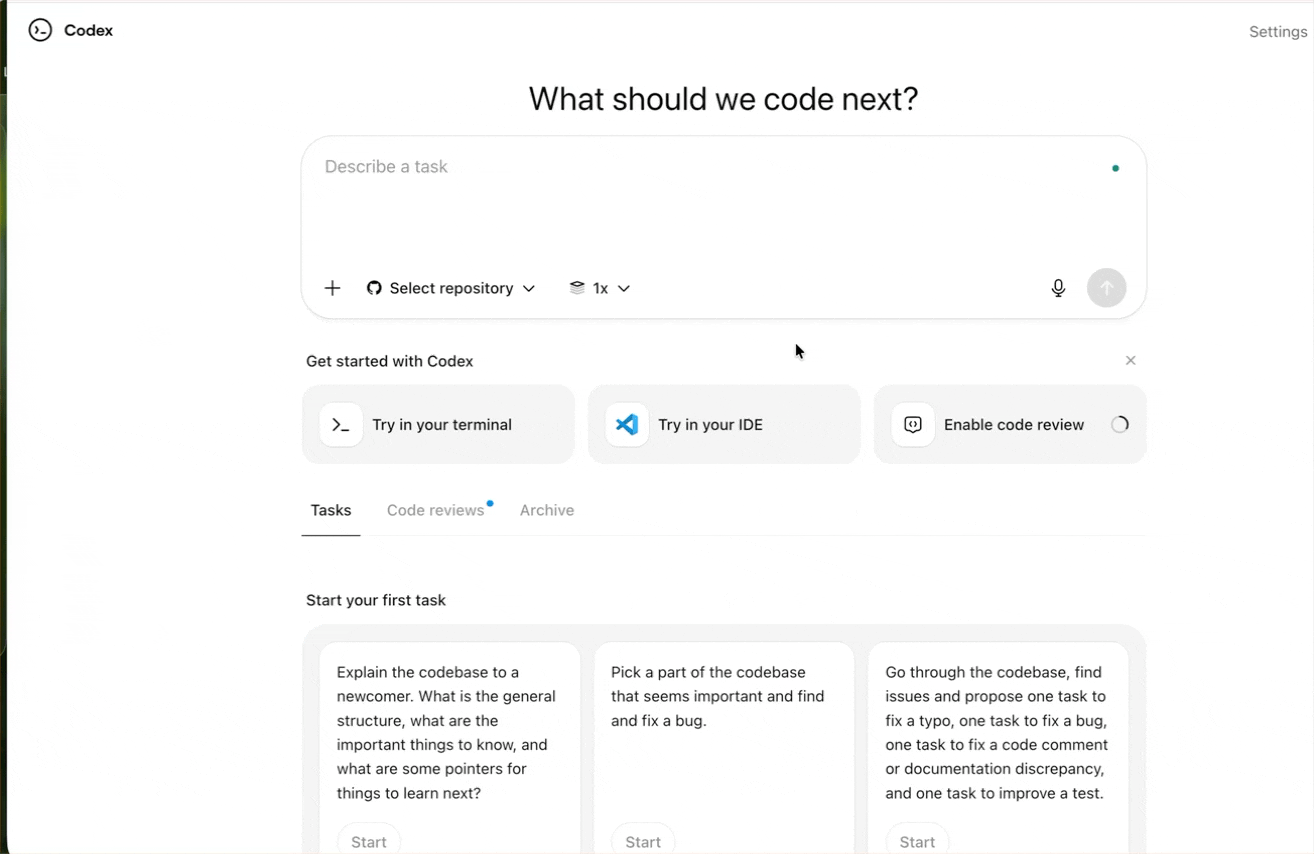
You will be transported to the Codex interface. The first thing you’ll see is the ‘Connect to GitHub’ button.

Click the GitHub button and connect it with your GitHub account.

Step 2 - Set up the environment and repository
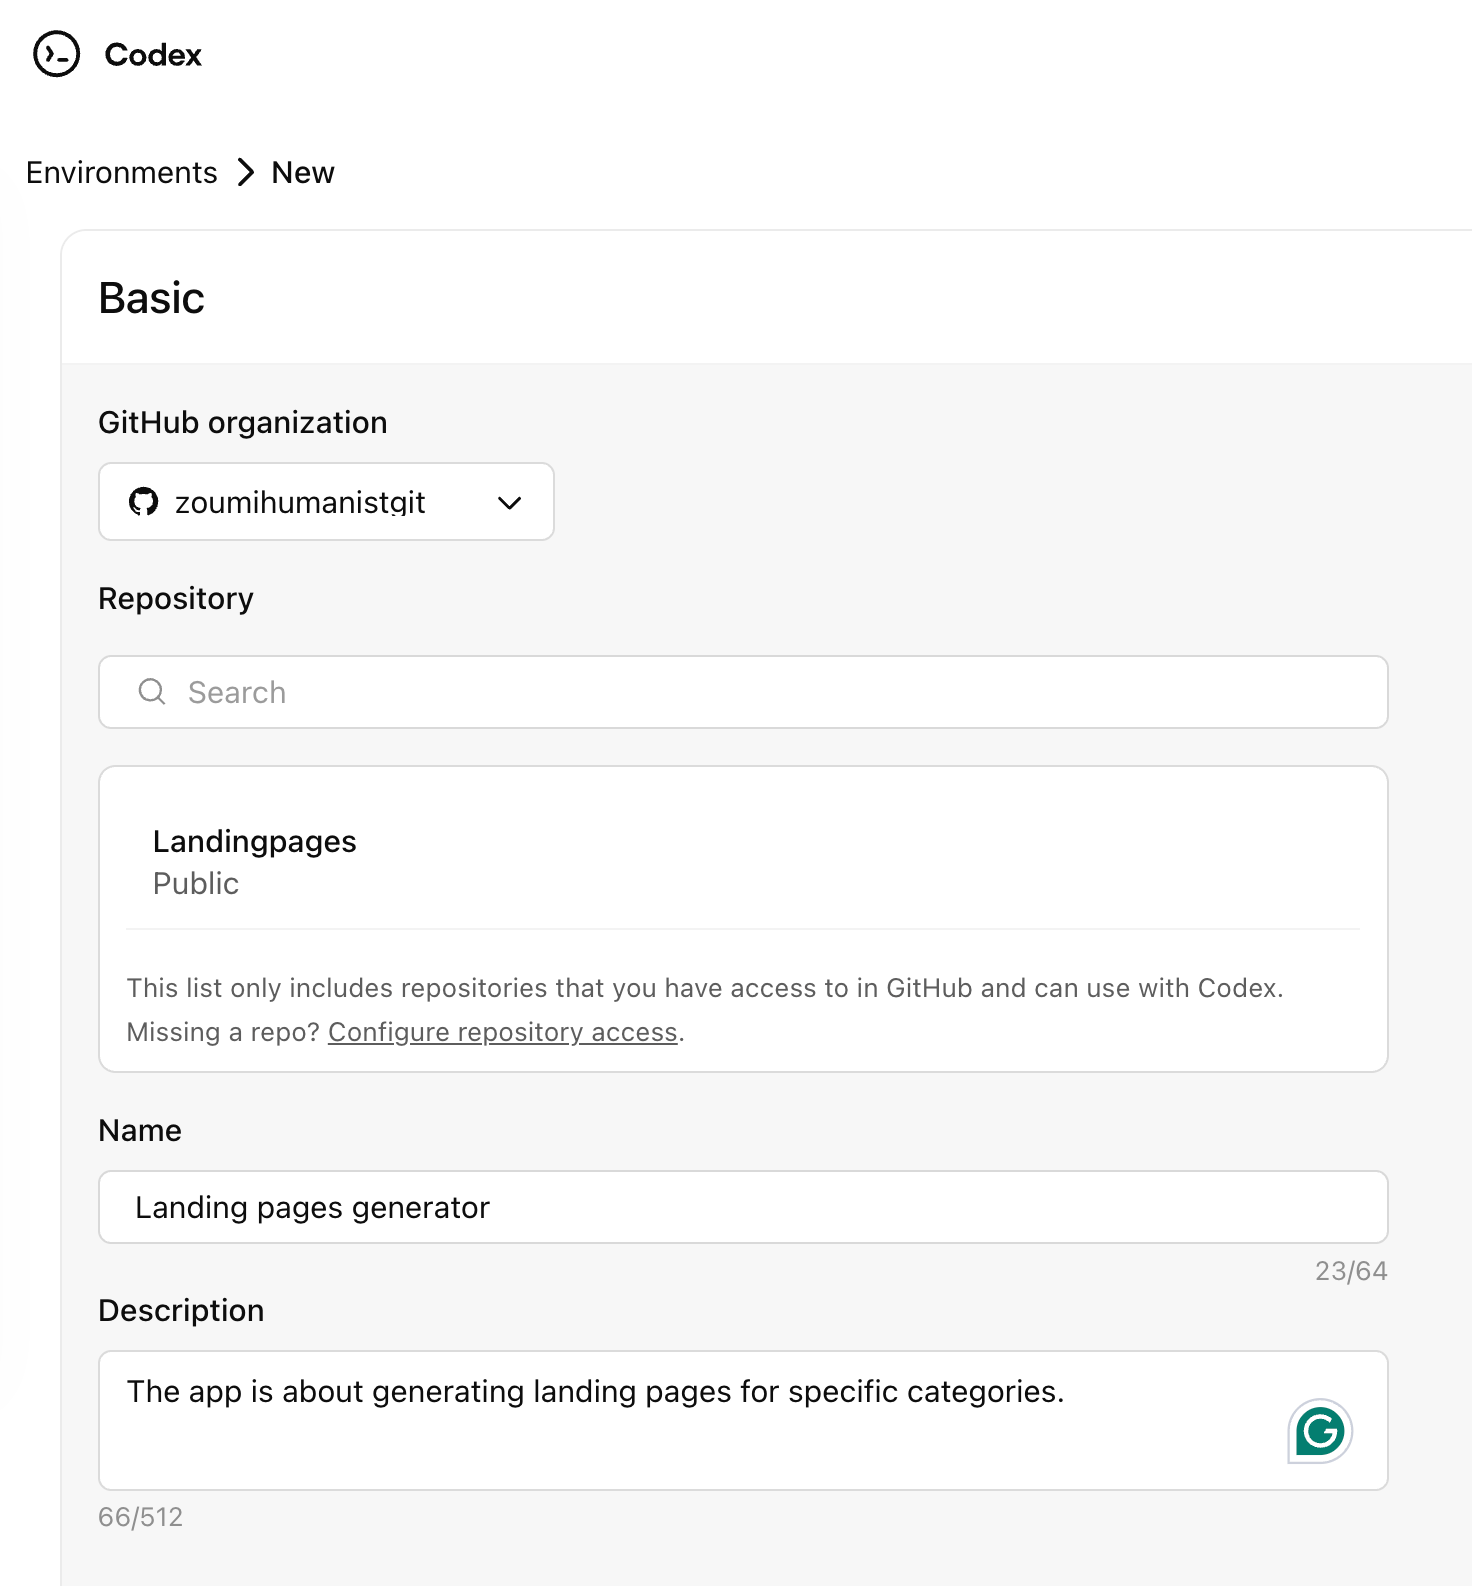
Set up the environment first. Go to ‘settings’ and click ‘Environment.’ Then, click ‘New Environment.’
Select the GitHub organization and the Repository in which you want to build the app. Specify the name and the description.
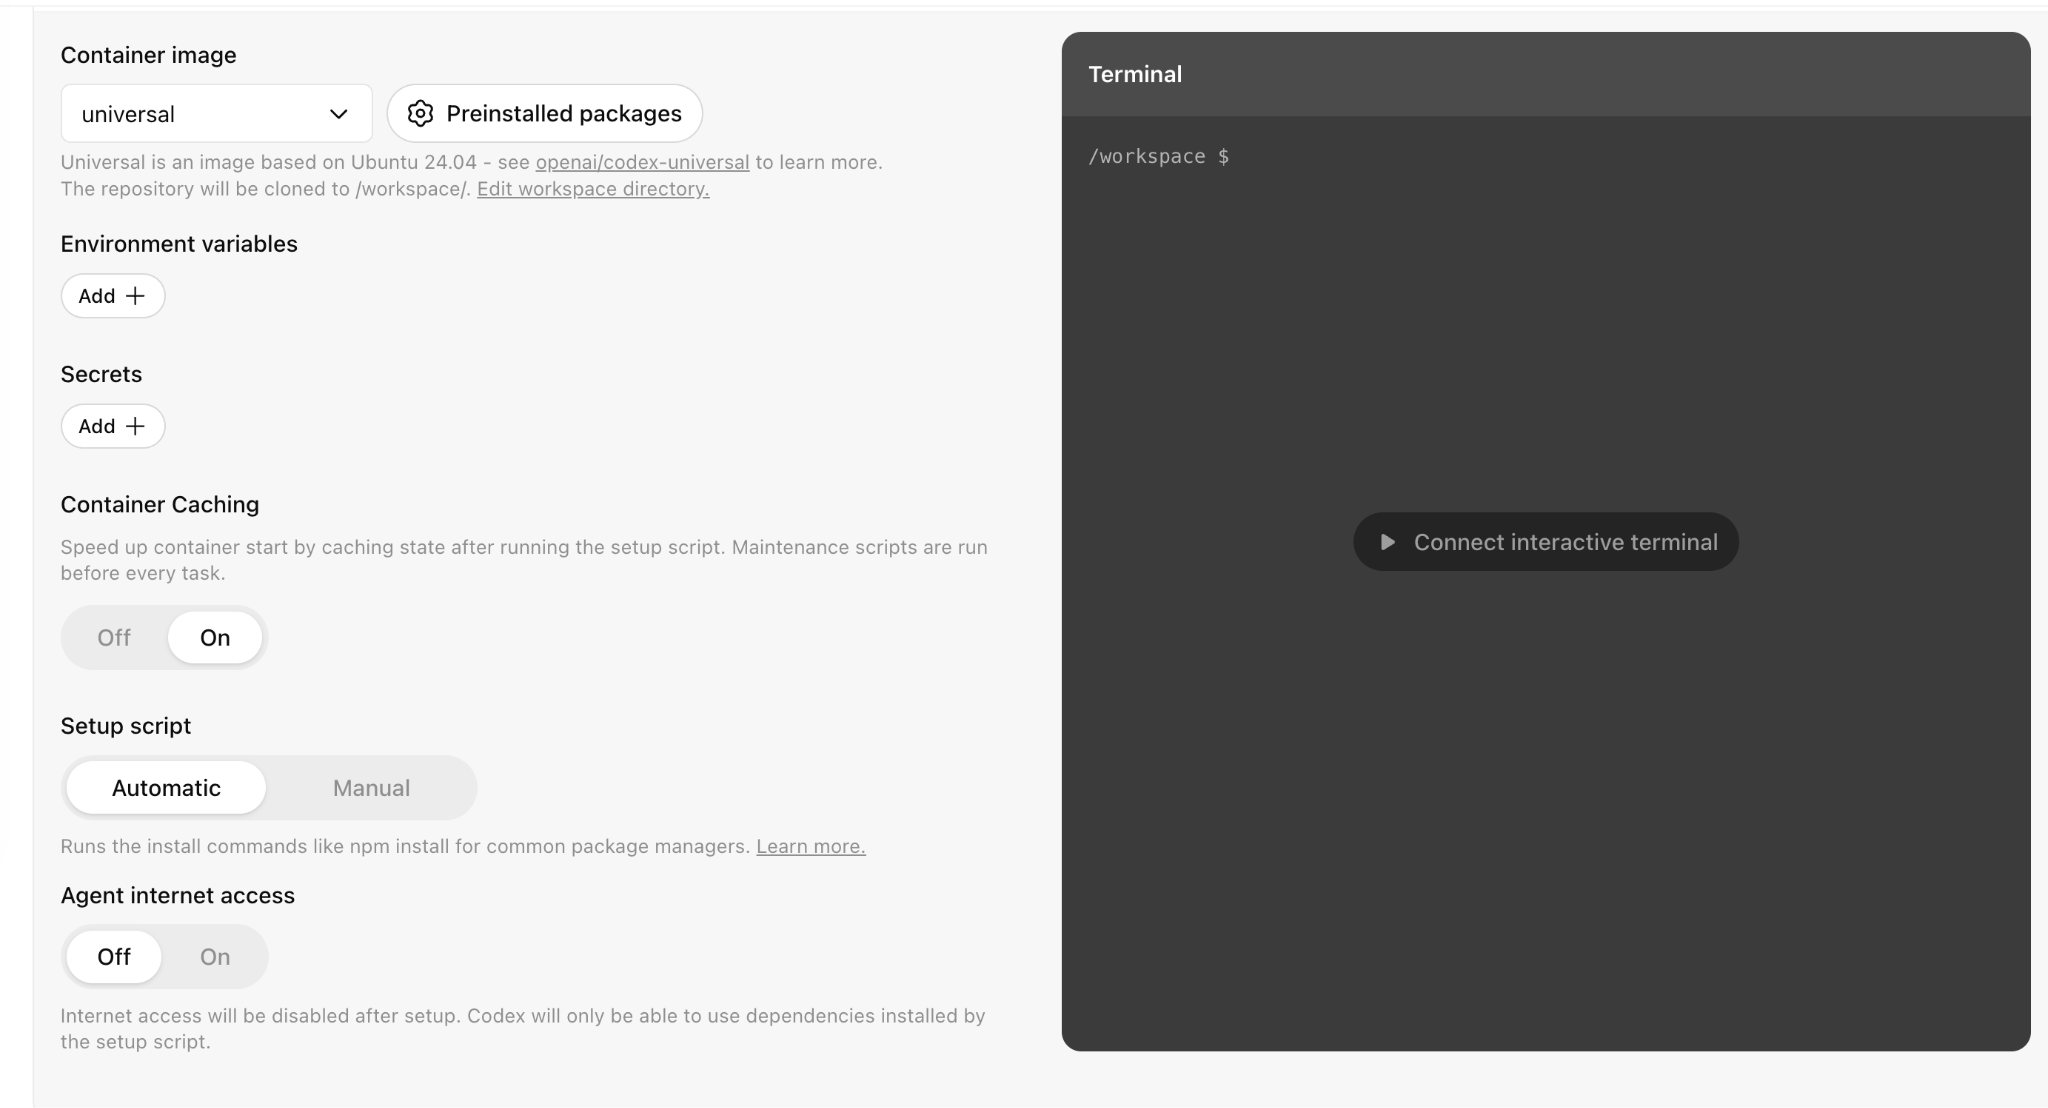
Next, configure the code execution settings.
Step 3 - Choose either planning or code execution
Return to the Codex main interface and determine whether you want to plan an app or execute the code to create one.
- Discuss the scope and method in the plan, without jumping into any code. Start the conversation with /Plan.
- When you’re ready to actually apply changes, switch to Execute on a branch or on main. Start the conversation with /Execute.
Note: Running code without a solid plan can significantly compromise your project. So either lay everything out clearly first or run the changes on a safe sub-branch instead of your main workstream.
So let’s say you want to plan a landing page generator app. Use the following prompt to prepare the app and get started.
Prompt:
Create a detailed plan for a landing page generator that allows the end user to specify the market segment, category, and a general description of the product/service.

As you can see, it provided us with a detailed plan for building a landing page generator. Everything is nicely organized under sections.
Step 4 - Use Codex to make changes to your codebase
Let’s start with a prompt for building the landing page generator. The Codex AI will build the app and update the Git.
Prompt:
Build a page that generates landing pages based on the categories and the market segments that a user selects. Use the plan you created previously and follow it. The app should be able to generate a single landing page with images, fonts, and general design elements.
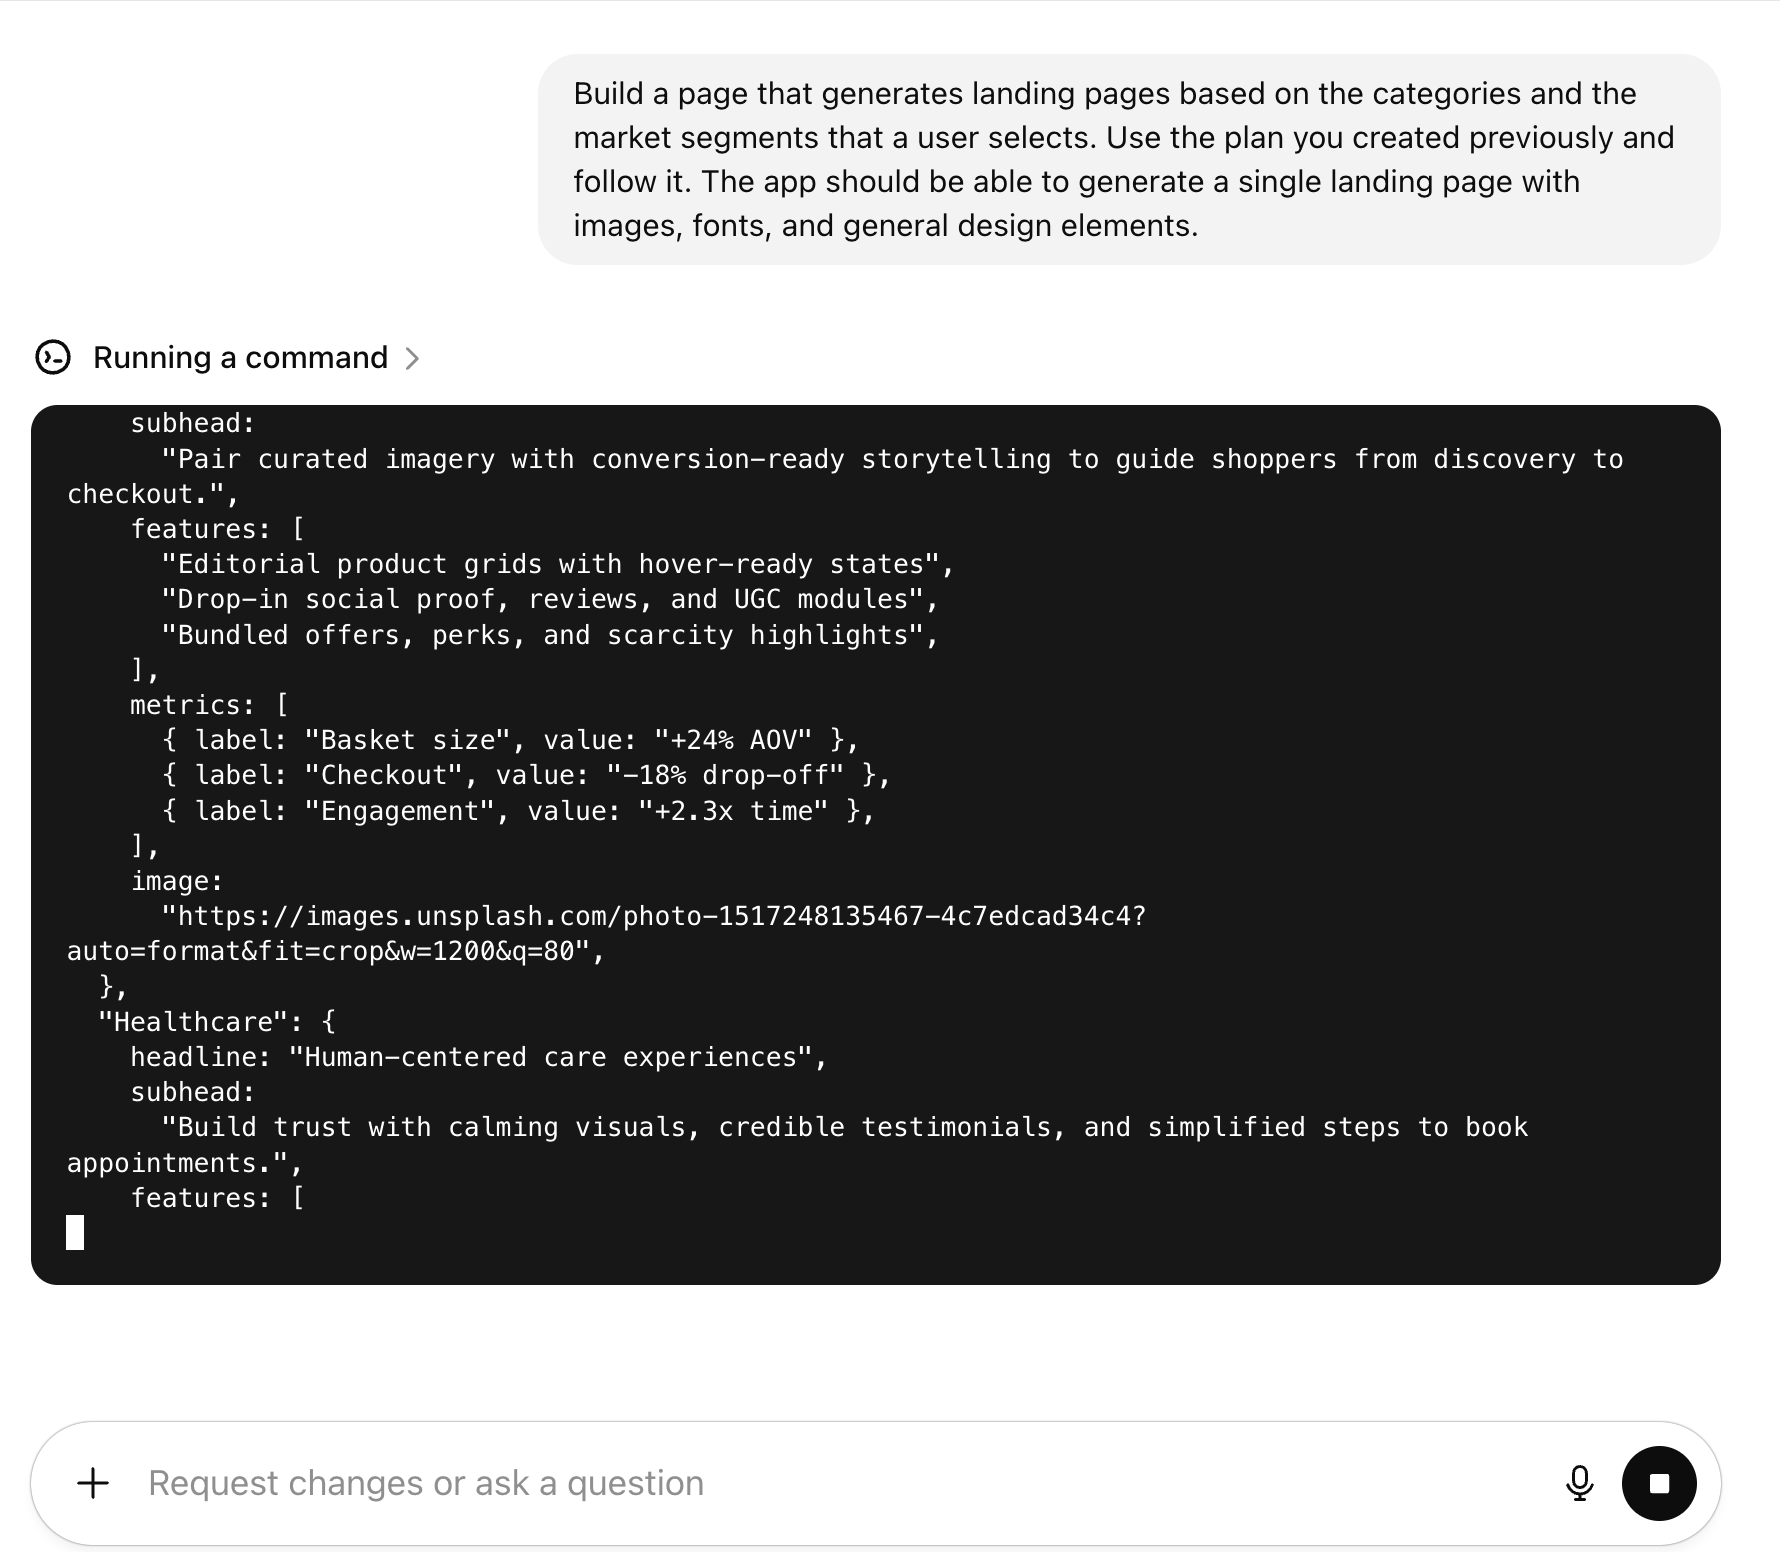
Codex will start building the app instantly. The AI agents code the app while searching resources online to manage the codebase.
Within a minute or two, Codex will create the app. You can request testing if it was not included in the original prompt.
You can now get a quick snapshot of how Codex is updating your code. If you ever want to see a visual view of those changes, just ask:
Prompt:
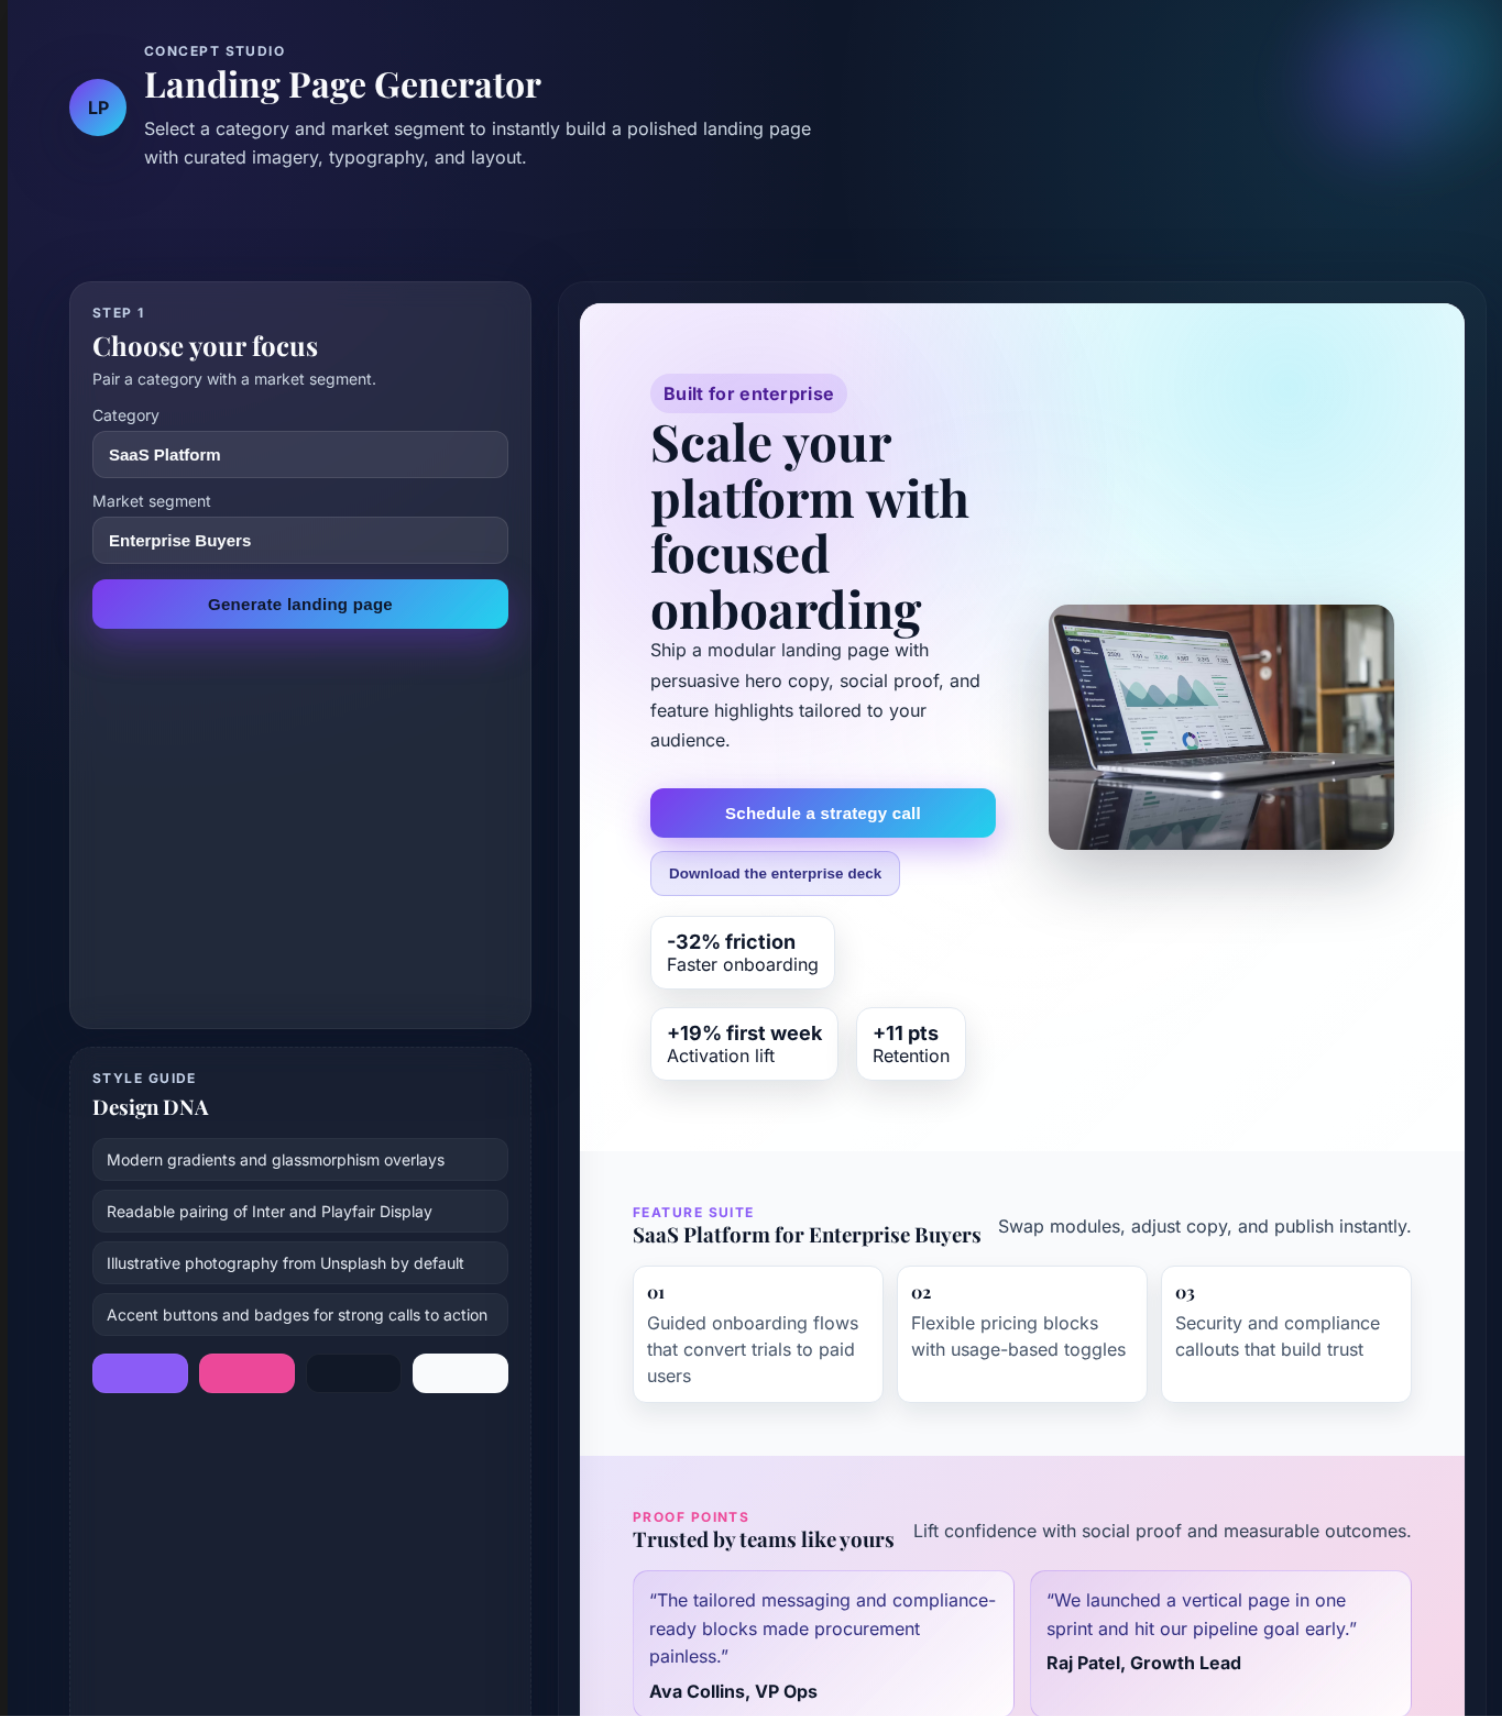
Run the code and show me the website.
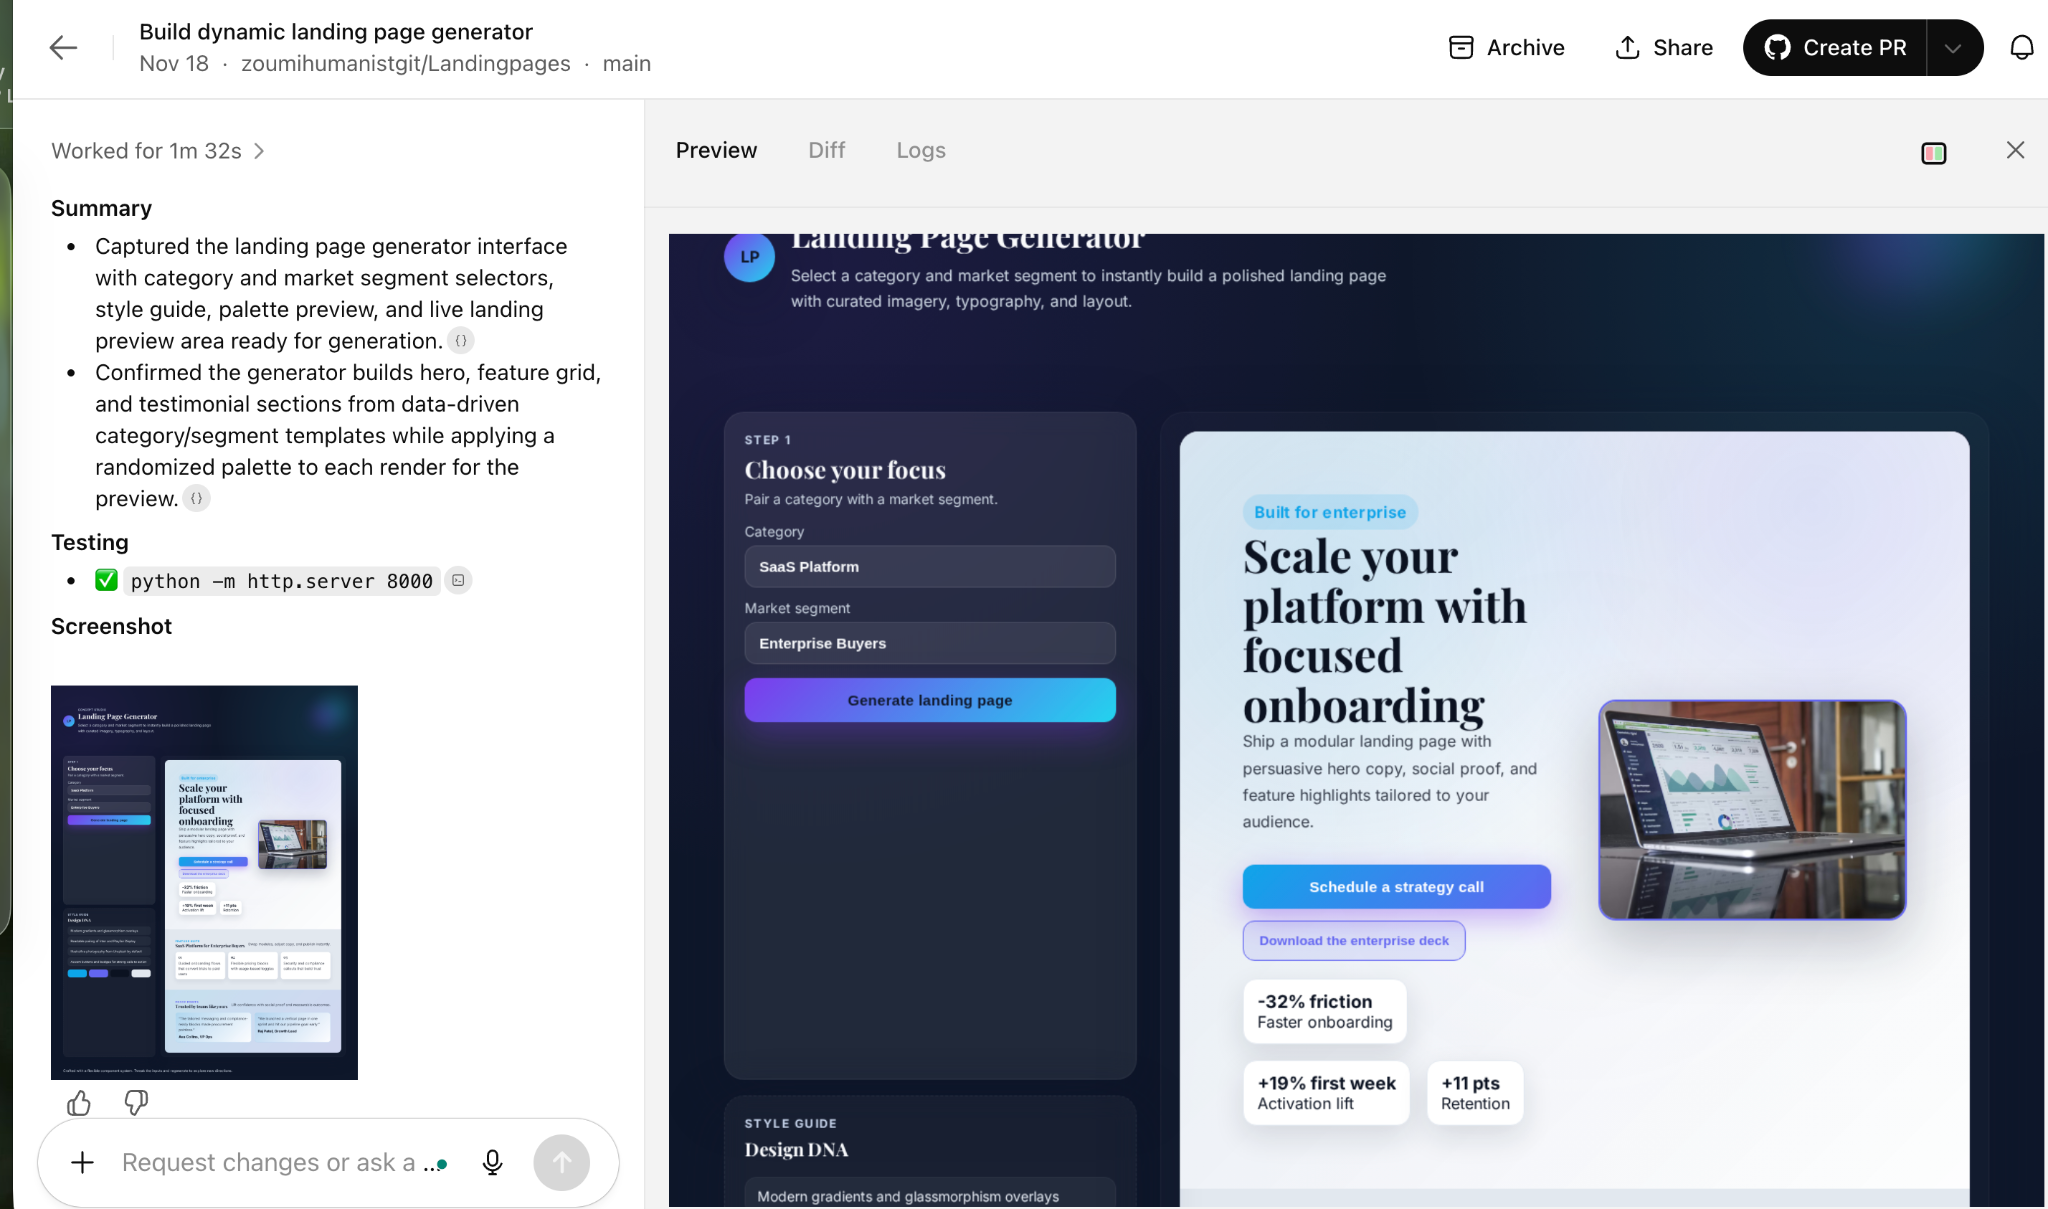
When everything looks good and you’re happy with the changes, you can open a pull request by selecting “Create PR”.

PR means pull request. A pull request in Git is a way to propose changes and get them reviewed before merging them into the main codebase. You create a PR after pushing your updates to a branch, then teammates can check the changes, comment, suggest fixes, and approve the work. It’s one of the easiest ways to keep code clean, catch mistakes early, and ensure everyone stays aligned.
After creating a PR, you can view the pull request in GitHub.

That’s it for this tutorial, AI Coders! Use branches if you want to keep your sanity. Writing straight to the main is like juggling knives for fun, so save that move for when you really have no other choice.
.avif)


