.avif)
.png)
Automation is the new trend in the IT world. The idea to automate tasks that consume our precious office time has become the hottest trend in 2025. It’s not that most of us are lazy. The idea is to automate repetitive tasks so that professionals can focus on important stuff that matters the most. It professionals are using various tools to automate. They want the apps to talk to each other. That’s the reason they created APIs.
Imagine accessing 8000+ in Zapier MCP through the OpenAI agent builder. You can build and automate any tasks with these tools. Instead of having multiple open tabs and thousands of workflows, you can streamline the whole task automation without accessing various apps and online services.
In this tutorial, we’ll show you how to access over 8000+ tools through Zapier MCP. You can access these tools from the OpenAI agent builder. The process is easy and takes only a few minutes. We’ll teach you how to access OpenAI agent builder, configure your agent, and integrate it with Zapier MCP, set up the Zapier MCP server, connect API keys, test the workflow, and publish your automation.
By the end of this tutorial, you’ll be able to:
- Access the agent builder
- Configure your agent and MCP integration
- Set up the Zapier MCP server
- Connect API keys
- Test the workflow
- Publish your automation
Let’s dive right into it!
Step 1 - Access the agent builder
The first step is to connect the agent builder to external tools. OpenAI agent builder is a separate tool from ChatGPT. Your ChatGPT Plus subscription is sufficient to access and use the agent builder.
Access OpenAI Agent Builder (https://platform.openai.com/agent-builder) and use your ChatGPT Plus/Pro account to log in.
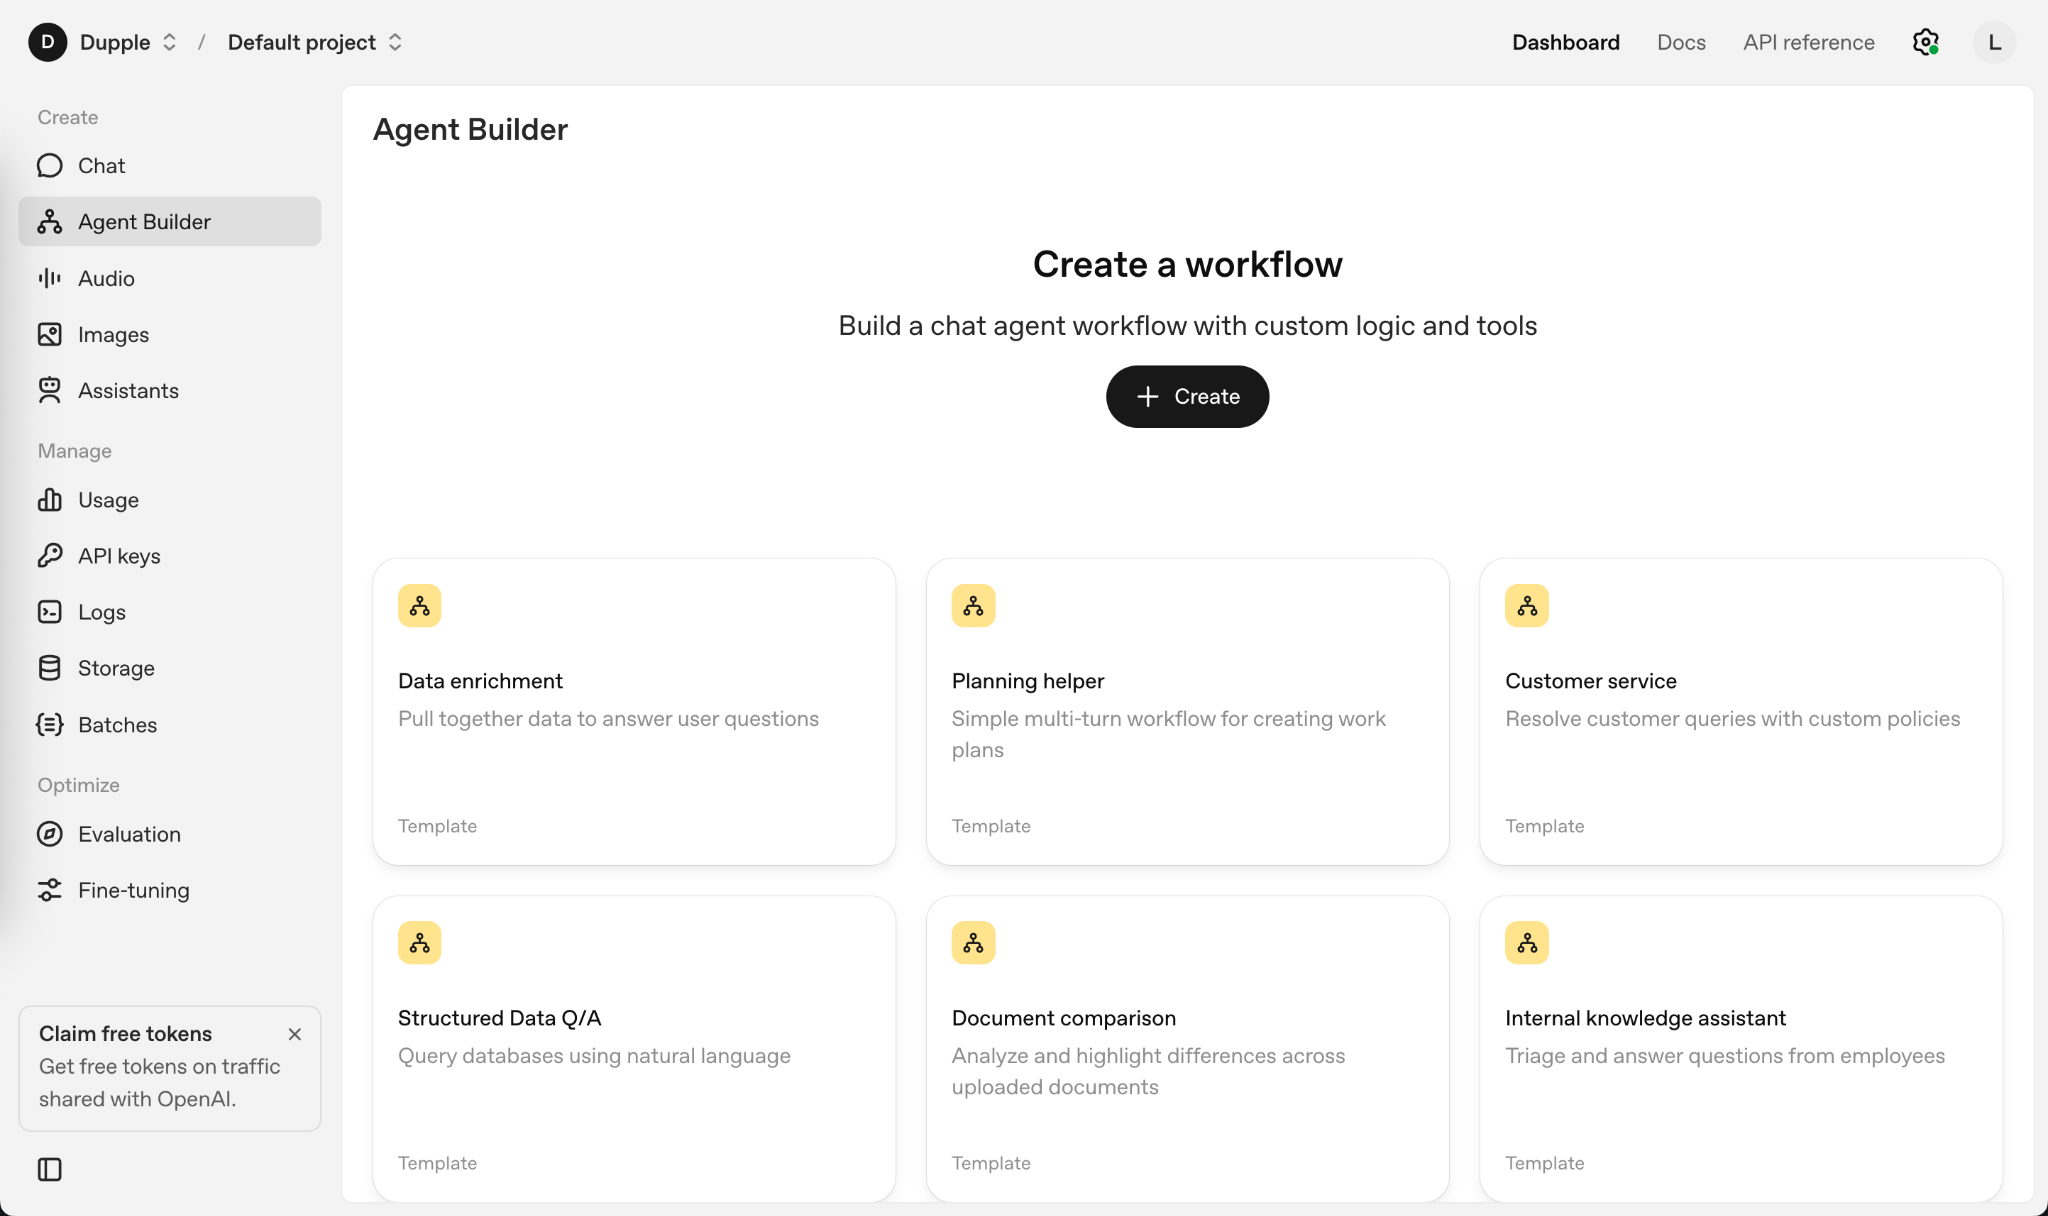
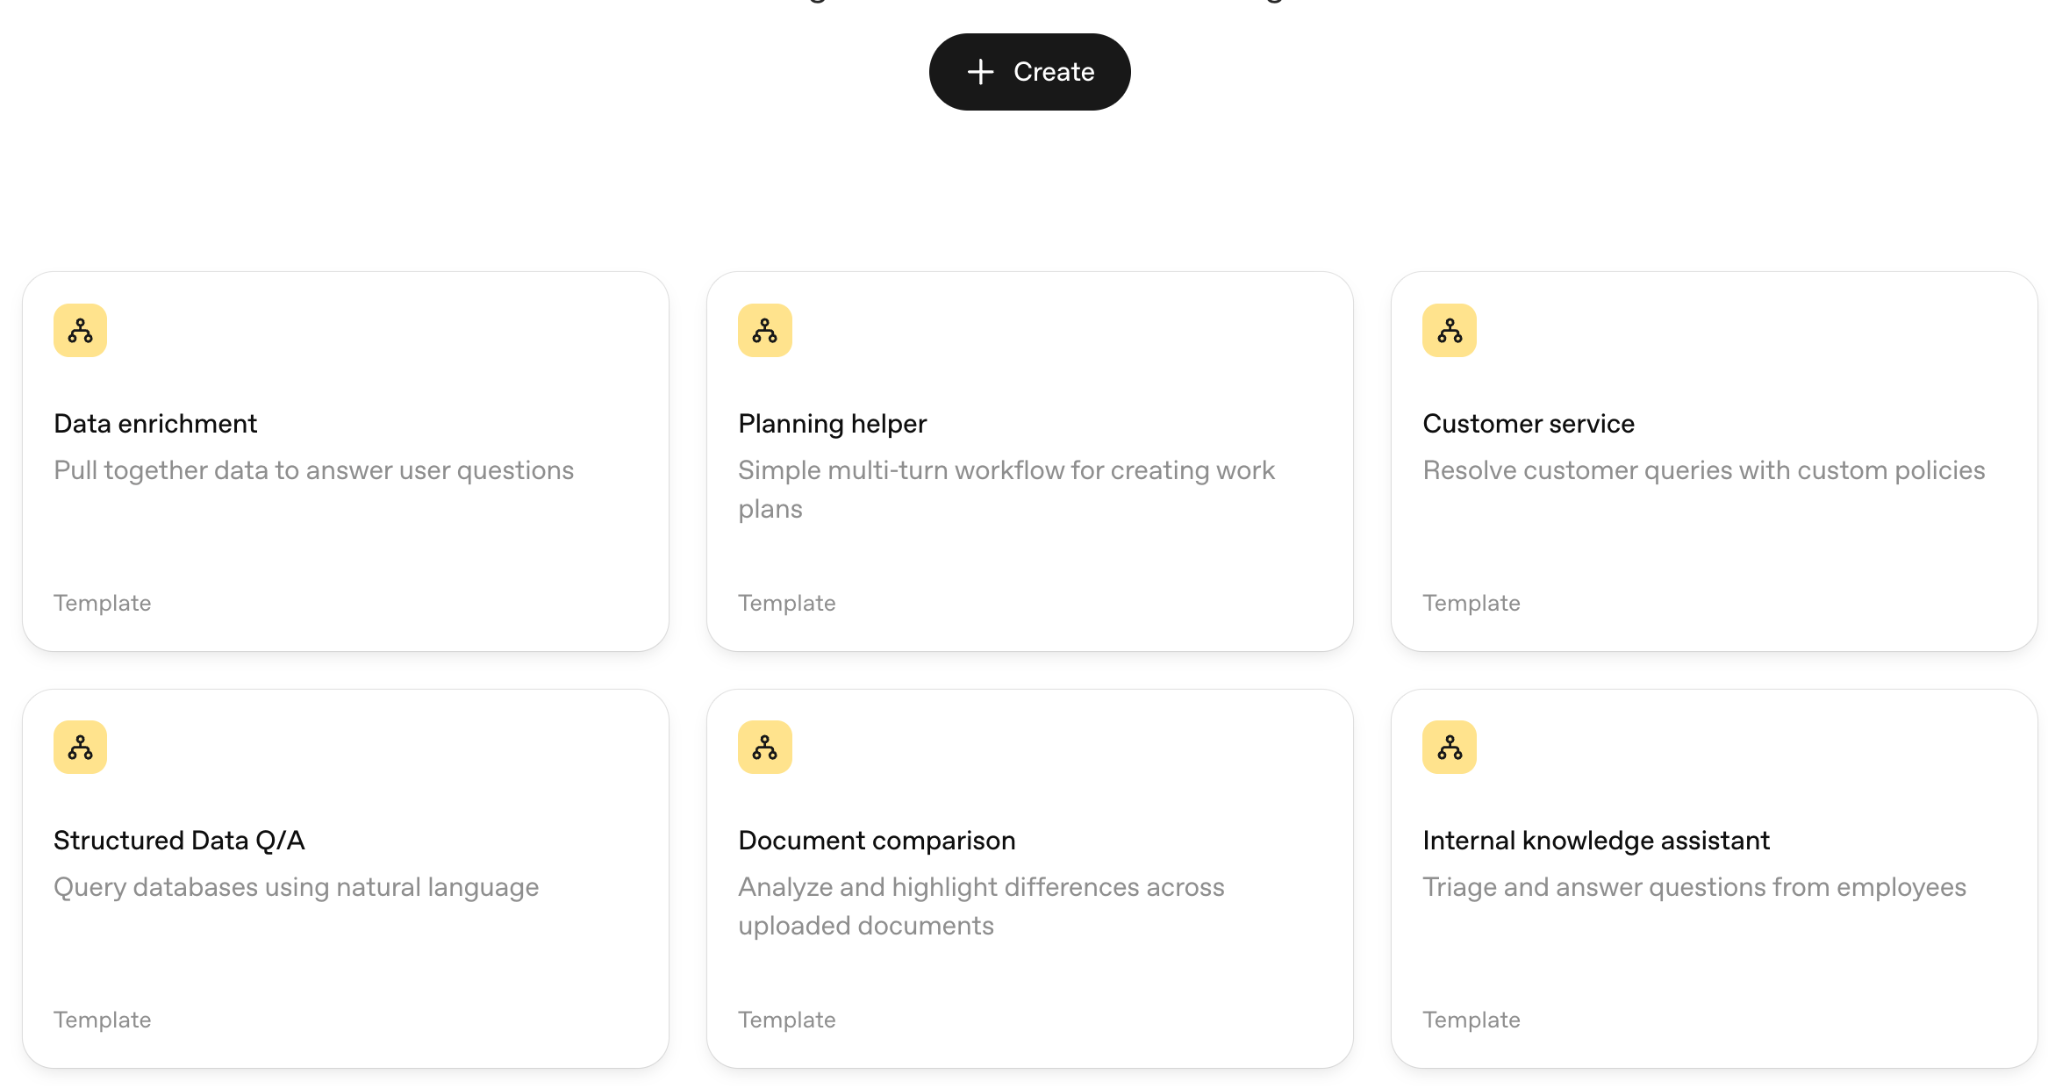
Click Agent Builder in the left menu. Here you’ll build your custom workflow. Click ‘Create’ to start a new agent from scratch. There are a few existing templates to choose from. You can create a planning helper or an internal knowledge assistant by selecting an existing template.
After clicking the ‘Create’ button, you will be transported to the agent workflow editor. The start node acts as a trigger, initiating the workflow. The agent node serves as the brain of your automation.

Step 2 - Configure your agent and MCP integration
Click the agent node and provide the following instructions to your agent. Expand the prompt box by clicking ‘Expand prompt.’
Prompt:
You are a helpful assistant who helps me create a Google Form to gather feedback on our weekly workshops.

Choose the AI model for your agent. GPT-5 is a good choice. However, you can select a pro model or a nano model based on the automation type. We suggest GPT-5 nano because it's cost-effective and is good enough to execute the automation we are building.
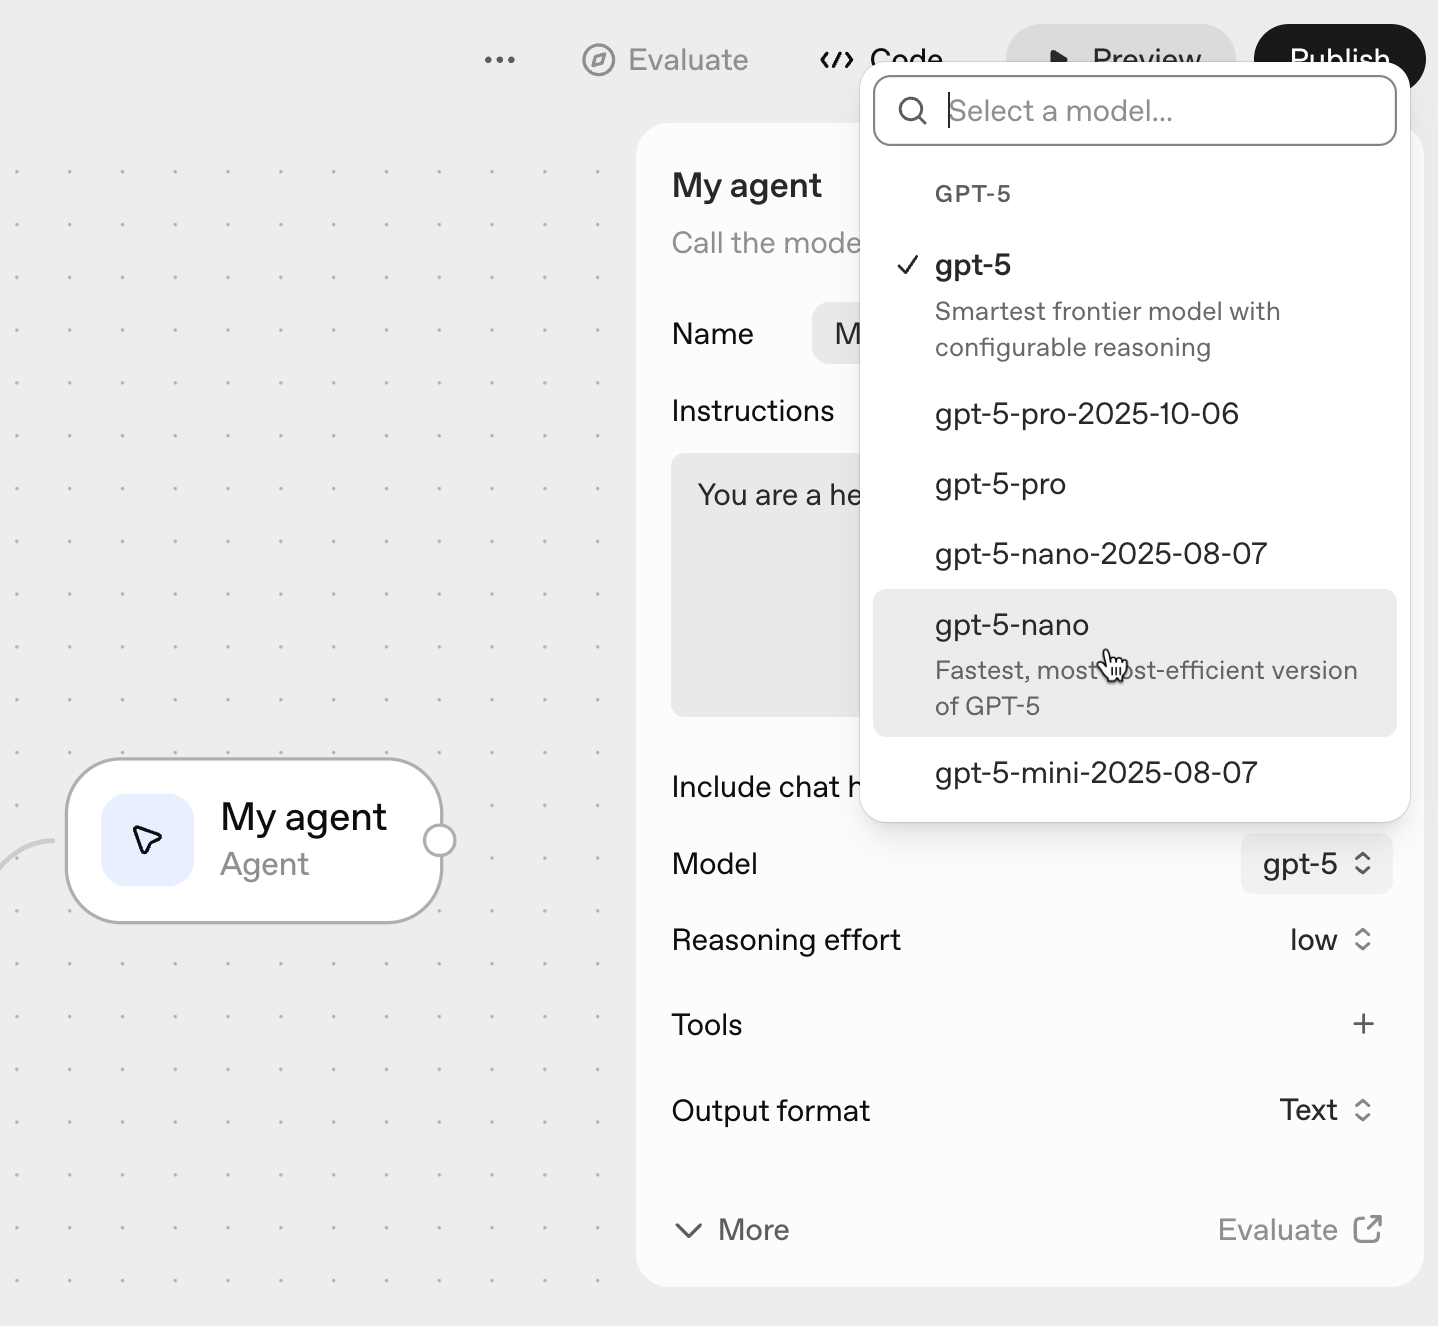
Next, choose the reasoning effort. Select the medium range to ensure that our automation doesn’t get stuck in the workflow.

Then, click the ‘+’ sign next to ‘Tools.’ Choose the MCP server. Now, under third-party servers, select Zapier from the list.

Leave the OpenAI agent builder open. We must get a Zapier API key to proceed with the automation.
Step 3 - Set up the Zapier MCP server
Before adding Zapier as a tool in OpenAI agent builder, we must set up a Zapier MCP server.
Go to mcp.zapier.com/mcpservers.

Click ‘New MCP server’ in the side menu bar. Then, choose OpenAI as the client and name your server. (e.g, ‘OpenAI Agent Server). Click ‘Create MCP server.’

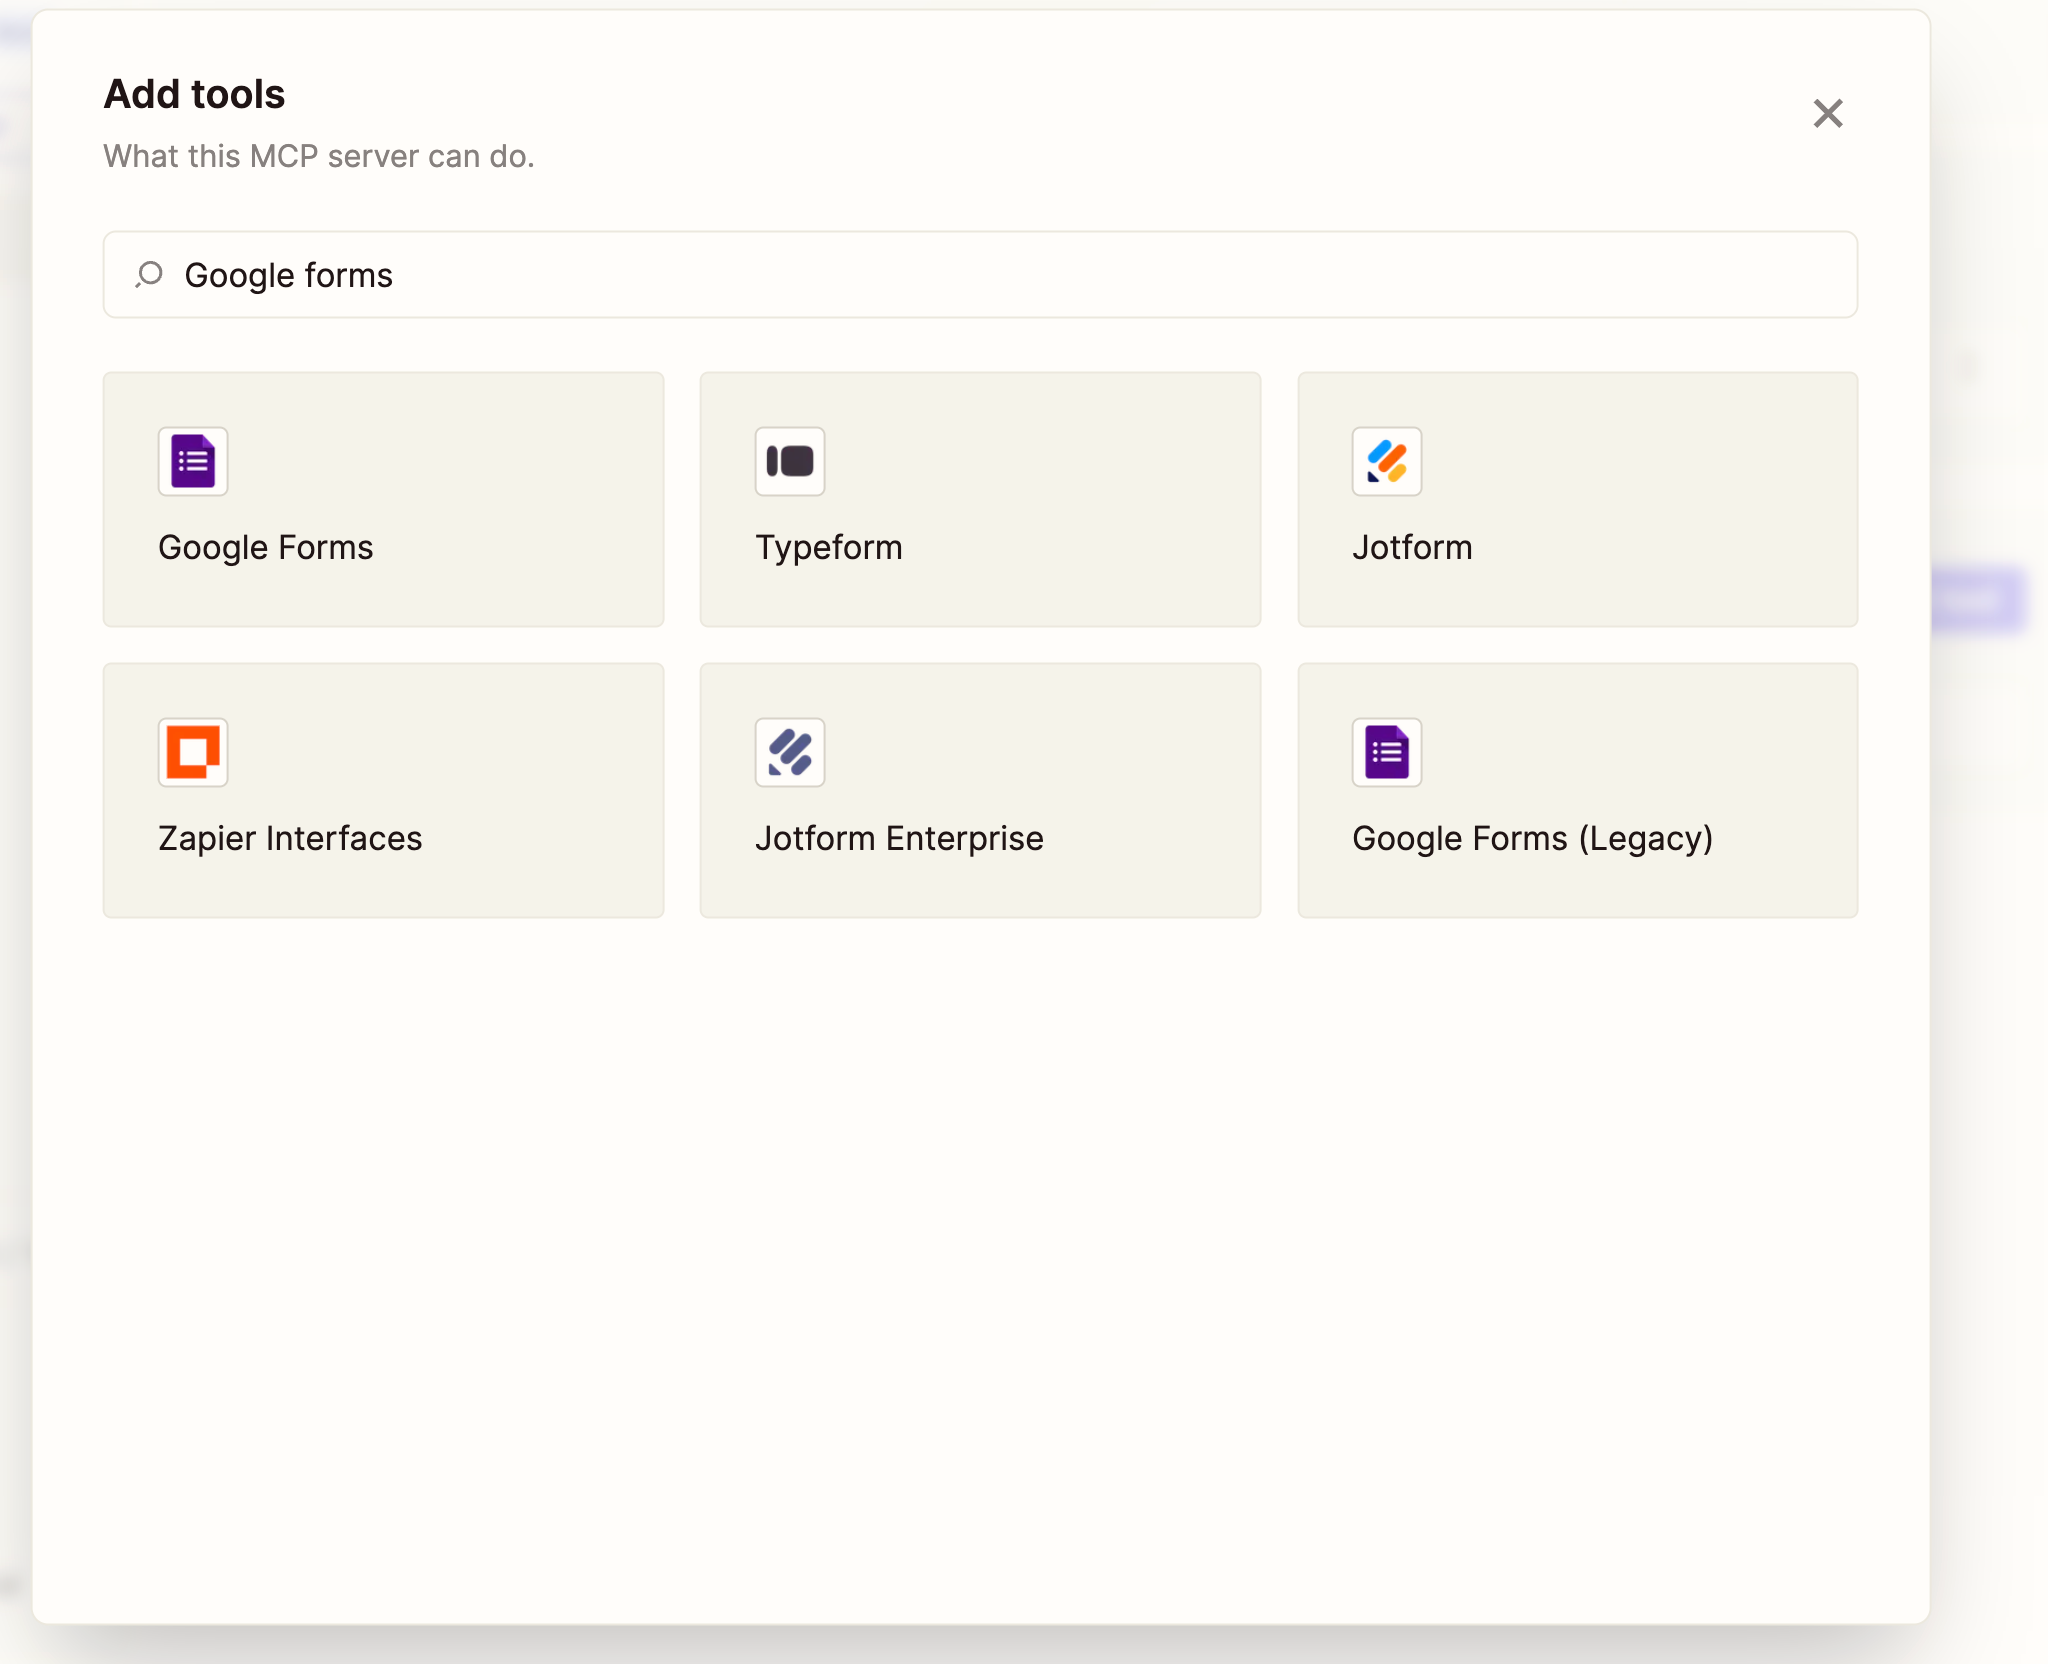
You can now add any app you want to connect with the OpenAI agent builder, such as JIRA, Confluence, Notion, or Google Forms (used in our example). In the main Zapier MCP server screen, click ‘Add tools.’
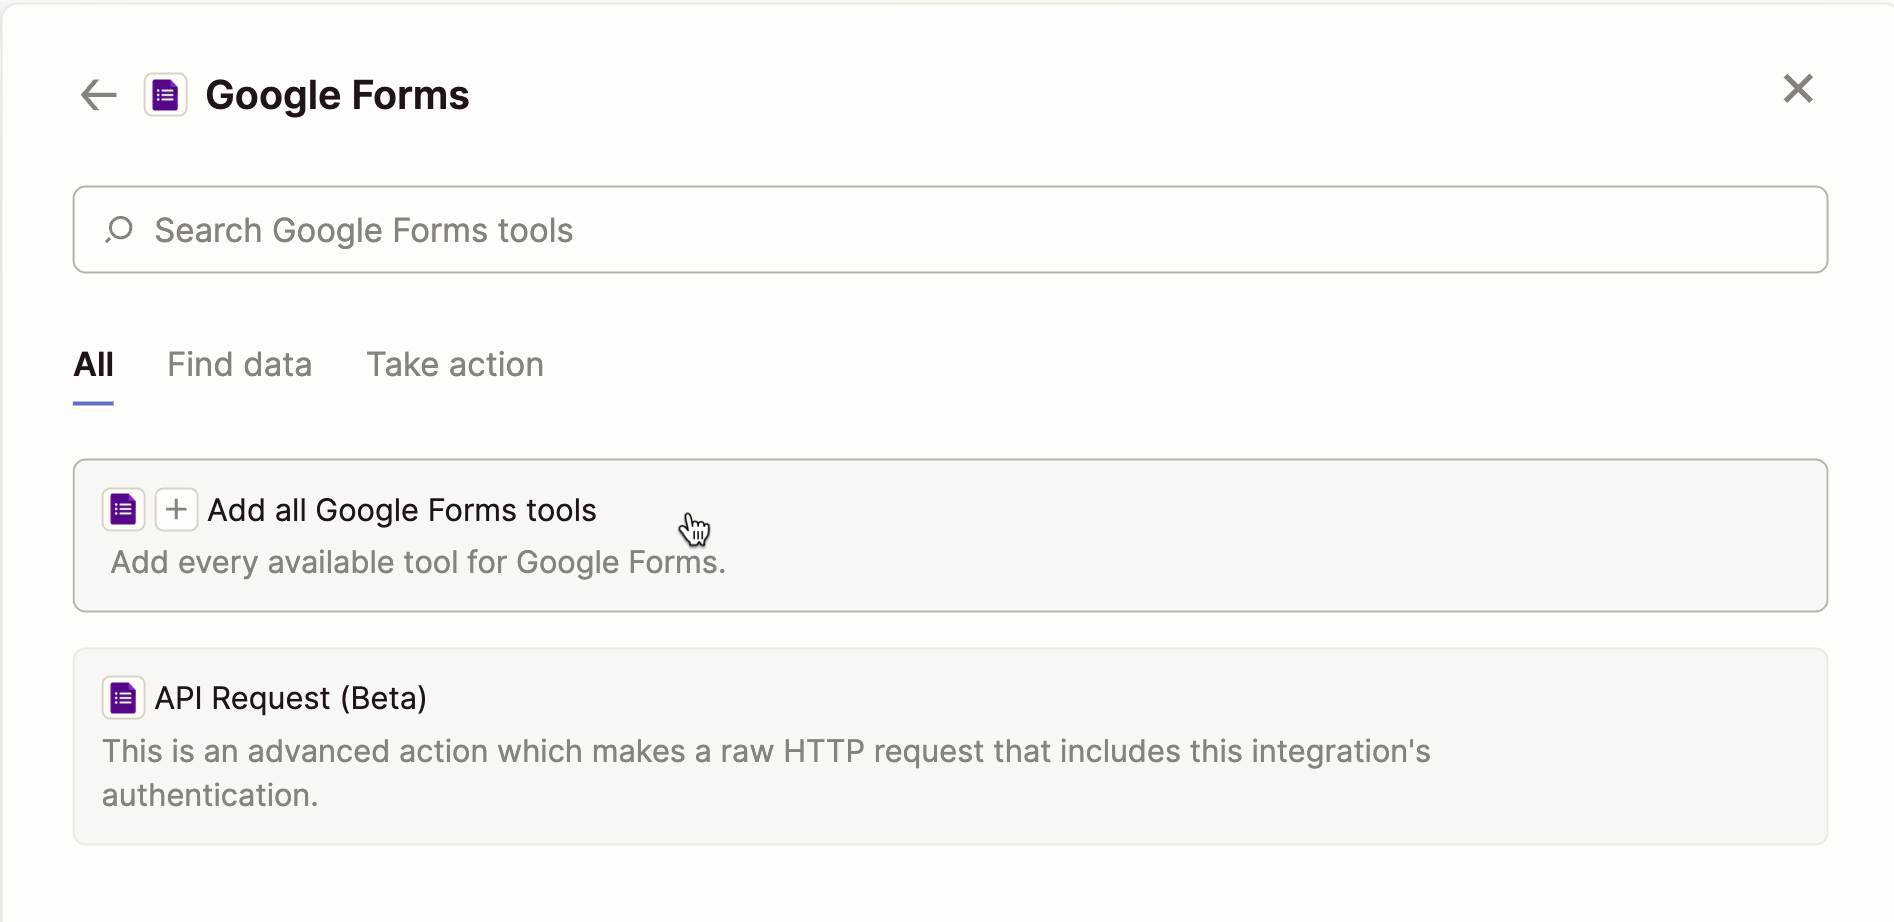
Search ‘Google Forms’ and add it to your MCP server.
Now, click and choose ‘Add all Google Forms tools.’
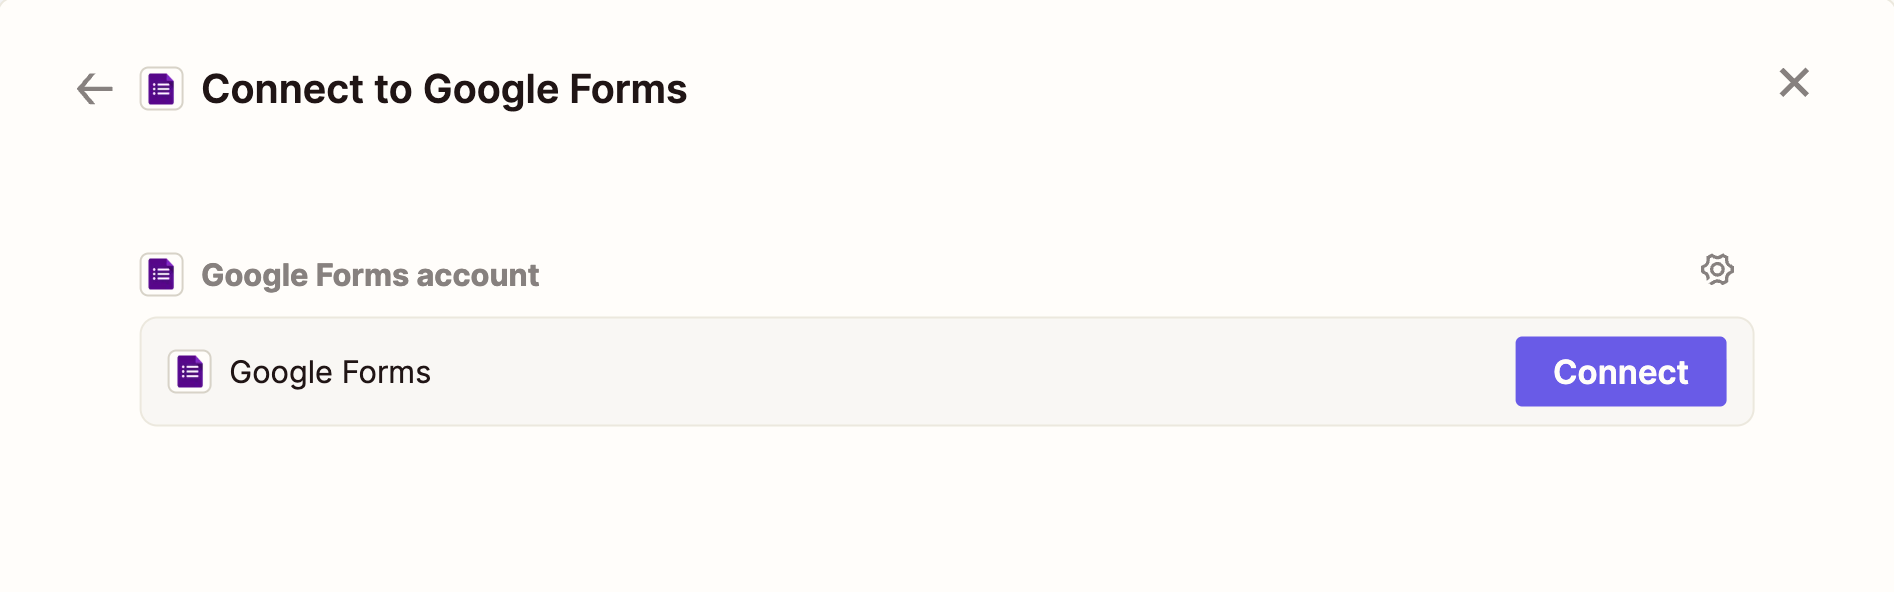
Click ‘Connect’ and you are good to go.

Step 4 - Connect the API keys
The last step in setting up the Zapier MCP server is to connect the Zapier MCP and Google Forms tool with your Agent Builder.
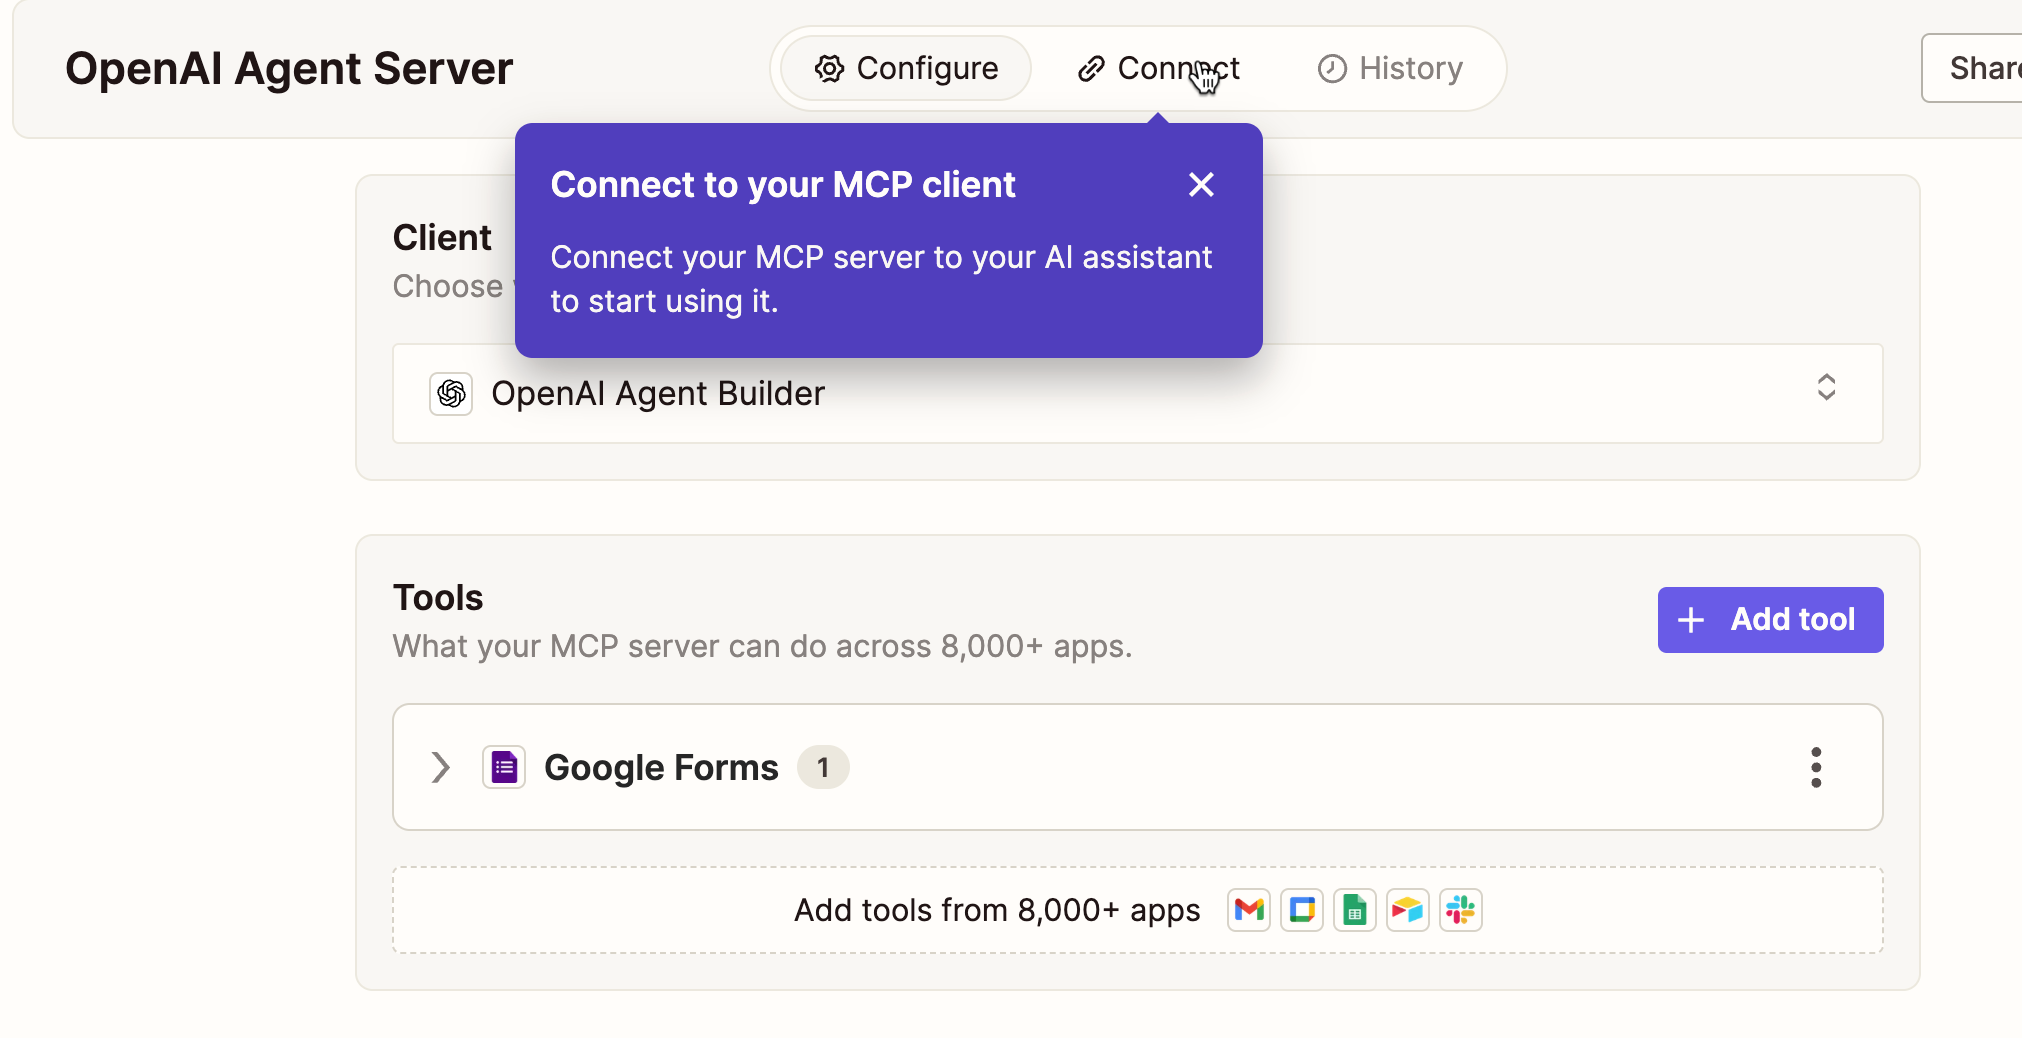
Click ‘Connect’ at the top of the Zapier MCP server screen.
Copy the OpenAI Secret API key first. Click ‘Copy secret.’
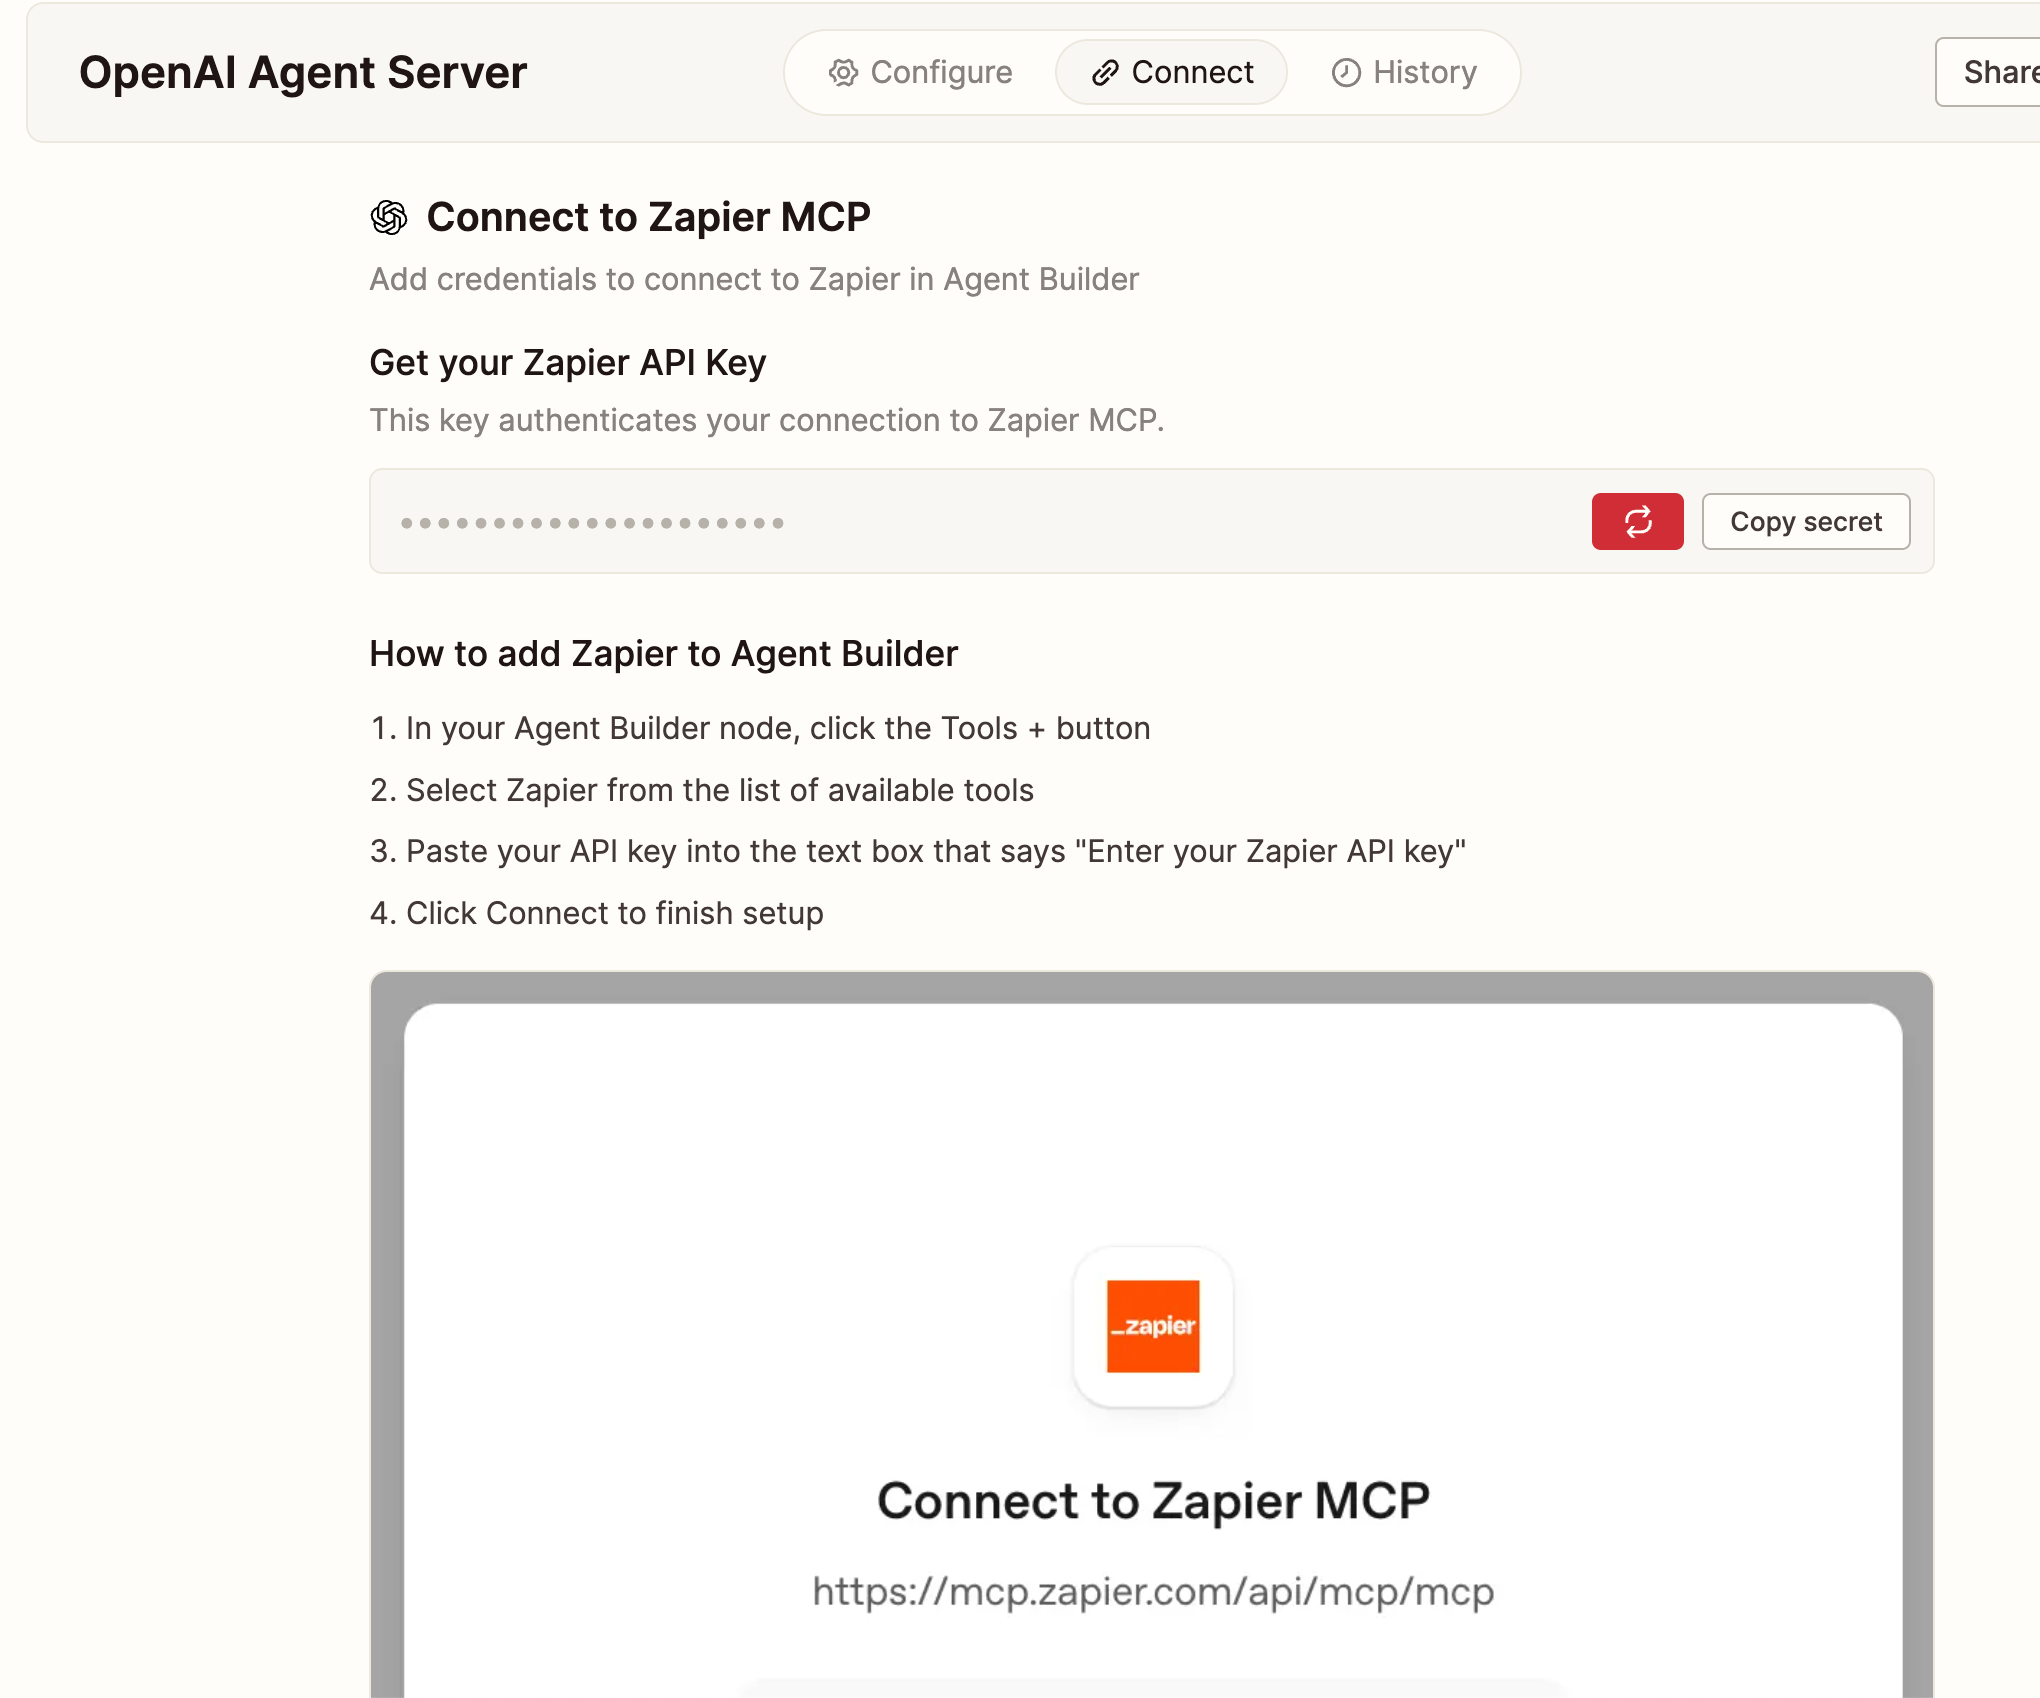
Now, go back to the connection field in your Agent Builder interface. Paste the API key and specify the server name in the description. Click ‘Connect.’
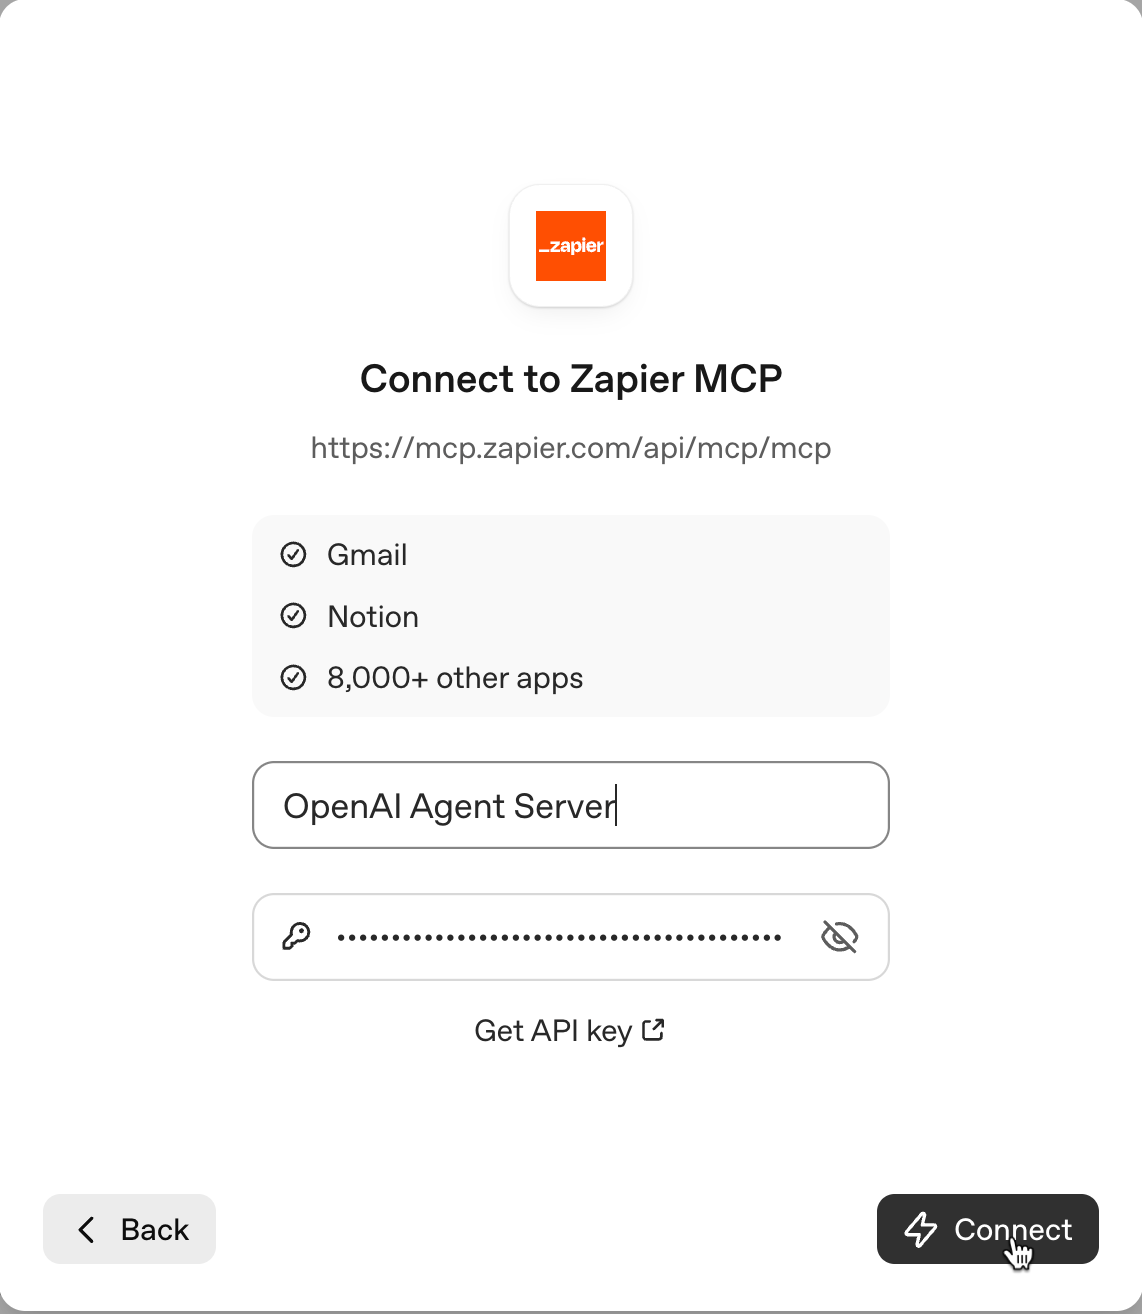
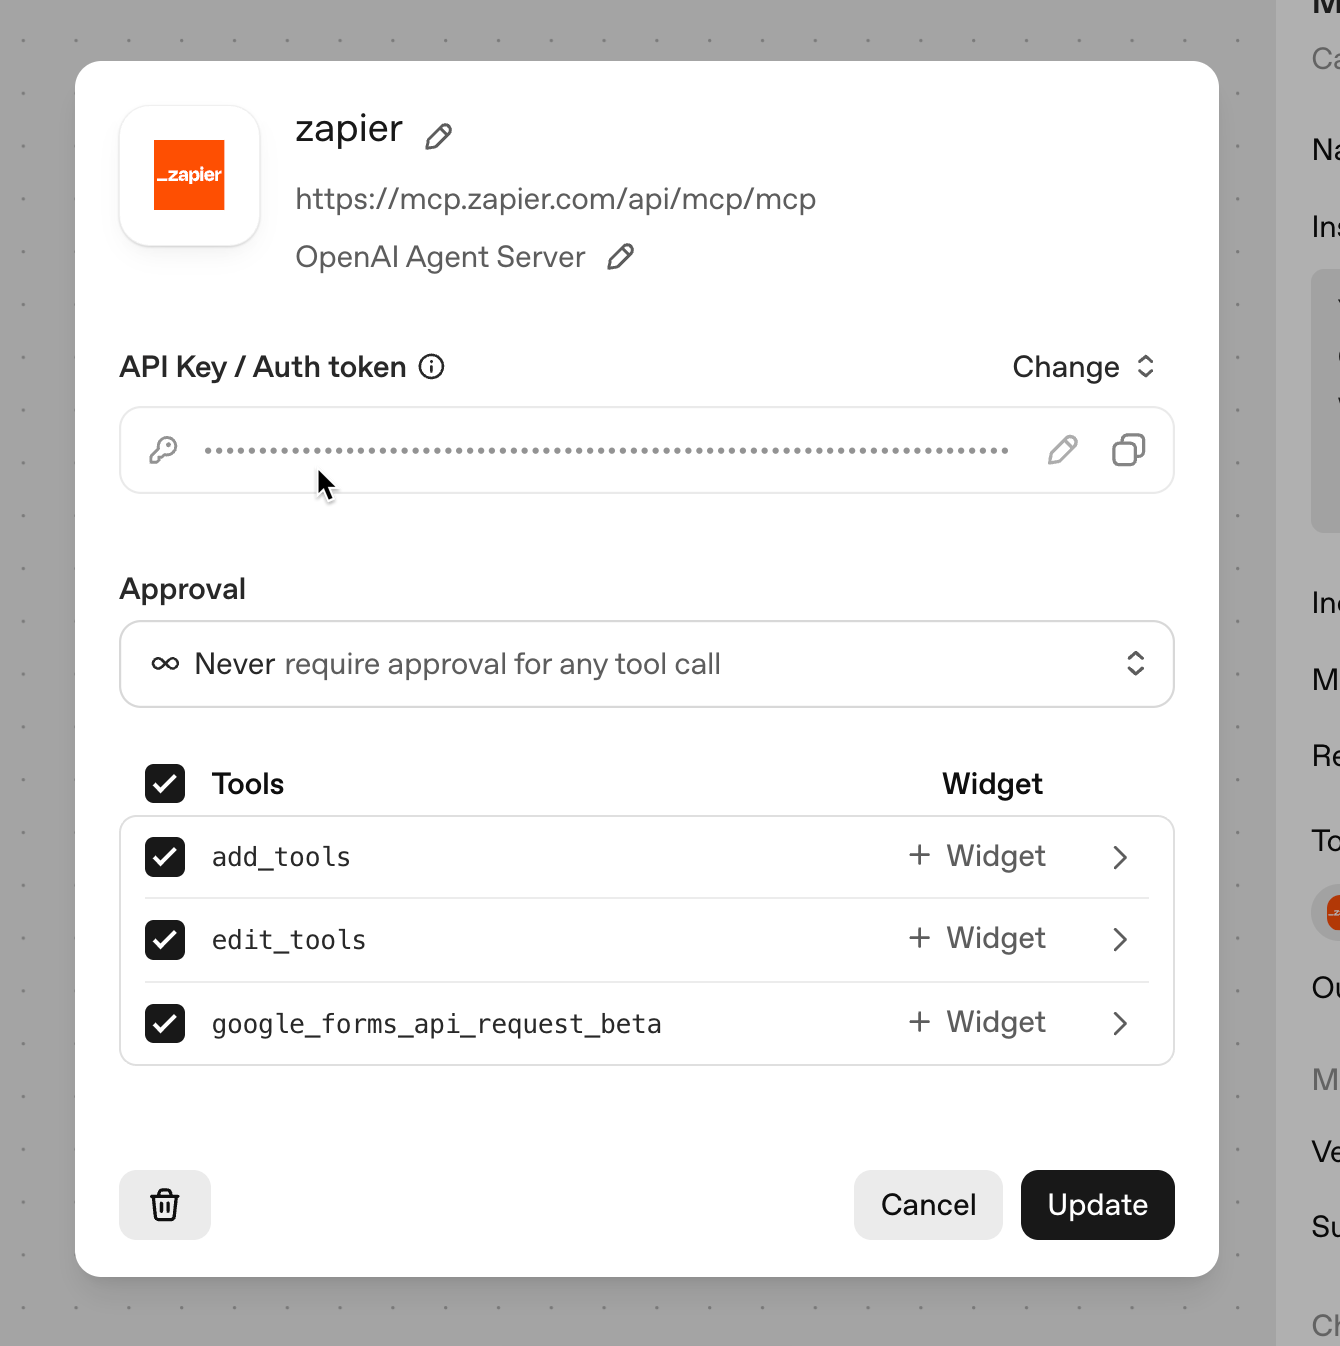
In the next screen, click ‘Approval and select ‘Never require approval for any tool call.’ You can change this setting later. Click ‘Add’ to finish the setup.

If the Zapier MCP tool integration setup is successful, you will see the selected tool (Google Forms) appear in the list.

Step 5 - Test the workflow
Before proceeding to evaluate the workflow, ensure that your OpenAI organization is verified. If your organization is not verified, the ‘Preview or Evaluate button might look grayed out. To verify the organization, you must go to API Organization Verification in OpenAI and verify your ID.
Once the verification is complete, click ‘Preview to test your workflow. An AI chatbot will open as a slider.

Ask your agent to do something. Let’s say you want to create a new Google Form with three questions to gather feedback on your weekly college workshops.
Prompt:
Create a new Google Form with three questions to gather feedback on our weekly university workshops.
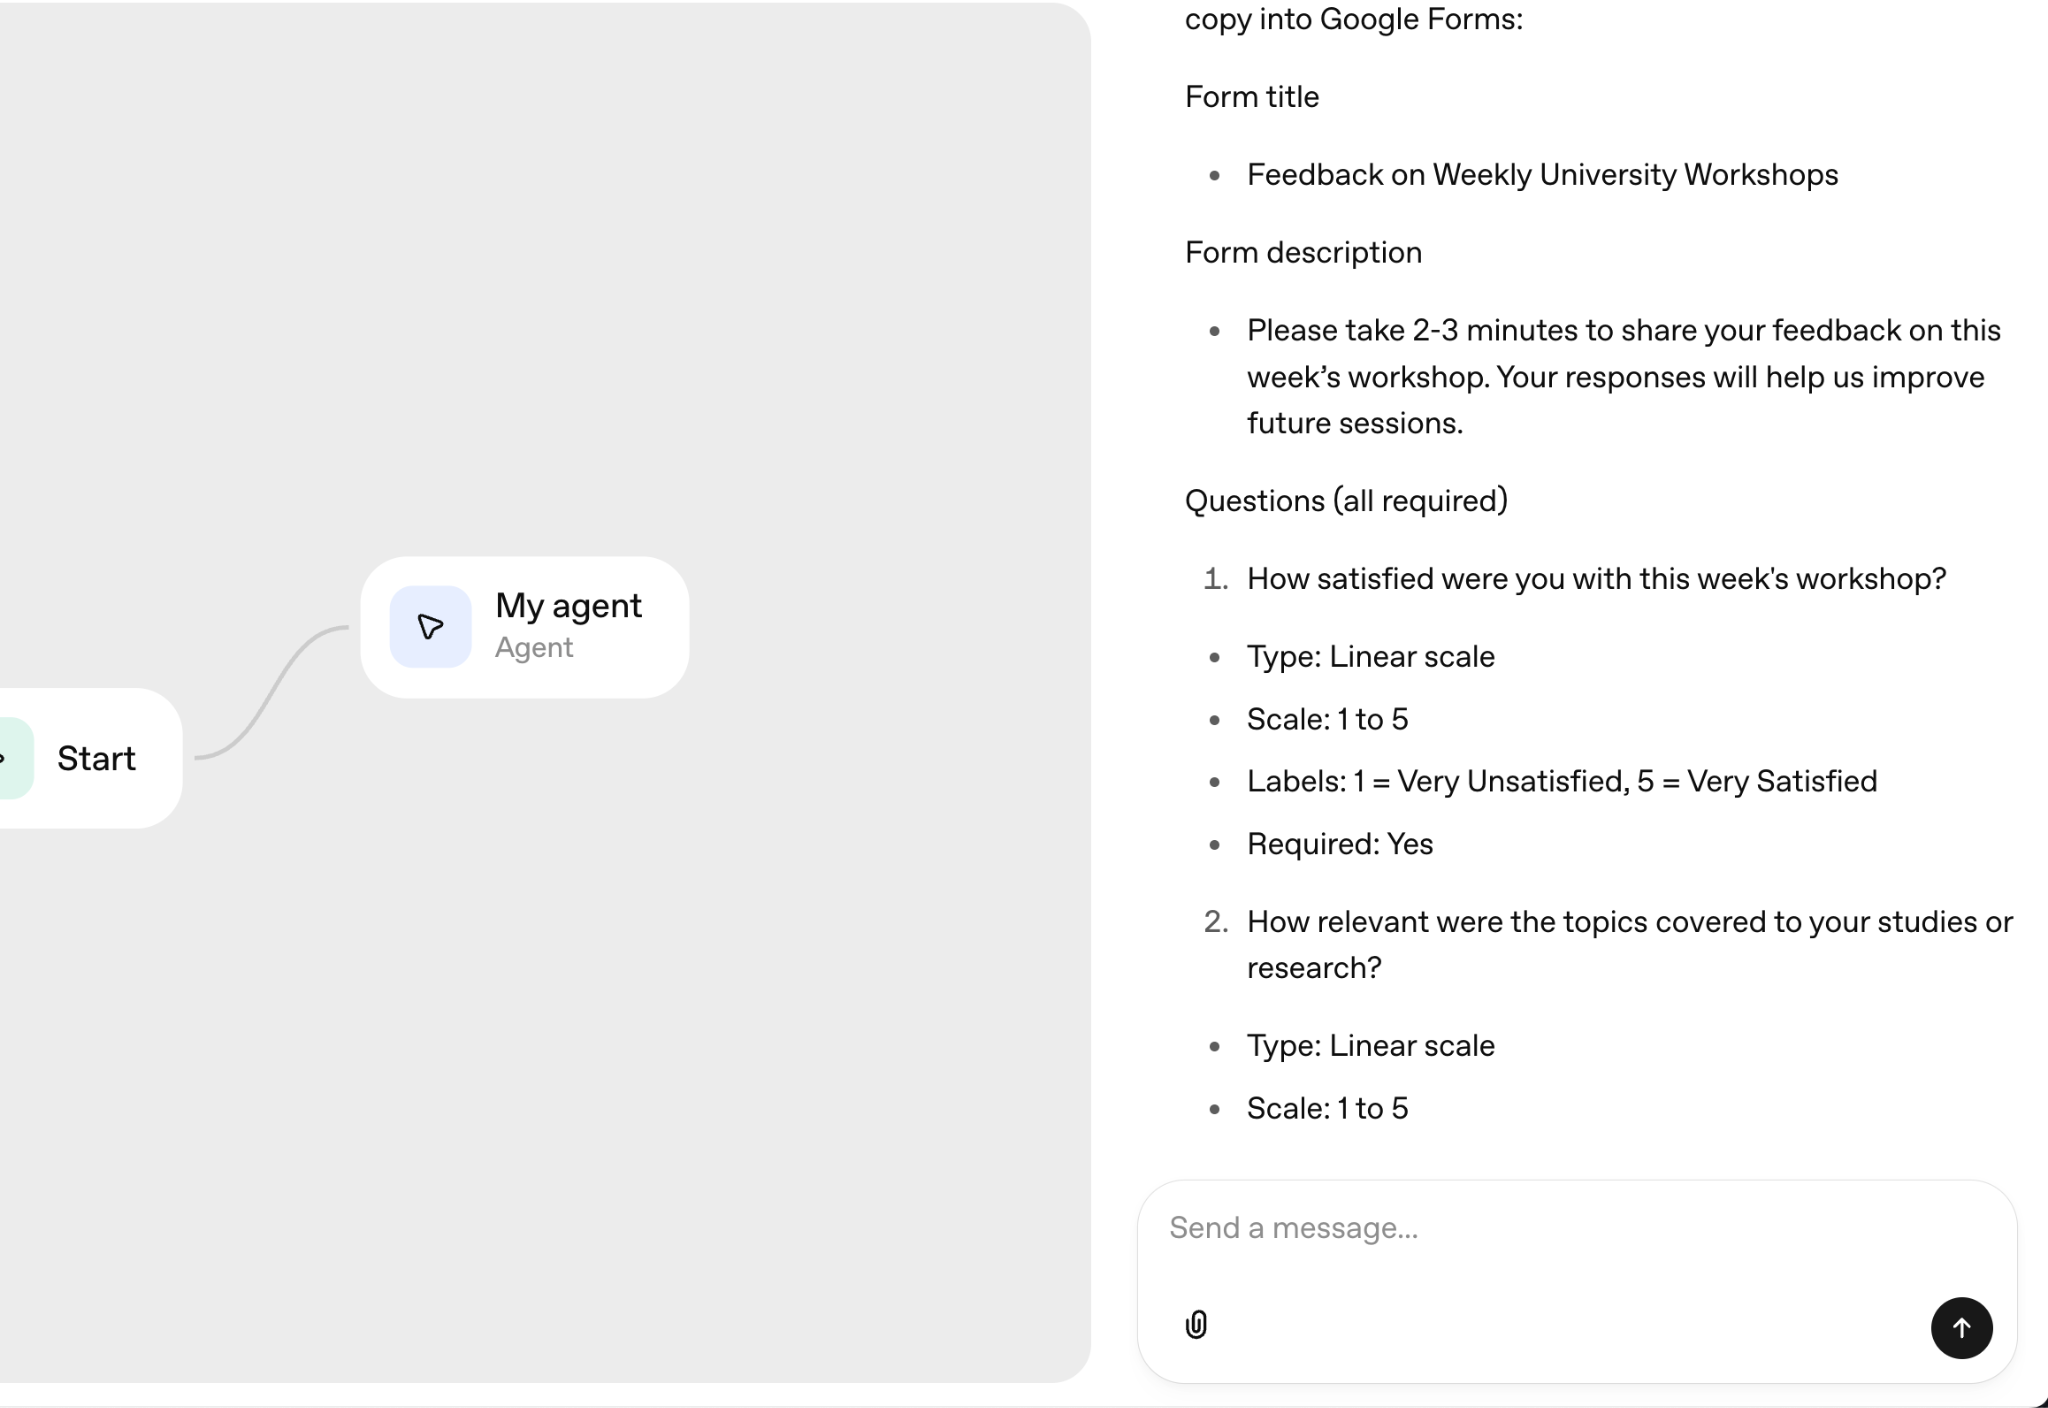
The agent will generate sample questions such as:
- How satisfied are you with this workshop?
- What worked well?
- What could be improved?
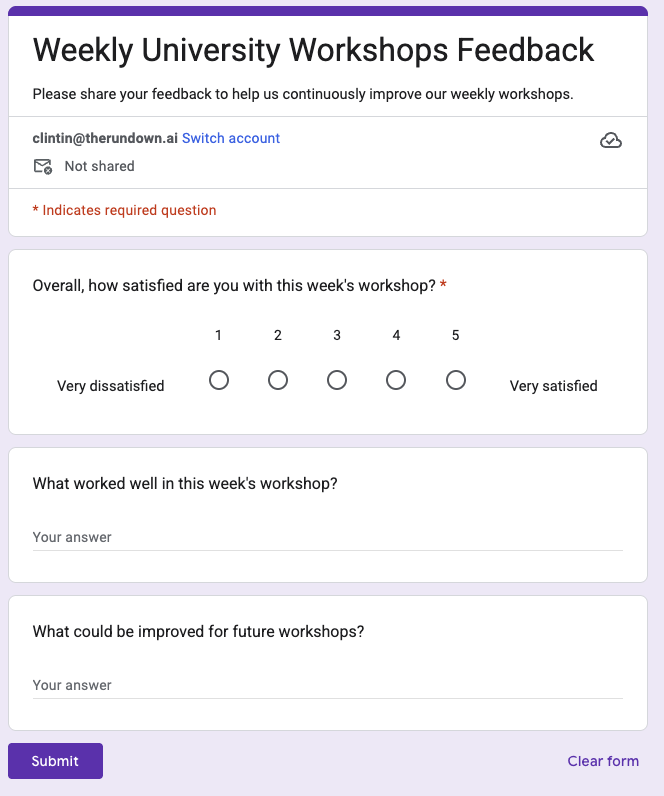
Request changes or tell your agent to proceed with creating the Google Form.
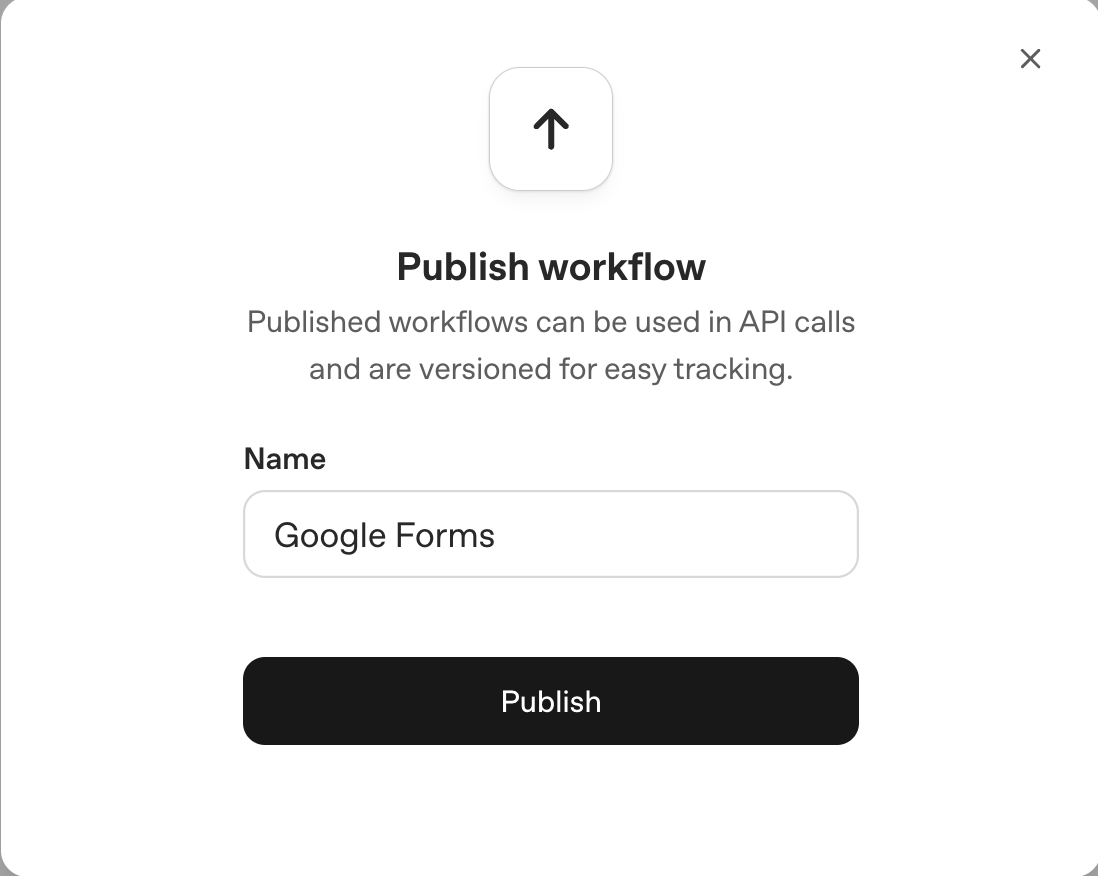
Step 6 - Publish your automation
Confirm that your workflow is running correctly. Once satisfied, click ‘Publish’ in Agent Builder and name your automation.
You can add ChatKit or Agents SDK to publish and deploy your agent.
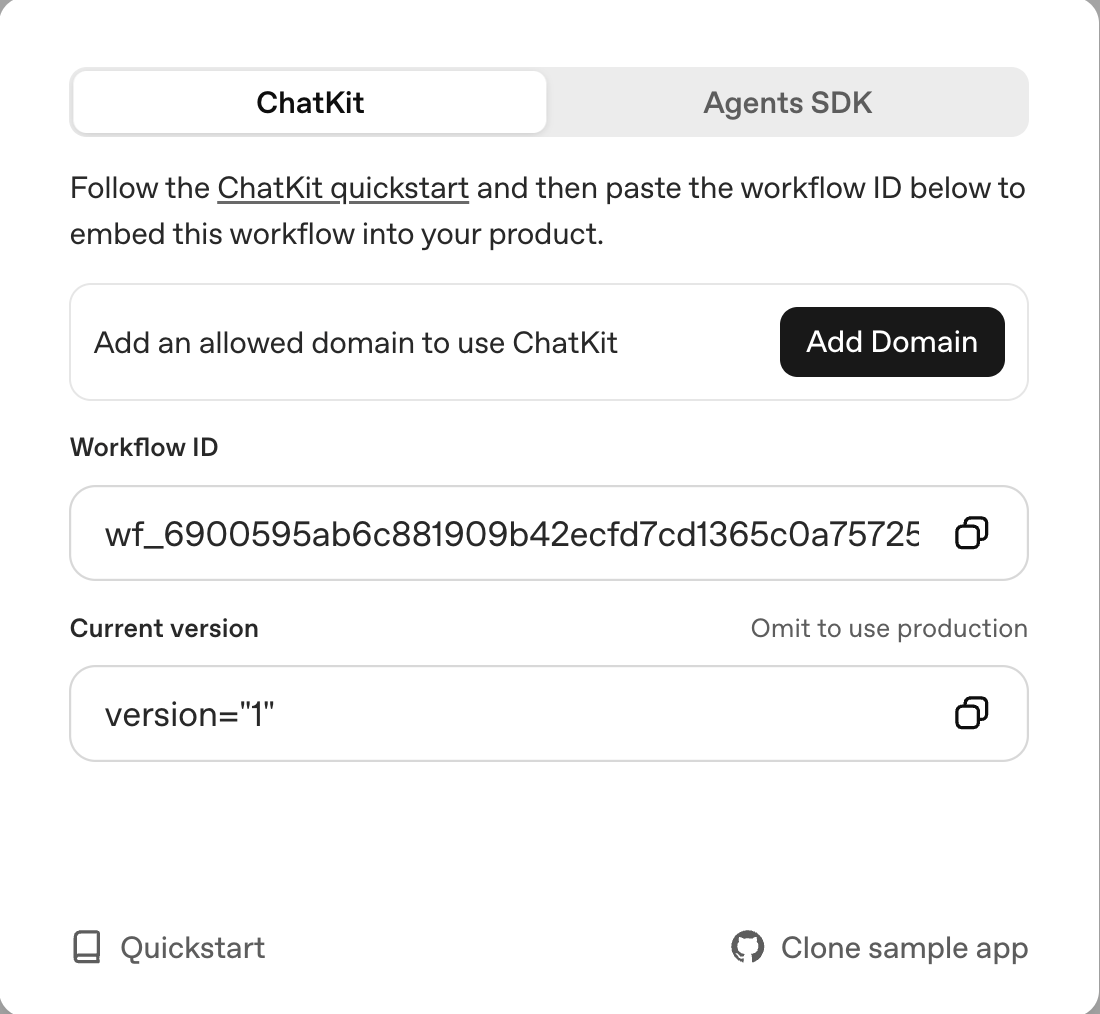
Your Agent Builder is now connected to the Zapier MCP, giving you access to 8,000+ apps.
That’s it for this tutorial, automation nerds! Try connecting a few different Zapier tools to see how far you can push your automations. Every new integration opens up fresh ways to build custom workflows and make your AI agent even smarter.


