.avif)
Bringing new people into a large company sounds simple until you are staring at a batch of five or more new hires. Suddenly, the checklists pile up, every department needs something, and each hire has different tools, access needs, and quirks. What should feel like a smooth welcome turns into a maze of admin, coordination, and last-minute fixes that swallow an entire week and threaten whatever plans you had for the weekend.
One way to make all of this way easier is to spin up a ChatGPT Project as your onboarding HQ. You can drop in your checklists, templates, training plans, and all the little steps each role needs, then share the workspace with the managers who have to pitch in. Everything lives in one clean place, it’s easy to update, and you can reuse the whole setup whenever a new batch of hires shows up. Instead of juggling a mess of docs and emails, you get a smooth, repeatable process that takes a lot of stress off your plate.
We will show you exactly how to do a ChatGPT project for onboarding new hires in this tutorial. You’ll learn how to quickly create a project, upload all the files into the project, share the project with new hires, submit a prompt and context using the ‘Talk-it-out’ method, and chat with your project to make it efficient.
By the end of this tutorial, you’ll be able to:
- Create a project
- Upload all the files to your project
- Share the project with new hires
- Submit your prompt and context using the talk-it-out method
Let’s dive right into it!
Step 1 - Create a project
First, let's provide an overview of how projects differ from custom GPTs.
A Custom GPT is basically one focused assistant you can share for a specific job. You set the style, tone, tools, and files it should use, then publish it or send it to your team. It is simple to roll out to lots of people.
ChatGPT Project is different. It gives you a private workspace with multiple chats, files, and evolving context, and it even remembers details that matter only to that project. You can also invite teammates to work inside it with you.
In our experience, Projects keep everything tidy and easy to follow, while Custom GPTs can turn chaotic once you start hopping between threads.
Let’s give Project a go and start by creating a new project.
Open the ChatGPT. Log in to your usual account and click ‘New project’ in the sidebar.

Specify the name for your project.
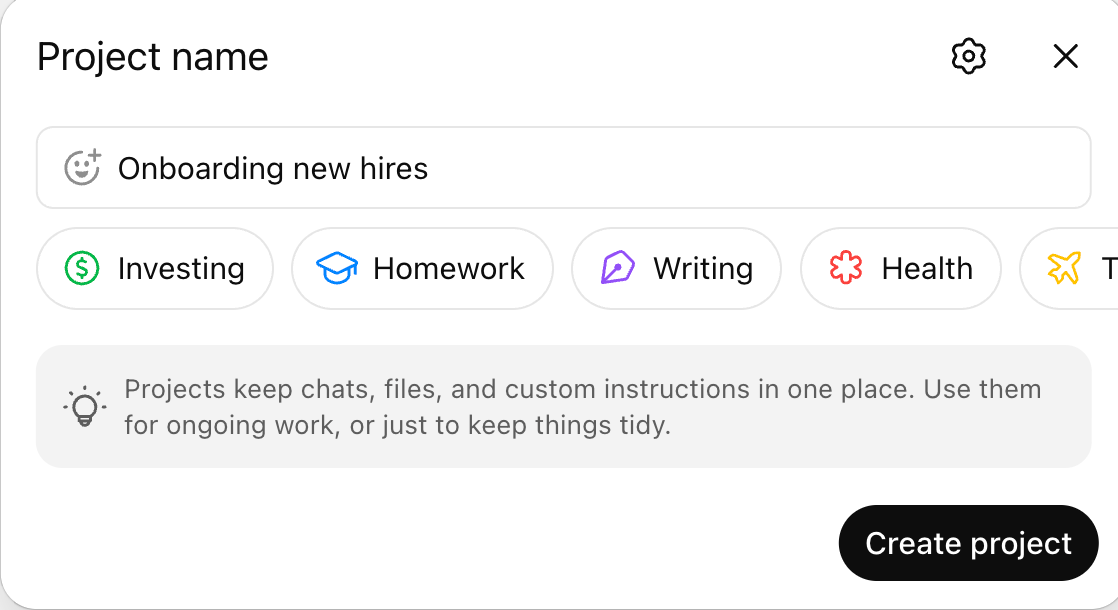
There’s a little cog icon in the top right corner of the Project name card. Here you can choose whether your project should tap into memories from your other chats or stick strictly to what lives inside the project. Our view is simple: keep it project-only if you are dealing with anything sensitive or you are bringing collaborators in. If it is just you, the default setup works well.

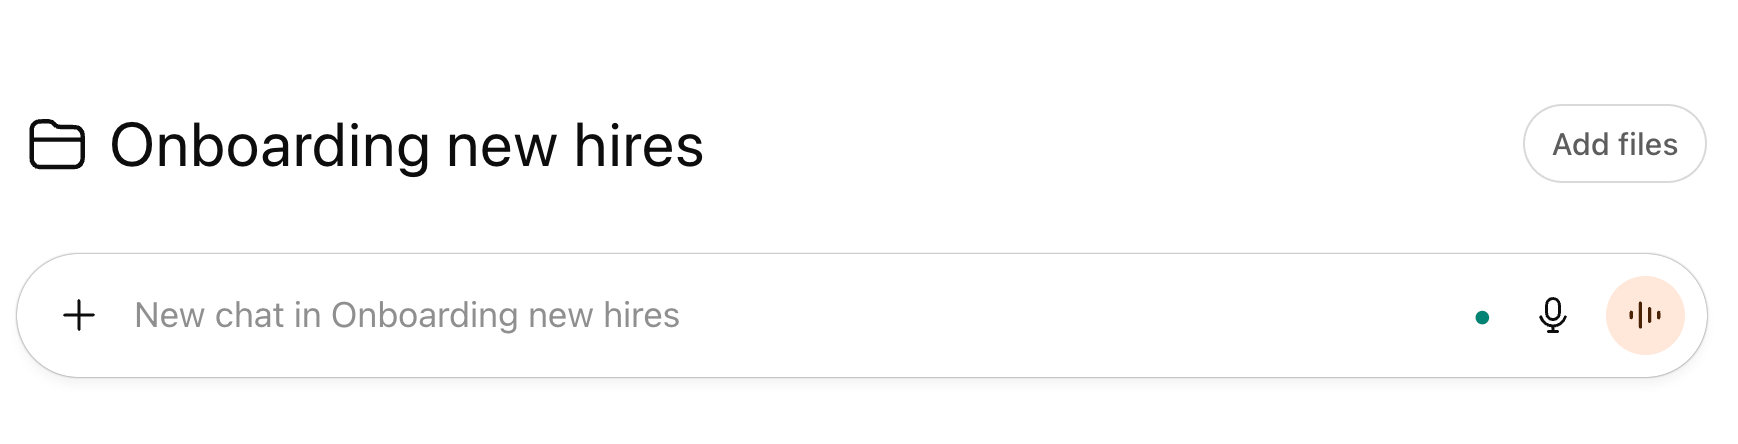
Inside the Project, the familiar tools are still there. Open the plus menu and you can launch:
- Deep Research,
- create images,
- Use agent mode, study, and
- search the web, open the canvas, or switch to dictation or voice.
Everything you expect is right at your fingertips, just organized inside a dedicated workspace.

Step 2 - Upload all the files to your project
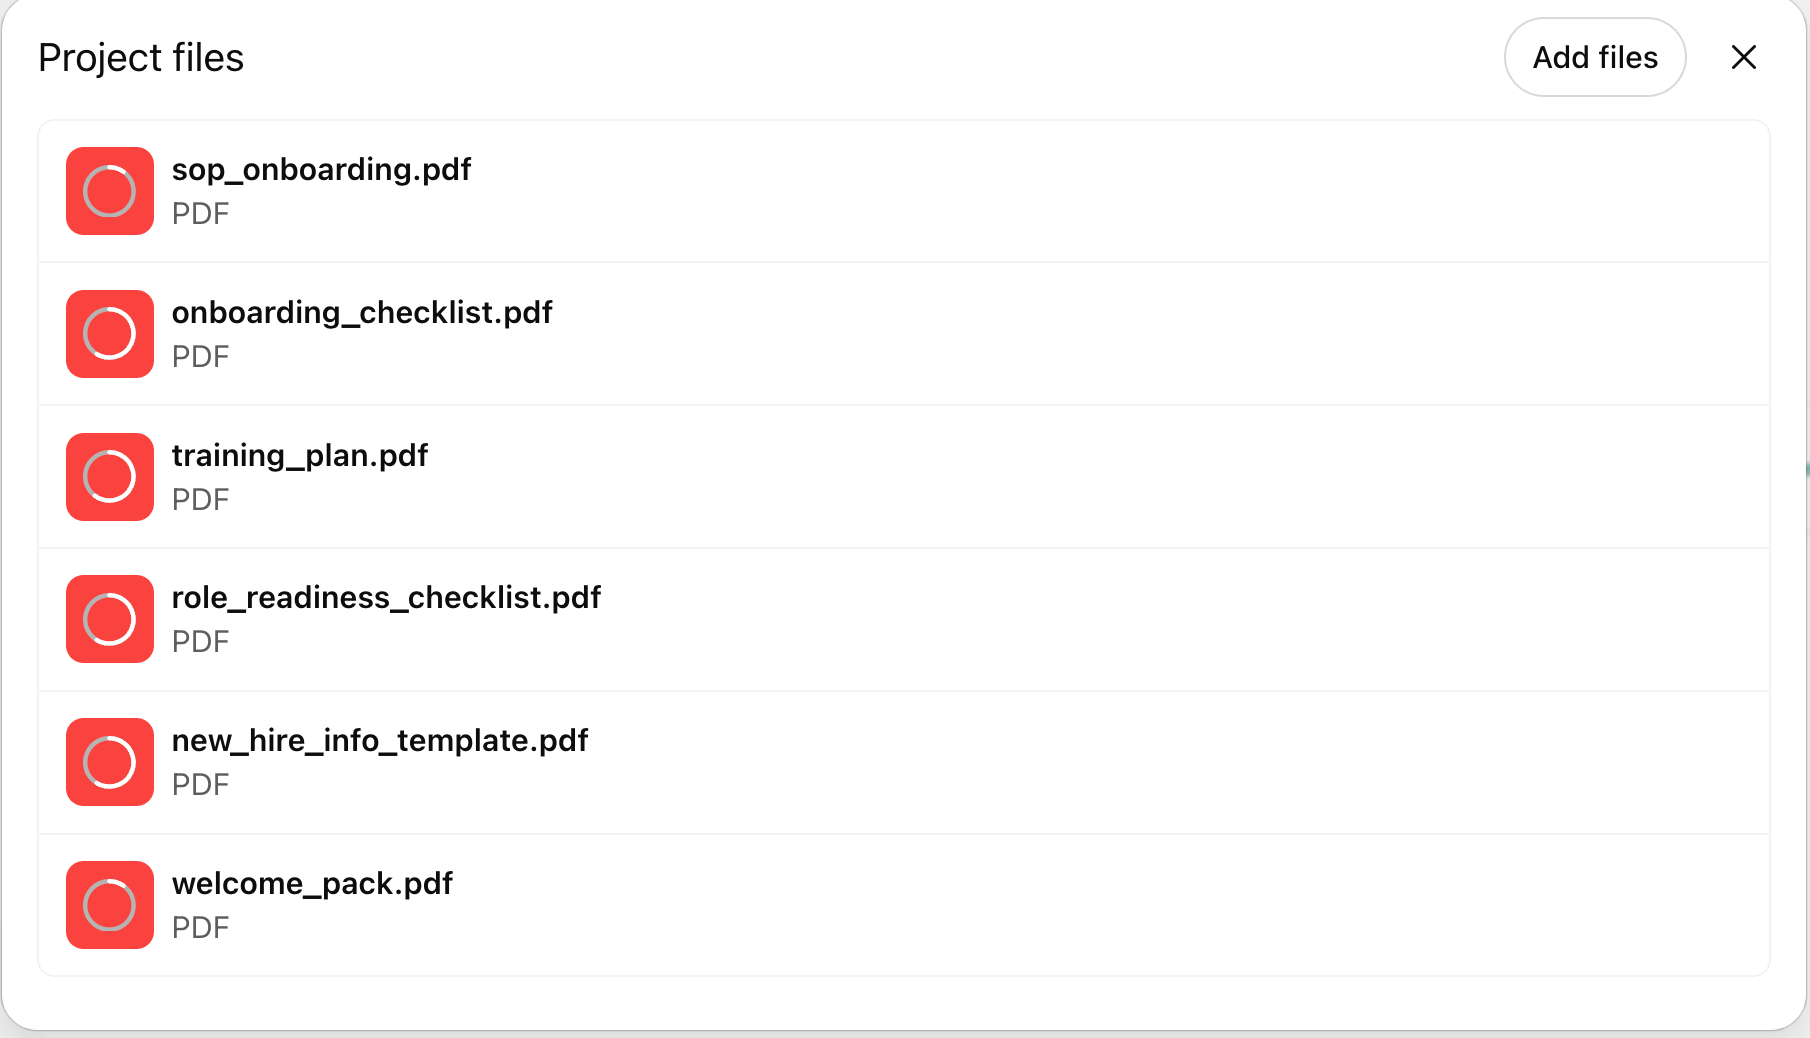
Now you will set up the project with the right mix of SOPs and guardrails so it can actually help you onboard new hires without dropping the ball.
There is one practical limit to keep in mind: the context window is not infinite. If you upload too few files, the model will not have enough to work with. If you upload too many, you will lose track of the early ones. You need that middle zone where the model has everything it needs without getting overloaded. That balance is the Goldilocks problem, and solving it is the key to a smooth onboarding setup.
Click ‘Add files’
Add all the related files to your new project.

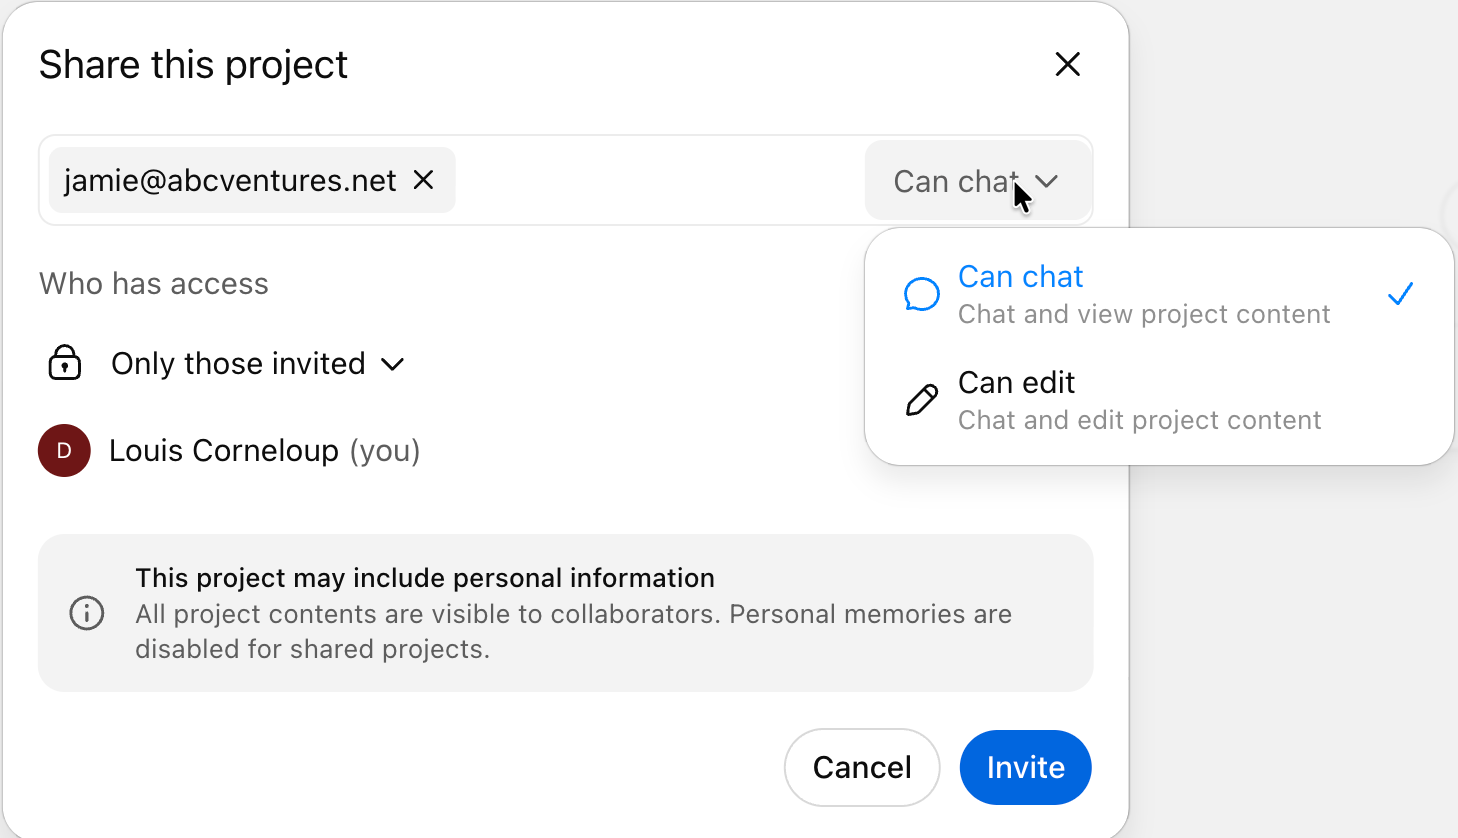
Step 3 - Share the project with new hires
Once you are satisfied with the files you uploaded and the way the AI responds during your test run, you can share the project with your new hire.
Just add their email at the project level, and they will drop right into the workspace you set up, with all the files, chats, and context already in place. From there, they can dive straight into onboarding without waiting for anything else.
Click the ‘Share’ button in the top right corner of the ChatGPT screen and invite new hires by adding their emails.

Select whether the new hires can chat or edit the documents in the project. Click ‘Invite’ when you’re done.
Step 4 - Submit your prompt and context using the talk-it-out method
Instruct the new hires to use dictation instead of Voice mode or the text to share context with AI.
The new hires can speak faster than they type. So, they can start with dictating a prompt, reading the AI responses, dictating again, and so on. This feature increases efficiency and provides AI with more context in natural language.
Let’ say you have been hired as head of inbound sales. Using the dictation, you can go like this:
Prompt:
I’m joining the company as the new head of inbound sales. I’m working fully remote. I already have Slack and Notion, but I don’t have Gmail access yet. My main focus is on reducing churn, and my background is an MBA with experience in BizOps. Don’t start the onboarding flow yet. Start by asking me whatever you need to understand my role before we begin.
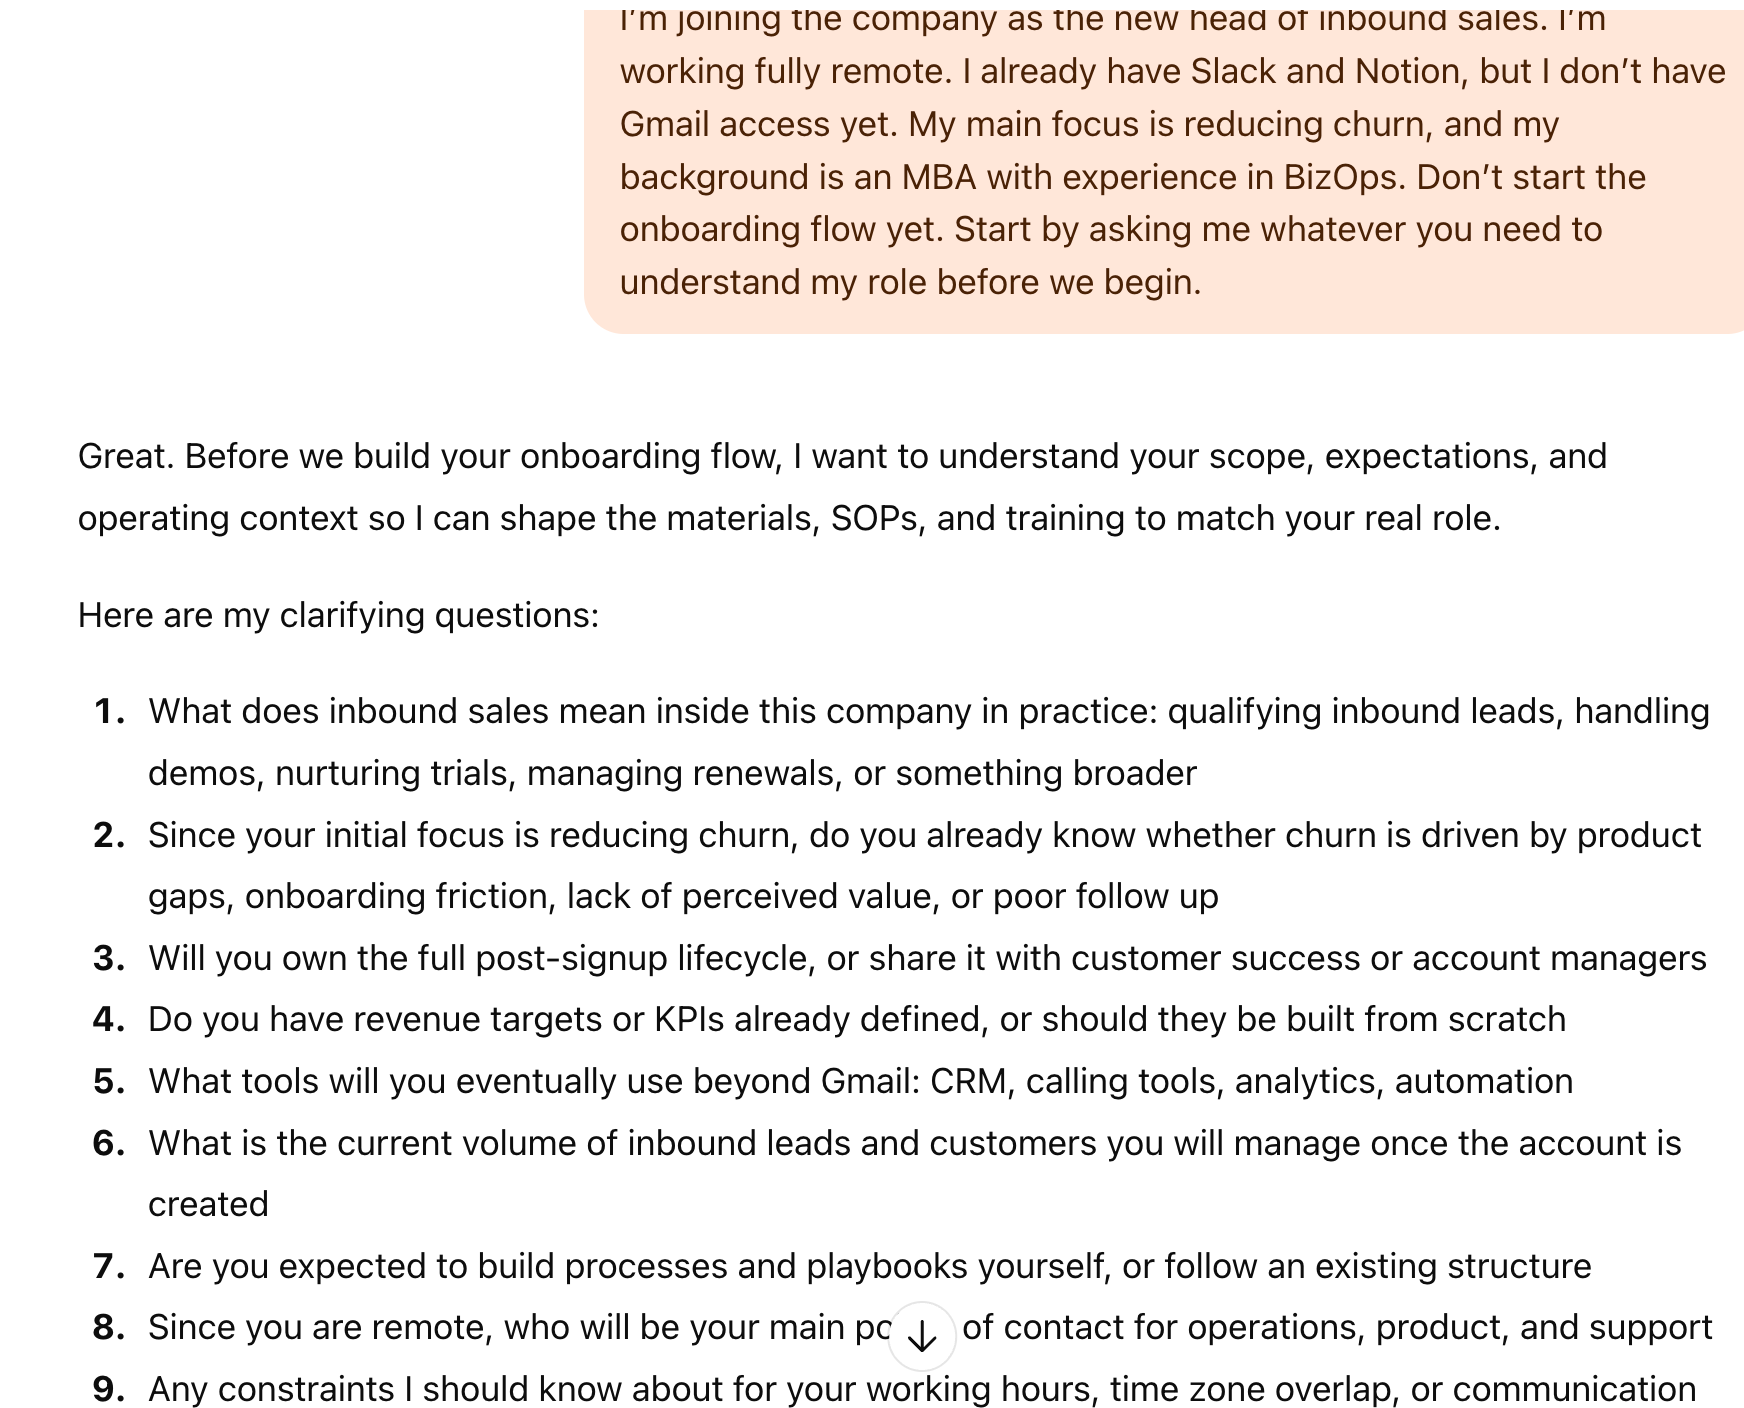
That last line is like the secret sauce. When you tell the model to ask questions first, it builds a clearer picture of what you need, which makes every response after that more accurate and more useful.
The AI should now give you focused answers pulled straight from the SOP files you added. At this point, you can share the chat by copying the link or even move that thread into a different project if it belongs elsewhere. You can also remove it from the current workspace if it is no longer needed.
Here’s how the ChatGPT project will respond to the questions from new hires, once it has established the authority and has the answers to the questions it has been up.

That’s it for this tutorial, Advanced HR managers! Use dictation mode to move quickly, keep memories limited to the project, and give the AI just enough context so it stays sharp without overloading its context window.
.avif)

.avif)
